Disclaimer: I am very much a novice and experimenter. Most of what I have written below is NOT field tested. So read at your own risk! I'm recording this mostly for my own entertainment, but perhaps it will be helpful to someone else. I love to watch YouTube videos about all of this but I find that many of the experienced hands who do have a lot to teach guys like me accidentally make assumptions and use words terms that I am unfamiliar with so I'm often left guessing. I'm the same in the areas of technology I am experienced at so I'm not criticizing them.
Woodburning Backpacking Stoves
The Emberlit Fireant Stainless Steel Stove
|
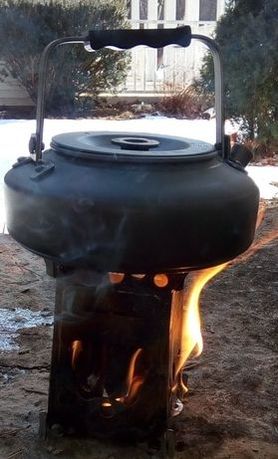
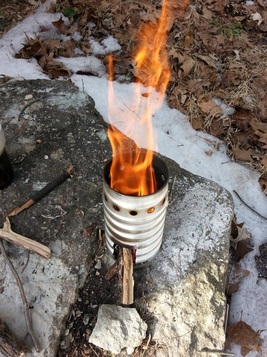
2017-02-08 I first saw an Emberlit Fireant stove on the Kenneth Click YouTube channel. Actually, his may have been the original Emberlit stove. I was fascinated by how well it seemed to work and it's very small pack size. So finally, I gave in and got one. I tried it out the day I got it I just to boil a kettle with 2 cups of water. It didn't disappoint me. It seemed easier and quicker to light than my wood-gas stove. And certainly didn't take any longer to boil water. My initial reaction is that it is a keeper.
I've now watched several videos of guys using it and there seem to be two approaches to lighting it. One, the most expected one, is to put your cotton ball or other fire starter on the bottom, put some small twigs and sticks on top of that and then follow up with larger sticks after it is fairly well under way. That is how I have lit just about every fire I've ever built whether in a stove or on the ground.
The other approach is to cut pieces from branches about 3/4 inches across and 3 to 4 inches long. Then pack the firebox loosely with those leaving bit of wobble room for air. Next put pencil and pencil lead sized sticks on top of that, with a vaseline soaked cotton ball on the very top.
The first time I used it I started with the cotton ball on the bottom. The second time, today, I loaded the firebox with split pieces about 3/4 across, topped with the twigs and cotton ball. Both worked. The loaded firebox seems to burn longer and steadier than the other approach, at least a half hour. It also did not require any additional wood during the burn. I'll keep experimenting.
|
Cooking lunch with my wood-gas stove
|
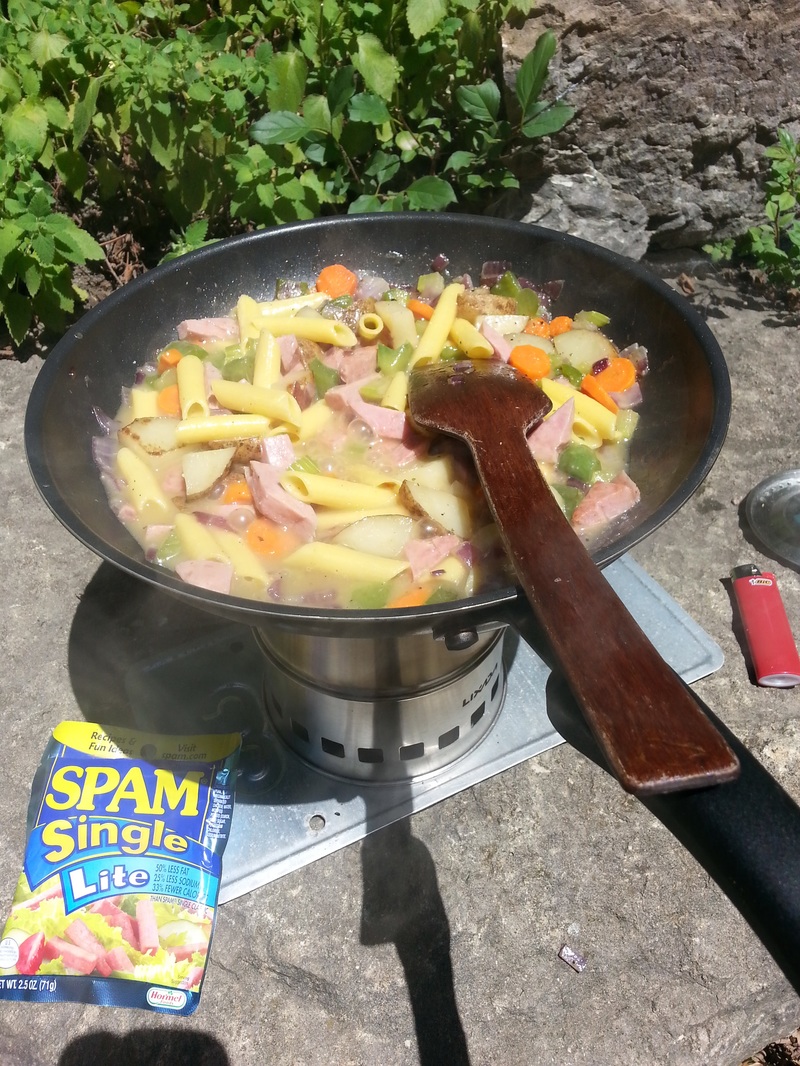
2016-07-01 A couple nights ago I watched a video of a guy cooking a sort of stew on his wood-gas stove. So today for lunch I decided to give it a try. I started by chopping up a half onion, small potato, a little celery, some green bell pepper and a carrot. To that I added about 2 tablespoons of butter, salt, pepper and garlic powder.
While the stove was firing up I put a little pasta in another camp cook pot with some water and set it on my Fancee Feest alcohol stove. Then I put a skillet on the stove, dumped the chopped vegetables in and let it saute. When the vegetable conglomeration was showing signs of progress I added a single packet of light spam (one has to worry about healthy foods!) and chopped it into small pieces and let it fry some more. Then I poured about a third of the pasta water into the skillet and and let it all steam a while. Finally, I dumped most of the remaining water off the pasta and added the pasta and cooked it down 'till the liquid was kind of a sauce. It was actually quite good! And the whole process only took about an hour. The wood-gas stove performed perfectly. One cotton ball, some tiny split wood pieces followed by larger ones did the trick with almost no smoke at all. The good heavy aluminum skillet handled the heat from the stove well too. I think having both the wood-gas stove and the Fancee Feest is a good combination. The Fancee Feest provides a backup in case you have trouble coming up with good wood. |
|
2016-06-06 Over the weekend my wife and I spent one night camping at Devil's Lake State Park near Baraboo, Wisconsin. Beautiful place with great campsites of all kinds. We chose one with no hookups and about as far into the woods as was available, site 415 in the Ice Age campground. The Ice Age Scenic Trail passed by about 50 feet from our site! We had a great time and plan to return.
I took along my little wood gas stove as well as my Fancee Feest stove as I wanted to use both in a "real life" situation. Both worked very well, but I especially enjoyed using the wood gas stove. We had trouble coming up with enough dry sticks to do the job since it had rained the day before. But I purchased a stack of firewood from the camp store so split some of that which worked very well. It would have helped to have a small hatchet or larger knife as it was a bit of a chore as well as hard on my $4 Walmart Christmas special folding knife to split off small pieces from the 18 inch long fairly large split wood. But it worked. Within a half hour I had several cups of boiling water. Definitely a success. |
2016-03-19 At about 4:15pm I got this idea of going outside (about 45 degrees) and making a cup of coffee with my Swiss Army Volcano Stove. So I donned my jacket and hat, grabbed my fire starter and a Vasolined cotton ball and headed out with some Starbucks instant coffee in my pocket. I already had some 2 or 3 inch sticks split into pieces about 3/4 inch "square" so with my knife and a stick for a hammer I split a couple of those into small pieces about three times the size of a tooth pick. I also had an old coffee can with small twigs and sticks ranging to about 1/2 inch (largest) and 2 or 3 inches long so I grabbed that and my "tooth picks" and several of the bigger 3/4 inch split pieces and went outside with my stove.
One strike with the fire starter lit the frayed cotton ball which I then dropped into the stove. Somewhat carefully dropped the toothpick sized pieces in on that and starting with the split pieces dropped the other stuff on top of that and waited. It took about 8 minutes to get a really good fire going. At that point I I filled the cup that came with the stove with water and set it into the top of the stove. It smoked a little for a while but shortly settled down. To keep it burning well I fed several more sticks and twigs in the bottom and cleared the vent holes a couple times with a small stick. In about 8 minutes I had a rolling boil. The cup had been sitting open in the garage for the winter so I let it boil for several minutes just to make sure everything was dead. At 30 minutes (I had started my stop watch when I walked out the door) I took off the cup and poured in the coffee. It is now 5:05 pm, just over 45 minutes from the time the idea hit me. And the coffee is almost gone, the stove is emptied and cooled and everything is back in the garage.
All that to say, with the kindling nearly ready and fuel collected, that Swiss Army Volcano Stove is pretty fast! Of course now I smell like smoke, but you can't have everything! It was fun, in that odd sort of way my wife does not understand! :-) Not sure I do either. But I feel like a real outdoors-man now again!
When it's Cold Outside!
|
Fire immediately after boiling water removed.
|
2016-02-13 It got down to zero here overnight. And perhaps it hit 25 today, not sure. It was hovering at about 20 when I decided to go out and split some wood and play with my wood gas stove again. I also just received a new Bahco 396-LAP Laplander Folding Saw and wanted to give it a go. The saw worked well on the one and two inch dead branches I cut into three inch pieces to split for my little stove..
This time it only took me one cotton ball! I'm getting better. I split some of the above pieces into "slivers" about 1/8th inch thick or so and then feathered the edges of several of those with my knife. As soon as the cotton ball was going I piled several of those slivers on top and then slowly added bigger ones, nearly filling the fire chamber before I quit. I didn't time it but it wasn't but about ten minutes later when I had a really good fire going with the gases at the top burning very nicely. |
Improving at Wood Fire Cooking
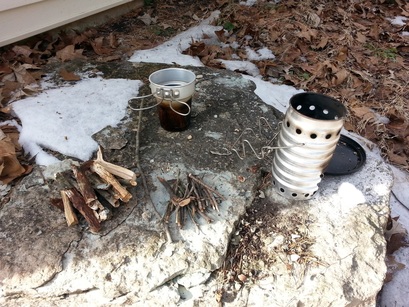
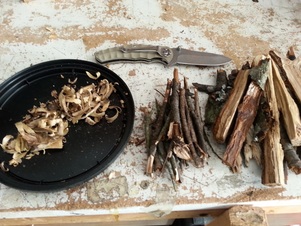 Carved chips, small twigs and larger sticks for my Swiss Army Volcano test today.
2/5/16 Well, today it was 35 at about 2:30 so I decided to revisit my Swiss Army Volcano Stove using some of what I may have learned the last few days about building fires.
Unfortunately it took two Vaseline smeared cotton balls and two matches again today! I have a problem getting my wood chips to land on top of the burning cotton ball. But once I get that stuff going it is pretty easy to feed the small twigs followed by the larger sticks onto the fire and get good results.
The picture at right shows the chips I carved plus my stacks of twigs and sticks as well as my Walmart knife that I used to carve the chips. Not a bad collection for making a cup of soup.
|
2 cups of water Vigorously boiling away after 8 minutes on the fire.
|
Eight minutes later I had a vigorously rolling boil. I had to add nearly all of my larger sticks to keep it going. It is a bit surprising how fast the wood burns up. I also learned that pieces split off a larger stick light the quickest and burn the best. Next time I'll look for more 1 inch diameter sticks that I can split into pieces about 1/2 to 3/4 inch across. With this stove you can use longer pieces too since you can just stick an end through the opening and then keep feeding them in as they burn.
This stove smokes more than the wood gas stove. I guess that is not surprising since it doesn't have the hot gases entering above the flame to burn the hot gases coming off the primary flame like the wood gas stove. But at the same time it is pretty efficient with the wood and does a good job. The pot is a lot messier when done as their is quite a buildup of soot or tar or something ugly! But it works. The whole experiment from carving the chips to having boiling water took just over half an hour. Not bad. |
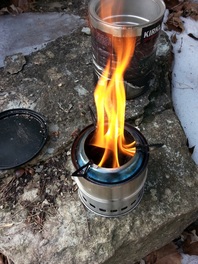 Twig & stick fire started with match and cotton ball smeared with Vaseline.
2/4/16 It was about 35F outside today at 2:00pm with beautiful sunshine. So I decided to go out and practice my fire building skills in the back yard again. I got my trusty little stove out and set it up. Then went to my box of sticks I've been collecting the past few months from the pile that needs to be burned. I know the videos all say that you should shave curls on the end of a stick, but I'm not very good at that yet so I just carved shavings until I had a pile about 3 inches wide and maybe a half inch deep.
Then I found some twigs and snapped them into pieces about 3 inches long until I had a comfortable handful. Then I broke up a number of bigger sticks about the size of your finger into 3 or 4 inch pieces and just a few maybe an inch in diameter. They were all just dead sticks, dead enough to pretty easily snap into the pieces. I didn't need a knife or saw or anything to break them up. Frankly all of them would have been sticks I would have passed over not many weeks ago as useless.
Then I found some twigs and snapped them into pieces about 3 inches long until I had a comfortable handful. Then I broke up a number of bigger sticks about the size of your finger into 3 or 4 inch pieces and just a few maybe an inch in diameter. They were all just dead sticks, dead enough to pretty easily snap into the pieces. I didn't need a knife or saw or anything to break them up. Frankly all of them would have been sticks I would have passed over not many weeks ago as useless.
What have I learned? Tiny twigs are valuable! If they snap easily when bent they are wonderful kindling. And serious cooking (well boiling anyway) can be done with just small sticks. Again, if they snap by hand they are good to go. So one really could find "firewood" for a stove like this almost anywhere. Also, cotton balls rubbed with Vaseline is an easy to transport and use way to get your fire going well without fussing around for a long time. But they do need to be loosened or fluffed up so they will light and burn well. I've now lit them with both a match and the Gerber Fire Starter I got from Amazon for just over $10. It's the only one I have ever had so i'm not suggesting it is great compared with anything else but it worked for me!
Finally, using a stove like this is not a really messy, time consuming or difficult experience. The key is to start it well. It only took me about half an hour to go from setting it on the ground, whittling my shavings, collecting the sticks and having a fire going well enough to put the "pot" on top. And around ten minutes later you can have boiling water (of course depending on the outside and initial water temperature). That's longer than with an alcohol or gas canister stove but not bad! I may well take this thing camping!
Finally, using a stove like this is not a really messy, time consuming or difficult experience. The key is to start it well. It only took me about half an hour to go from setting it on the ground, whittling my shavings, collecting the sticks and having a fire going well enough to put the "pot" on top. And around ten minutes later you can have boiling water (of course depending on the outside and initial water temperature). That's longer than with an alcohol or gas canister stove but not bad! I may well take this thing camping!
01/30/16 Today it got up to about 43. My wife and I went for a walk and I got the itch to see if I have learned anything reading and watching YouTube videos about building fires during the cold days this winter. I have to admit my past efforts have been more smoke than fire!
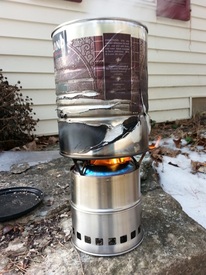 3 cups water in a large coffee can boiled in about 11 minutes with outside temperature of about 35 degrees.
Next I got a cotton ball that I had rubbed with Vaseline and lit it with a match. I decided to cheat and use a match this time, but I did use the strike-anywhere variety that I finally found at our local hardware store. With the first cotton ball I made the mistake of not loosening it up by pulling it almost apart so I had a lot of surface. It lit but went out shortly after when I dumped my shavings on top of it. So I frayed a second cotton ball and lit it and dropped it into the stove on top of the shavings and stirred things up a bit.
When it was obvious a fire was under way I carefully piled the small twigs on top, followed by some of the larger ones. Within about two minutes I had a very healthy flame. The smoke had pretty much subsided and the gases were beginning to ignite at the top of the stove. (See above picture)
So I put my large coffee can filled with 3 cups of cold water on top and watched. Bubbles started forming on the bottom of the pot within just a few minutes. I added a half dozen or so larger sticks to the fire a couple times but in eleven minutes I had a rolling boil.
The fire burned well for another five minutes or so and then began dying down. I could have kept it going for a long time by just adding larger sticks (3 inches long and 1/2 to 1 inch diameter. I am very pleased.
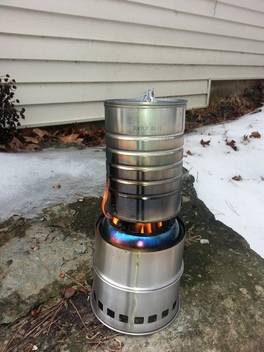 1/30/2016 Non-match wood fire!
Boiled 2 cups in 10 minutes.
Over the winter I got a fairly good knife, learned how to make charcloth and got a Gerber Fire striker. I've never messed with such before but am impressed. It really throws out the sparks.
So I got out my little wood burning backpacking stove shown below, gatherer a few dry sticks, whittled some tender, greased a 100% cotton ball with Vaseline and set up my experiment. My two cups of cold water were in a small coffee can that just fit on top of the stove. The striker ignited the cotton ball with no trouble after just a few strikes. I lit it outside the stove and then dropped it into the stove fire pan. Then I dumped by half cup or so of shavings made with my knife on top of that and began piling on smaller, then larger sticks. In about ten minutes I had a very good fire going. So I added a few more larger sticks and set the can on to see how long it would take to boil. Ten minutes later, after removing the can once to add some wood I had a rolling boil! And lots of fire left over. That got me so excited that I went all around the yard gathering up small sticks and breaking them up into small pieces about two or three inches long for the future! The whole event from deciding to do it until it was all cleaned up was about 45 minutes! I spilled the can of boiling water trying to remove it but that's OK. I didn't intend to use it, just practice.
What a nice way to enjoy a nice winter day.
Success!
At that point I put on my pot (small coffee can shown below) with two cups of cold water that had been sitting out while I cut and split the wood. In six minutes I had a rolling boil and a lot of fire left over. I made myself a nice cup of tea and then promptly spilled most of it trying to move the cup with my mittens on!
My conclusion is that cutting and splitting wood is well worth the trouble. The fire catches and burns very well with those. My split pieces were about three inches long, cut from a one to two inch dead stick. I split the wood at least four times and some times more so I had a lot of pieces roughly 1/2 inch square. Of course they were mostly three sided rather than square but no matter. I'm increasingly convinced this is a feasible cooking stove.
My conclusion is that cutting and splitting wood is well worth the trouble. The fire catches and burns very well with those. My split pieces were about three inches long, cut from a one to two inch dead stick. I split the wood at least four times and some times more so I had a lot of pieces roughly 1/2 inch square. Of course they were mostly three sided rather than square but no matter. I'm increasingly convinced this is a feasible cooking stove.
|
12/19/15 This afternoon, even though it was only about 28 degrees I decided to give my newly acquired wood gas stove a try. This one has a different name from the one I gave my son when he was here for thanksgiving (shown below) and which we only managed to get to smoke really bad but otherwise is identical. I'd watched a ton of videos of guys using one and wanted to see if I had learned anything! So I got a cotton ball, my box of twigs and sticks I've been collecting and keeping in the garage to dry out, a box of matches and about two cups of water in my cook pot. I set the stove on one of the big rocks at the foot of the hill in our back yard and had a go with it. Once again I got a lot of smoke initially, but finally, after about half an hour I had a respectable flame and MUCH less smoke. So I put the pot on and started my timer. about 20 minutes later and after adding a little more fuel the water started a vigorous rolling boil! Success! I am now convinced it is my fire making inability that is the problem, NOT the stove!
|
|
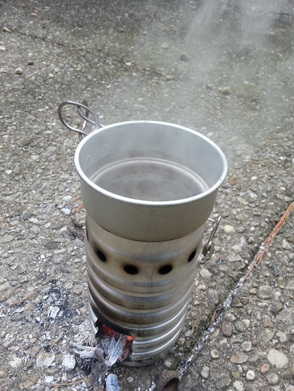 Swiss Army Volcano Stove in action.
12/18/15 It is 27 degrees outside. I decided to give my Swiss Army Volcano stove another try. As you can see from the photo at left I got water boiling vigorously.
I also think I learned something about the fire needed. My tendency is to want to put the pot on too soon. I'm thinking I need to build a bigger fire in the stove and let it burn down to create some very nice coals. Then when I put the pot on it will heat quickly.
I think the trick is to use some kind of hard wood once the fire is going well which will remain as coals for a little while. We'll see with further experiments later.
I've never done much with wood fires of any kind since heating with wood years ago in North Carolina in a stove. I learned the key then was to get the stove going good to heat up the pipe and generate a draft and then use the air inlet to control the air and hence the heat output. And use good hard wood! With that combination I could keep the house warm all night.
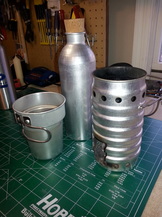 Swiss Army Volcano Stove
12/4/15 Being a slow learner I decided not to abandon the idea of a wood burning backpacking stove and ordered a Swiss Army Volcano three piece stove set. It has been sitting on my bench for a couple days so I decided it was time to give it a try. I did finally get two cups of water boiling vigorously. But once again, lots of smoke and blowing on the fire. It has the advantage of being easier to refuel while burning, compared to the other one. You can blow directly on the fire which helps also. And it looks better to me, kind of rugged and earthy like you'd expect a Swiss Army stove to be!
My conclusion is that both are probably better than nothing but I don't plan to hit the wilderness without at least a good alcohol stove if not a pressure stove if I can help it!
My conclusion is that both are probably better than nothing but I don't plan to hit the wilderness without at least a good alcohol stove if not a pressure stove if I can help it!
 The wood-gas stove
12/4/15 While our family was all here for Thanksgiving I decided it would be fun to get my son a backup stove for hiking. He has a great little gas stove that we have always used but what if it failed? Wood seemed like a good option. So I ordered a Ohuhu Potable Stainless Steel Wood Burning... one from Amazon. After the festivities wound down he and I want to the back yard in the 40 degree weather to give it a try. I hate to say it but we never managed to get any water boiling. We did get a lot of smoke. Seems VERY dry wood is required. And they need to be small pieces. I'm fairly certain it could work under the right circumstances but you better be prepared to be persistent.
(2015-12-13 Update) I got an email from my son a today that indicated he got the stove going well. The key appears to be to get a "roaring" fire going so the "afterburner" kicks in. Then it will do very well. He didn't do a water boil test but said it clearly works. That was encouraging. I got another one and am anxious to give it another chance.
(2015-12-13 Update) I got an email from my son a today that indicated he got the stove going well. The key appears to be to get a "roaring" fire going so the "afterburner" kicks in. Then it will do very well. He didn't do a water boil test but said it clearly works. That was encouraging. I got another one and am anxious to give it another chance.
