My Portable Hammock Stands
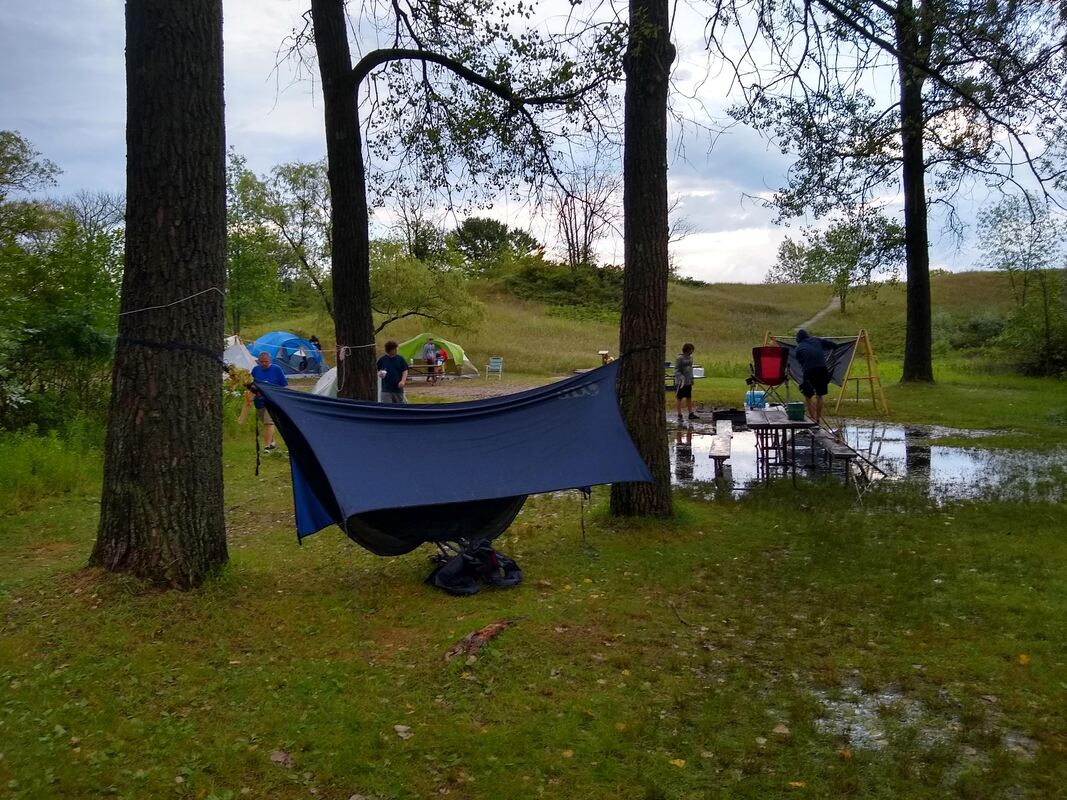
2020-07-29 This past Monday and Tuesday I went with my son, grandson and 9 of my grandson's teen-aged friends to celebrate his 15th birthday, Camping! I took the DIY hammock stand along. Yesterday, I set it up, slung my hammock, underquilt and tarp and even took a nap in it late morning! About 4:00PM we began noticing threatening clouds in the west and weather statements warned of a severe thunderstorm. So we went to town for pizza rather than try to fix hamburgers, the intended meal! Great plan! It turned out to have heavy and gusty winds and a heavy downpour that flooded the entire "common" area of our group site. One of the tent pegs pulled out of the sandy ground and flipped over the stand so the hammock and everything got drenched.
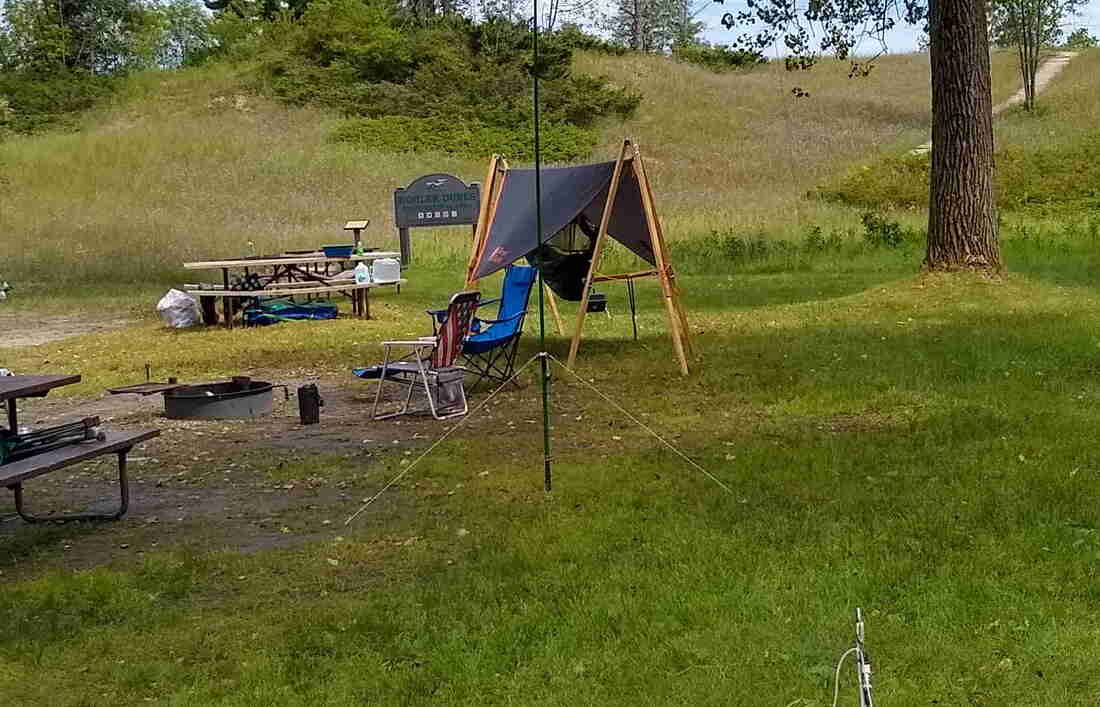
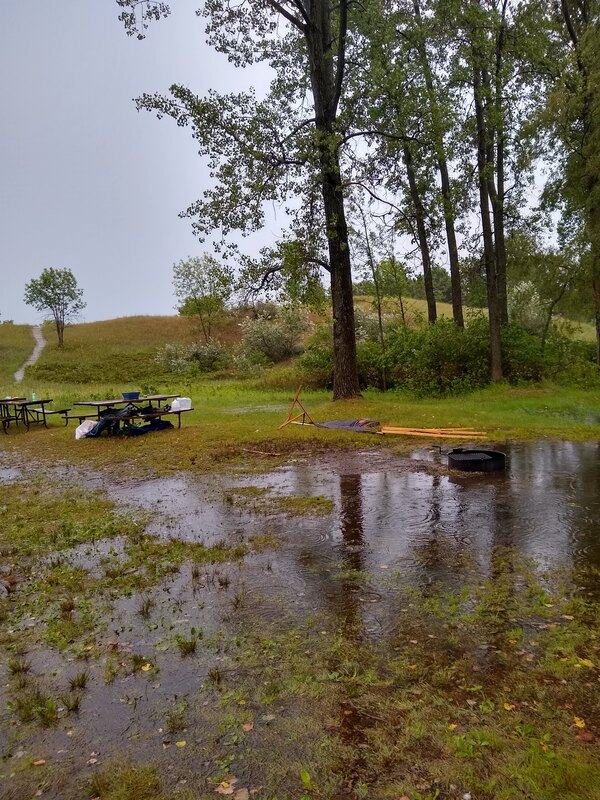
I was pretty proud of my stand though, which was still intact and standing! But the party wasn't over. An encore soon hit again with strong winds and buckets of rain. This time the hammock stand blew over leaving all the "stuff" lying in the water. But again, the stand survived. all the harm was to it's content, not the stand itself! Not sure it that is good or bad!
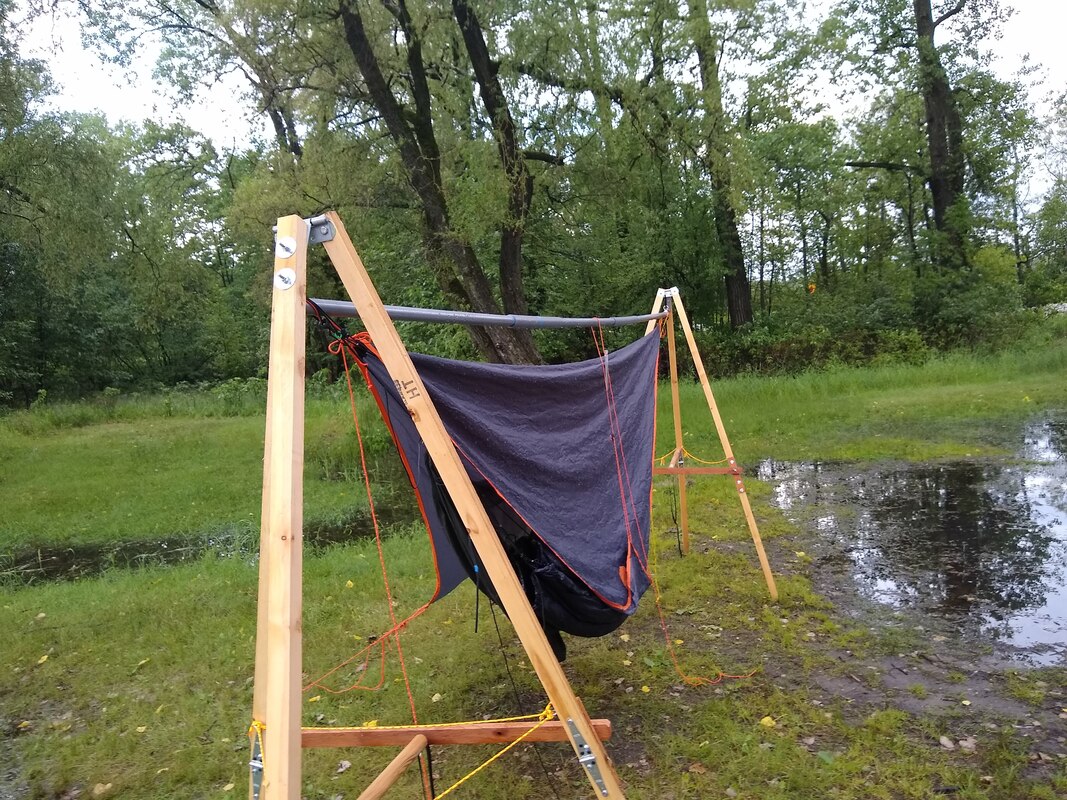
What did I learn? The basic stand design is OK. But if there is any danger of strong winds, batten the hatches! Had I used better stakes for the tarp and perhaps anchored the stands themselves, possibly all would have been well. maybe not. My son had a hammock and somewhat larger tarp tied to two sturdy trees. Nothing blew away but one tarp peg did give way and the underquilt and hammock got more than damp but less than soaked. It might have been sleepable. Mine was absolutely NOT sleepable!
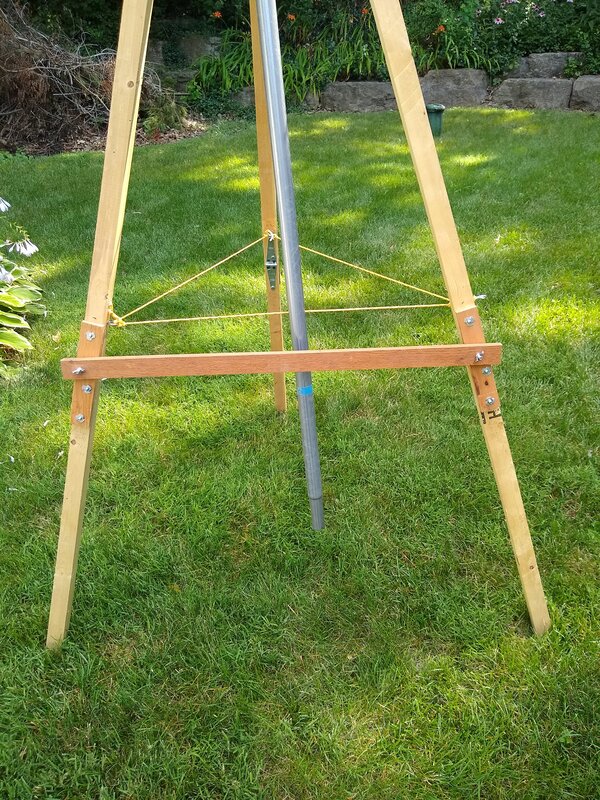
2020-07-25 Yesterday after setting the stand up a couple times I realized I needed to "anchor" the third lag on each end also. So I cut two pieces from a 2" dowel I had lying around to go from the back leg to the middle of the piece between the two front legs. That anchors that third leg so it won't walk on you while setting up. To mount the new piece I put an eye screw in the front bar and a L-shaped screw in each end of the dowels so it simply drops into eye screw on the back leg and the new one in the front spreader bar. Seems to work OK. I failed to take any pictures before packing it up for a camping trip in the next few days.
2020-07-21 It's been quite a while since I've messed with a hammock or my DIY portable hammock stand. But this coming week my son and I are taking my just-turning-14 year old grandson and a bunch of friends camping. My son wants to sleep in a hammock and we're not sure there will be convenient trees in the park where we're going So I decided I better solve the "creeping legs" syndrome I described two years ago below! So I cut two 33 inch 3/4 by 1.5 inch spreader sticks from some scrap, drilled a hole in each end and using longer 1/4x20 bolts replaced one of the bolts in the brackets that hold the assembled legs straight and use those to hold the spreader sticks. I don't think I need to deal with the third leg on each pair of legs as they seem to like to stay put. I haven't slept in it but it seemed robust when I got in and out of the hammock several times. Guess my son will find out for sure!


2018-06-25 My plan was to use my hammock stand this past weekend at the ARRL Field Day. Thankfully I had another option. The problem came up when a fairly strong gust of wind hit it broadside while I was putting up my tarp. As the wind blew against it sideways and with no weight in the hammock it started to tip over. The moment a leg lost firm contact with the ground that leg began to move toward its opposing leg meaning it could not return to its right position which made the whole thing unstable and had I not intervened quickly, it would have totally collapsed. Granted, with a person in the hammock that probably would not have happened, but it was clear that if anything causes one of the three legs to begin moving, disaster is on the way!
I have two thoughts about what is needed. First, the legs need to be spread wider, giving the whole thing more stability. Second, the legs need to be rigidly braced to each other to avoid their "walking" in the direction of the tip. Back to the drawing board.
2018-03-28 As I mentioned on my 2018 Backpacking/Camping page earlier today, I decided to modify my rejuvenated hammock stand to make it so it can be taken in a car. The legs of the stand can be taken apart so they are approximately four feet long. The ten foot ridgepole section was the problem. I ended up cutting that ten foot section into two parts, each four feet and nine inches long. The ridgepole is made from 1-3/8 inch chain link top rail which has a roughly six inch long reduction on the end of each ten foot piece so they can be joined together by just slipping that smaller part into the adjacent pipe. The nested joint is a bit loose letting the pole sag more than I am comfortable with. So I cut a twenty inch piece of 1-1/4 id Rigid PVC schedule 40 electrical conduit to fit over the joint. That doesn't add much to the weight while strengthening it considerably. the final result is a ridge pole thirteen and one half feet long with two joints roughly equal spaced.
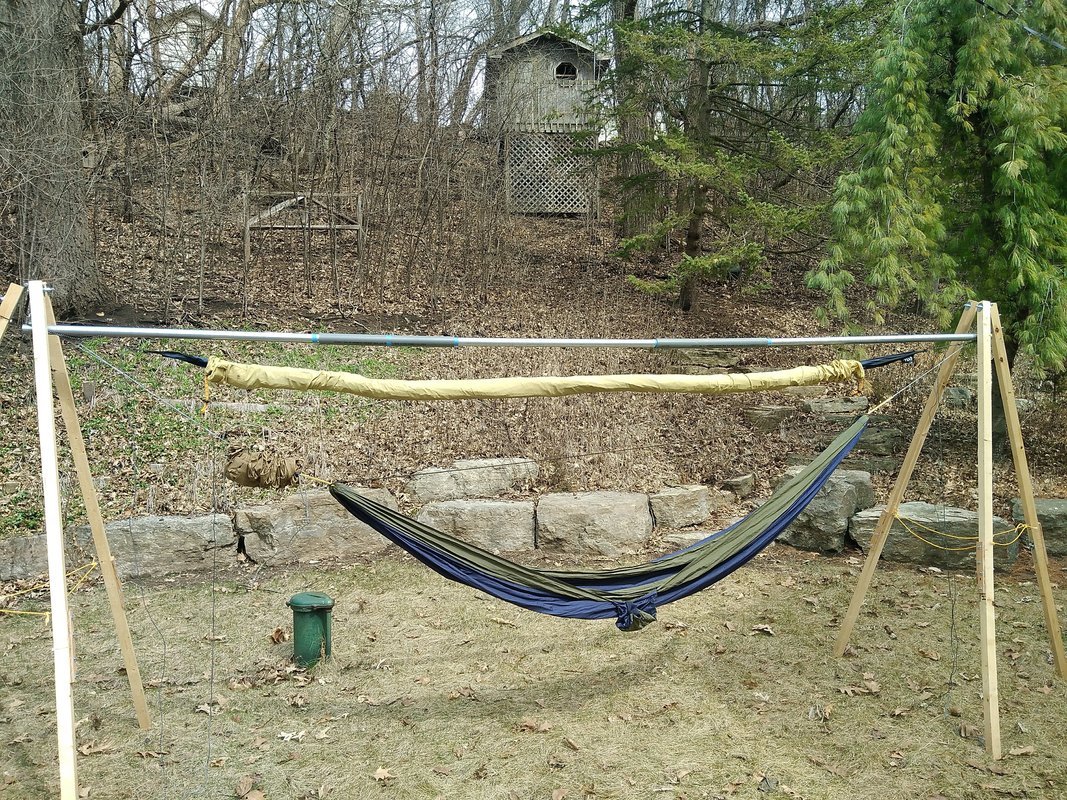
The final portable package is about four and a half feet long weighing just under 30 lbs. total. Each leg package weighs 13 lbs. So it is manageable. The legs are approximately 1-1/2 inches square. One minor concern, I think its minor, is that a rope keeps the legs from spreading apart (spread about 45 inches at the ground) but nothing keeps them from moving together. I can envision a collapse if something happened to start tipping one over. Once you're set up and in the hammock it seems very stable and solid. So I'm not terribly concerned.
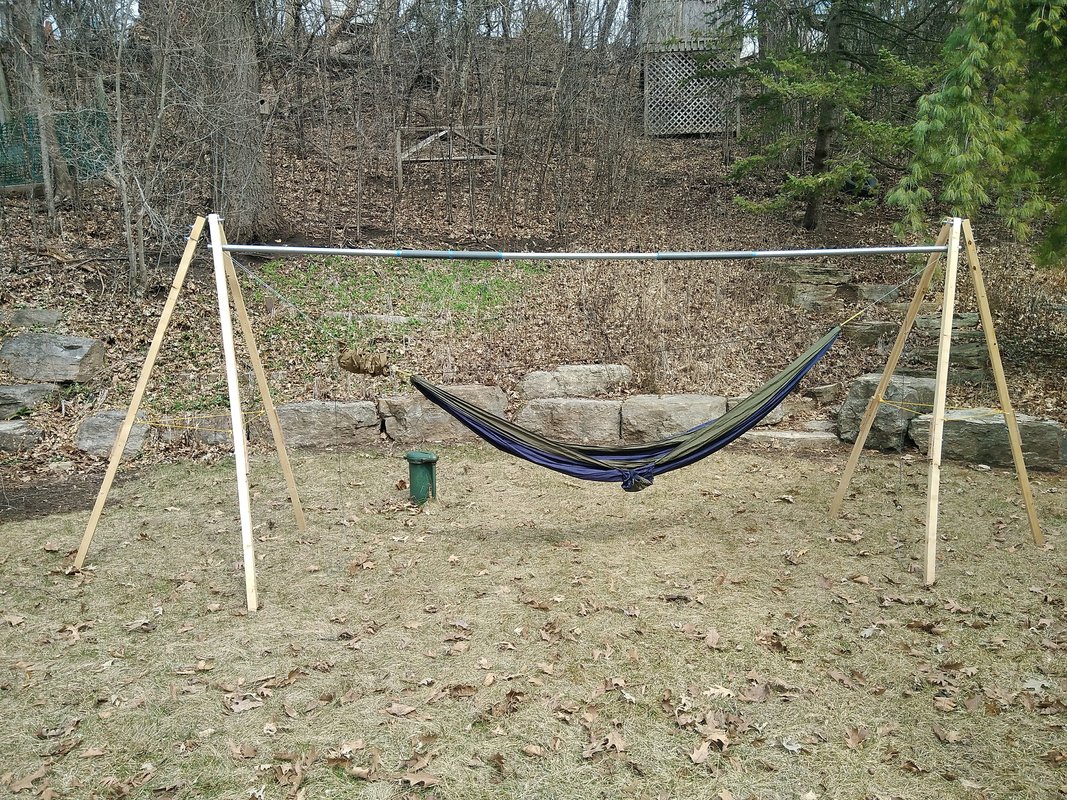
Stands with hammock. Ridgepole is 13-1/2 feet long. Hammock is suspended with whoopie slings looped over the end of the ridgepole.
Hammock and tarp attached to the stand. Both are are just looped over the end of the ridgepole against the eye bold.
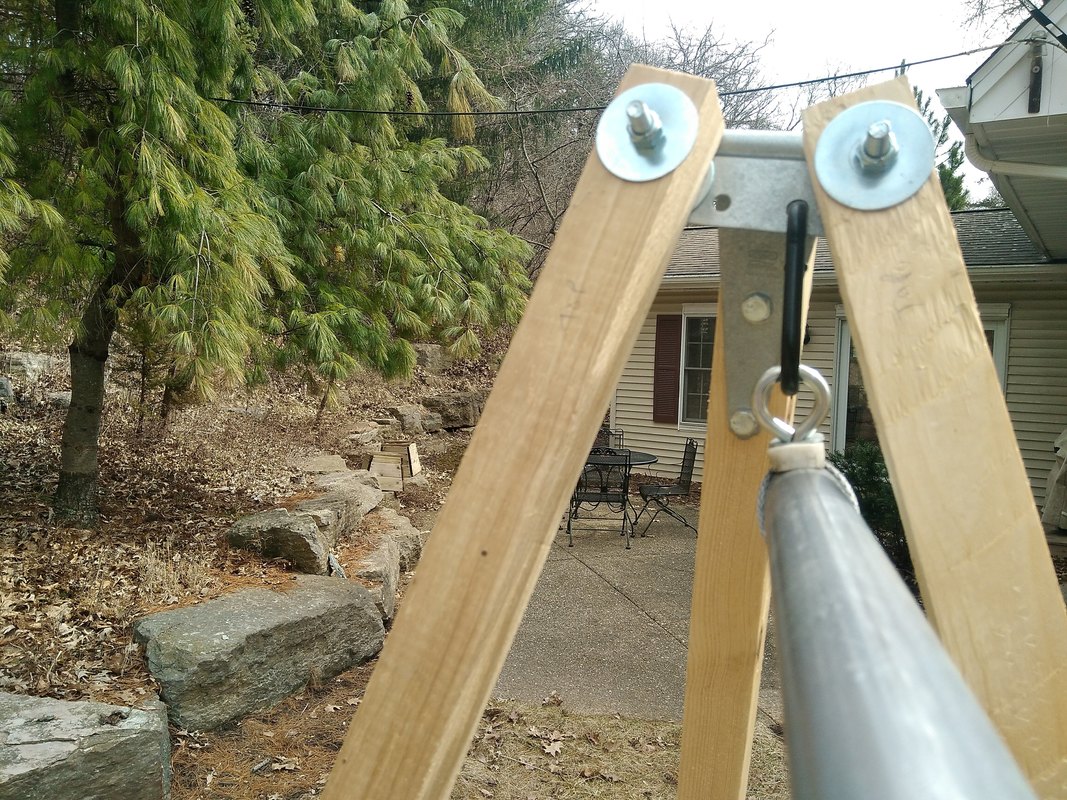
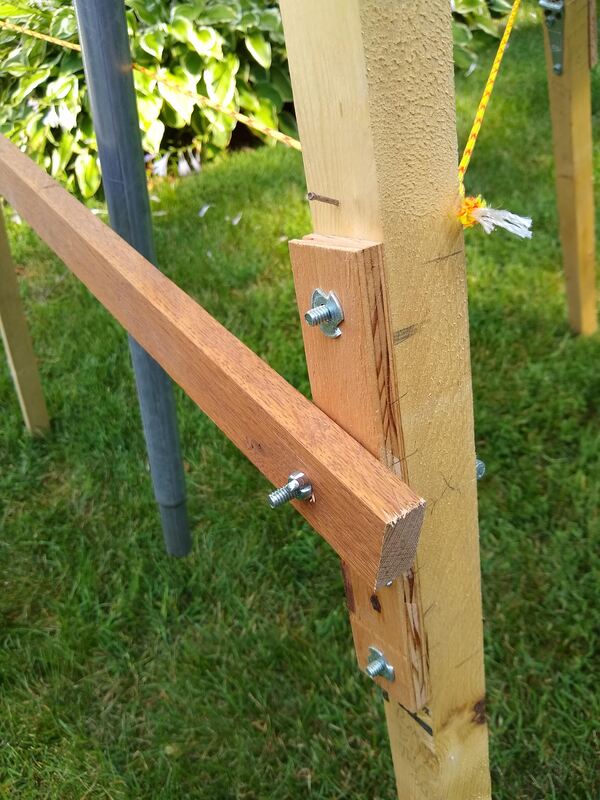
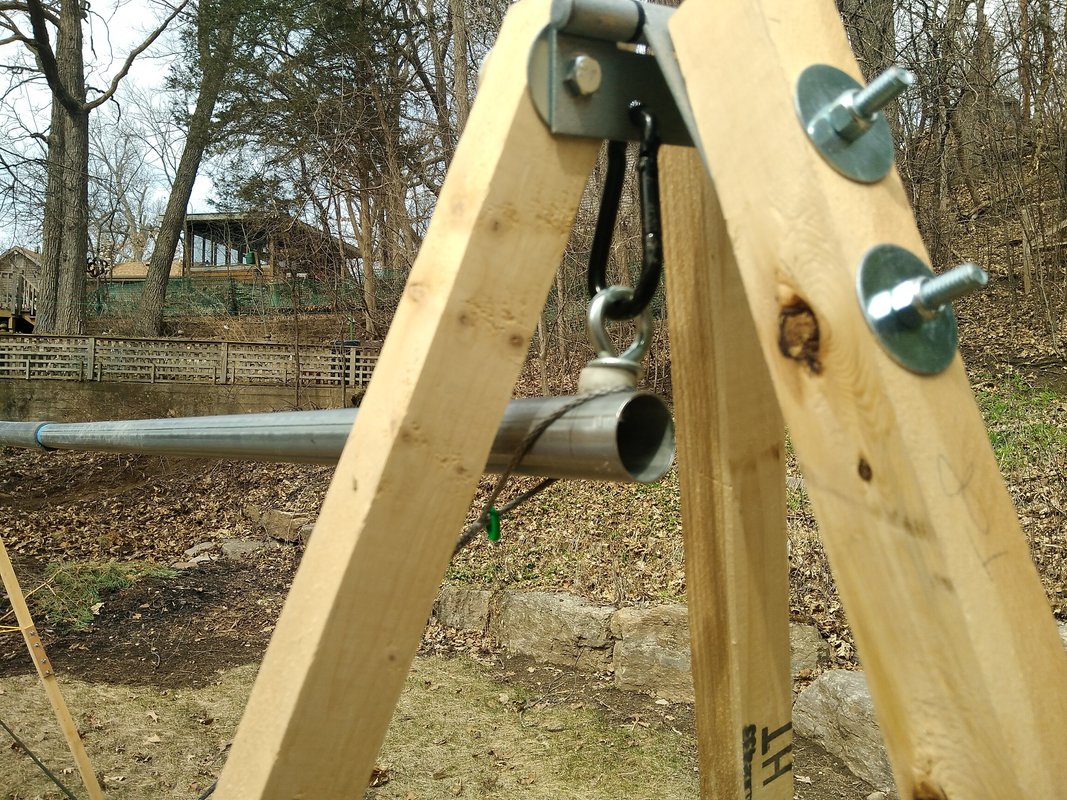
Detail of how legs and ridgepole are attached to the hinge.
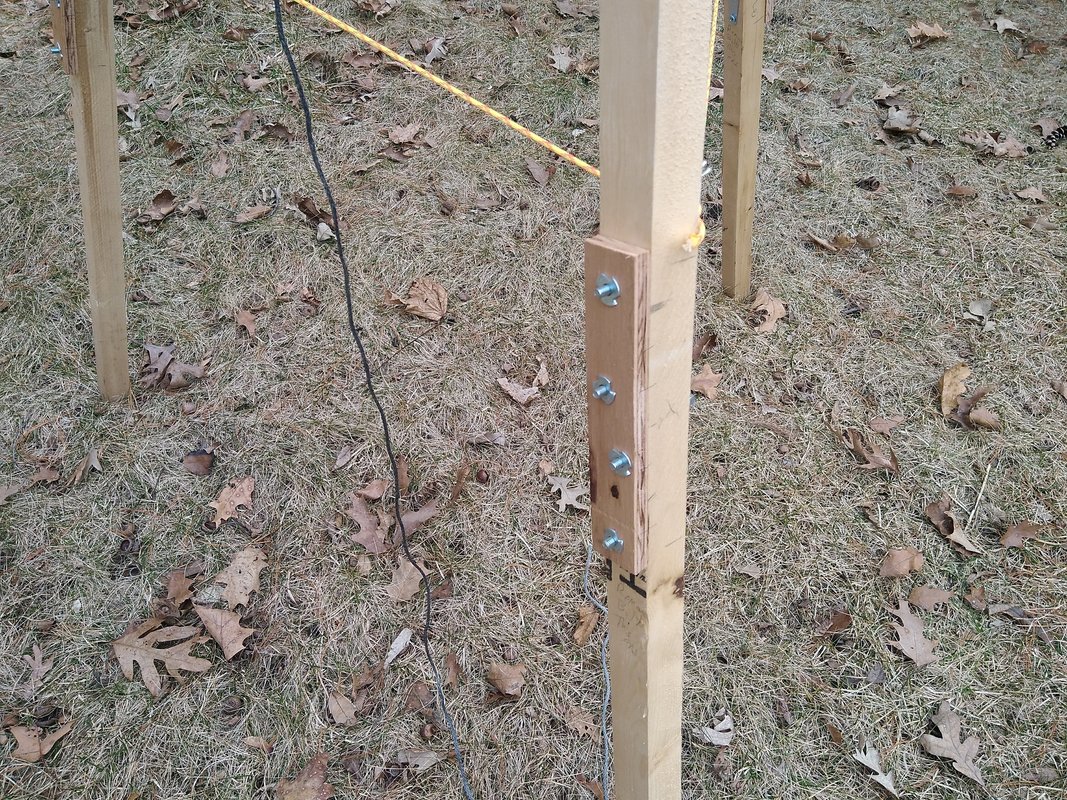
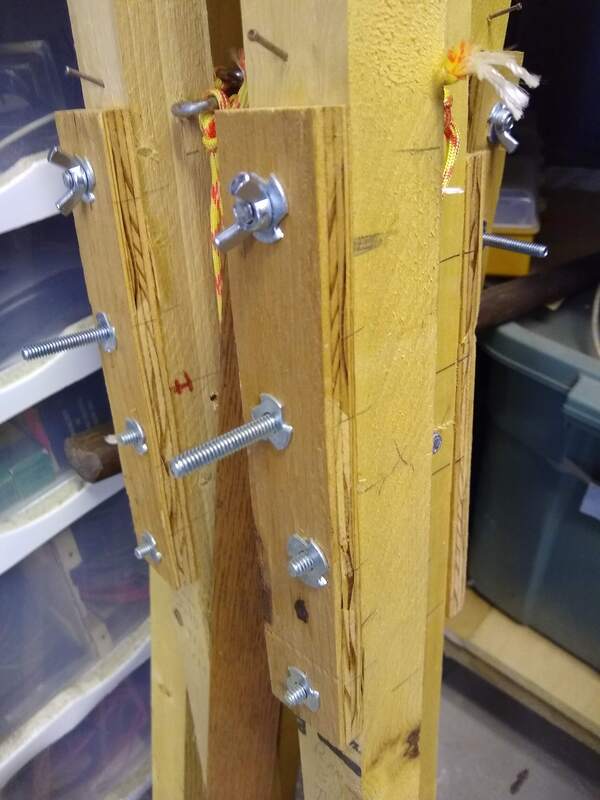
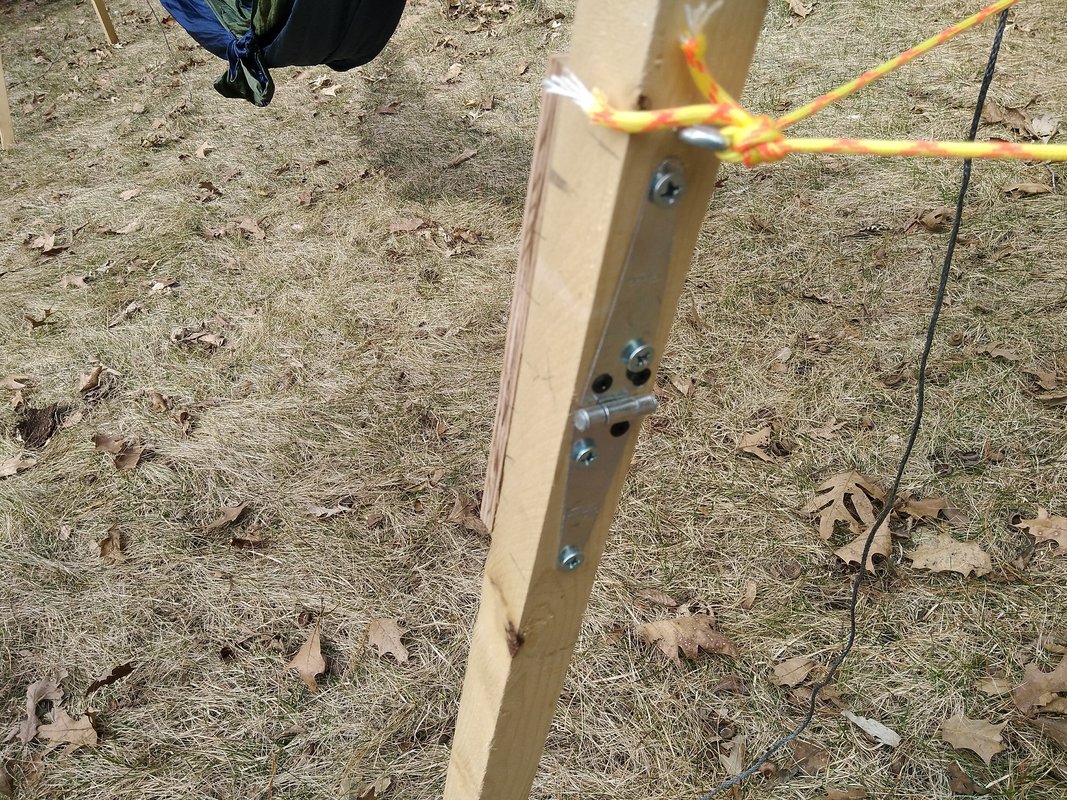
Detail of the joint in the hammock stand legs. This side is opposite the hinge.
|
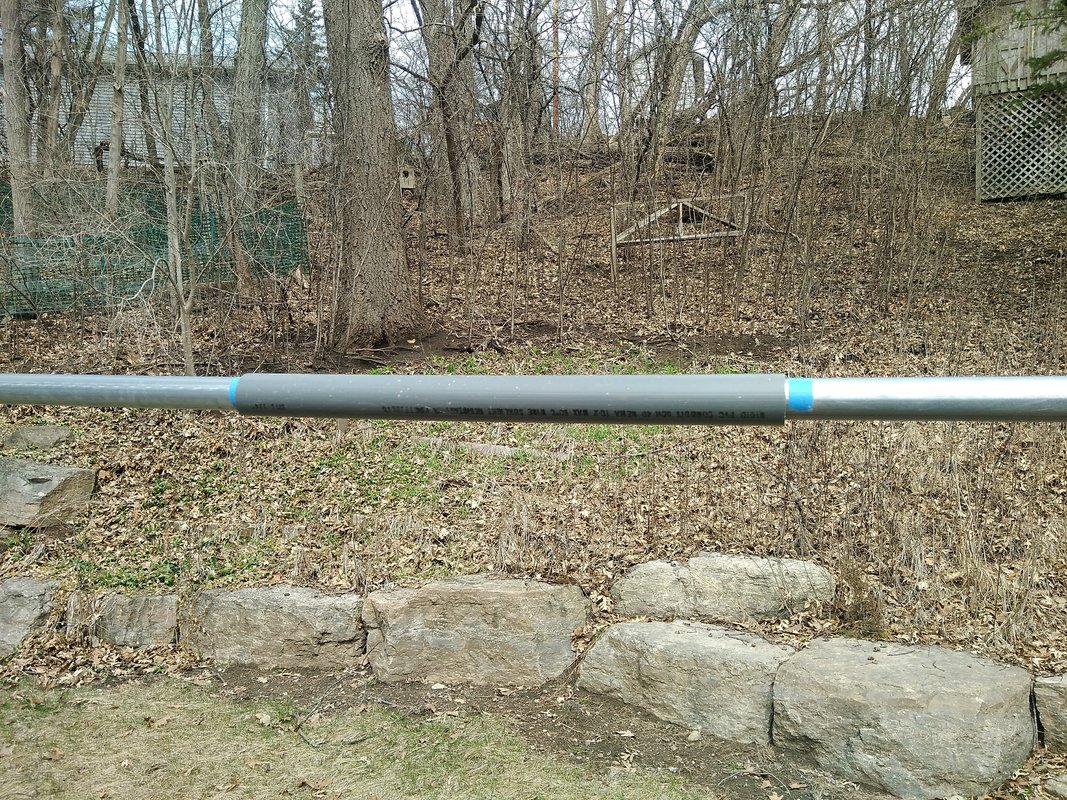
The 1-1/4 inch id of a 20 inch piece of Rigid Schedule 40 PVC conduit fits snugly but can still be slipped over the joint between the 4' sections of the ridgepole.
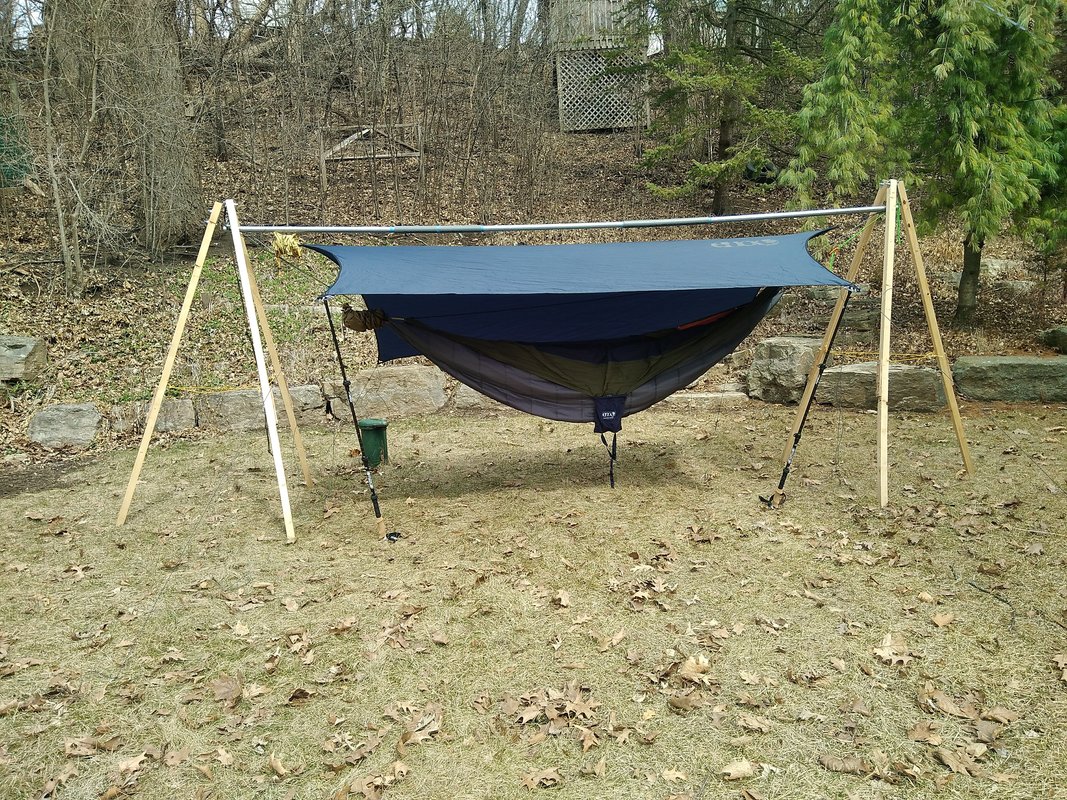
The full setup with an underquilt slung under the hammock and tarp deployed in porch mode using hiking poles.
Detail of how rigdepole is attached to the stand and the whoopie sling from the hammock looped over the end.
Detail showing the hinge side of the hammock stand leg joints.
|