DIY Hammock Stand
TurtleDog-like Hammock Stand
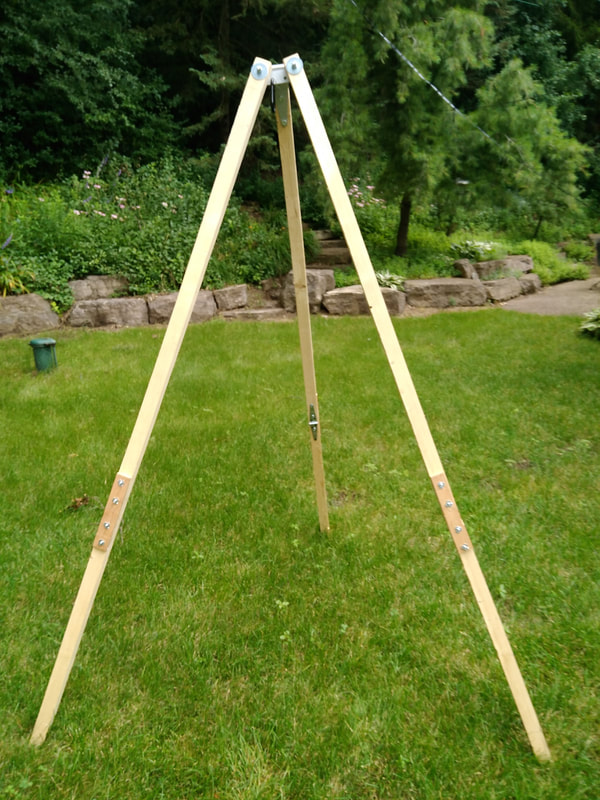
Newly modified hammock stand tripod using 1-1/2 by 8 by 1/2 inch plywood to replace the removable pin hinge.
|
2017-07-11 I went to work today and replaced the removable hinges with a piece of 1/2 inch plywood approximately 1-1/2 x 8 inches. It is much stronger than with the small removable pin hinge. You still need to be somewhat gentle with it when the legs are folded as the joint of the main hinge is fairly fragile. That would be improved if I had used the heavy duty hardened galvanized hinges but I didn't want to spend $4 per hinge rather than the $1.75 or so that I spent.
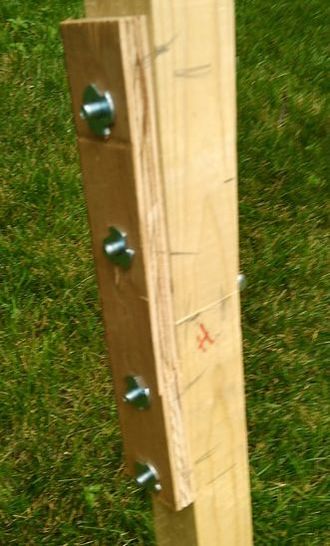
1/4 inch bolts used to attach the plywood go through the main hinge. One bolt gots through the tip of the hinge. I drilled a new hole for the second bolt, leaving the two inner screws in place.
The more I think about it I could probably have saved money and had an even stronger and perhaps simpler joint if I tossed out both hinges and used a 1-1/2 by 8 by 1/2 inch piece of plywood on both sides. It would be a bit harder to disassemble and reassemble but not much. You need a screw driver for either configuration. Now to work on the ridge pole. Haven't' decided how to proceed. may try three 4 ft 2x2s.
|
1/2 by 8 by 1-1/2 inch plywood used to replace the removable hinges which are way too light for the task.
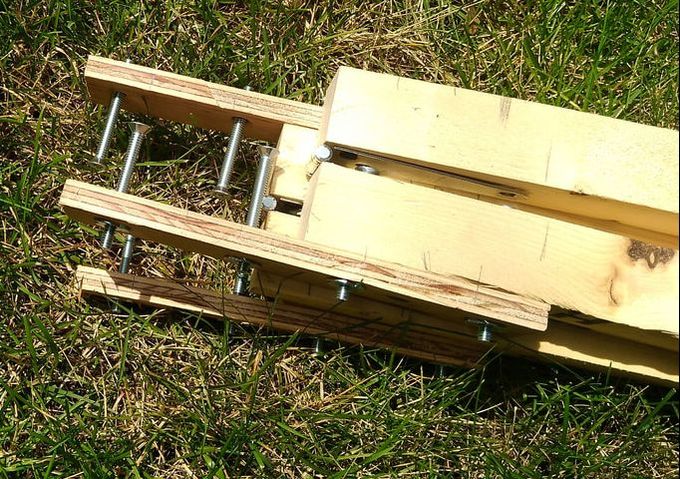
The modified stand with the legs folded.
|
2017-07-09 Well, more work to do on the hammock stand! We spent several days at a family gathering over in Minnesota at our son's place and I took the stand along. It set up nicely. I laid in the hammock several times. My son told me that the ridge pole was bending quite a bit. Then when my other son got in the hammock the bar sagged even more and suddenly started to give way at the center joint. The 3/4 inch piece of water pipe I was using as the connector (it fits perfectly inside the conduit) started to bend! That was the last piece I expected to fail. My son had a piece of 1-1/2 inch water pipe about 11-1/2 feet long which we pressed into service so all was not lost. Our conclusion was that there should not be a joint in the center of the ridgepole and the connectors should be lighter than galvanized water pipe.
But the "tragedy" did not end there. I was real proud of my shortened legs on the stand which I joined with hinges, one pinned to allow the leg to be bent back on itself for transporting. That actually did work very well. However, when a strong gust of wind caught a large tube the kids used in the water and blew it against the side of one leg it bent! The hinges hold well on one axis but not well the other way. A piece of wood and a couple C-clamps saved the day but I have to come up with a better way of joining the top and bottom leg pieces. But even with those failures, I slept part of the night last night in my hammock from the stand while my son slept on one suspended from a tree and a couple wooden legs he had hastily thrown together!
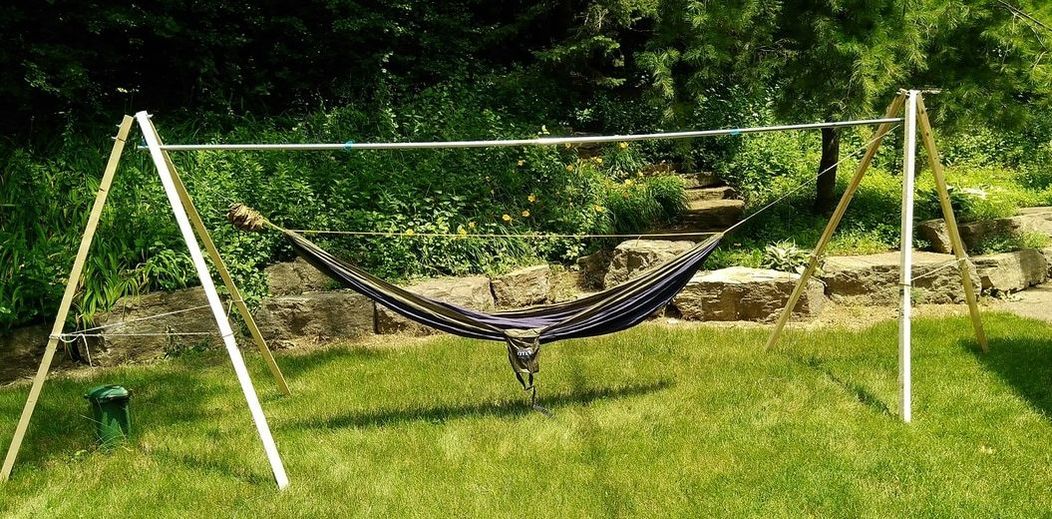
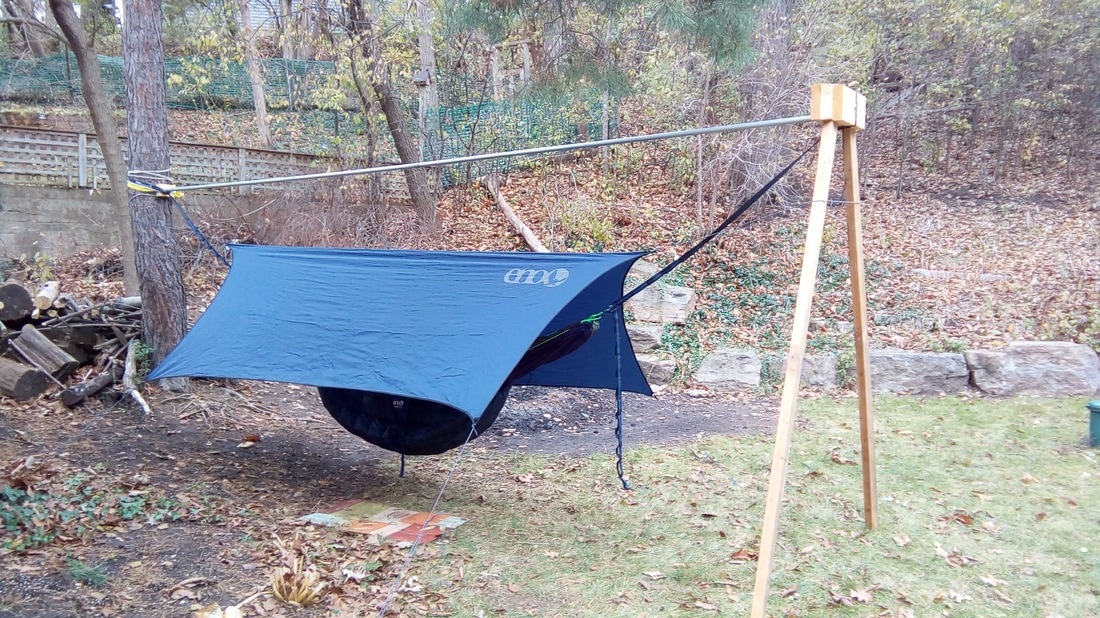
Completed, modified TurtleDog hammock stand ready for a workout with grandkids!
|
2017-07-04 What a difference a day makes! I spent most of the day making three "improvements" to my hammock stand. First I got rid of the eye bolt below the ridge pole. By doing that the ridge pole is about two inches higher and the whoopie slings can fit right over the end of the ridge pole up against the insulated threaded part of the remaining eye bolt which hangs the ridgepole. THAT solved my hang angle and height. A significant improvement by eliminating parts! See the photo to see what I did.
One objective of these next two changes was to make it fit into the trunk of my car so I needed to get all pieces down to around 4ft long. That mean cutting the legs down and providing a way to rejoin them on locations. I thought about that a long time and came up with the idea of using two hinges on each leg. One would be the primary load bearing or really stabilizing one and the other would serve to lock the leg in place.
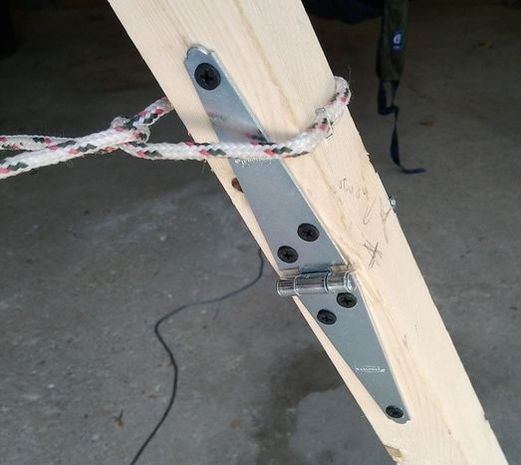
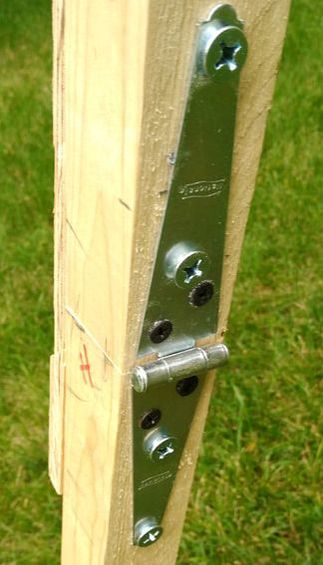
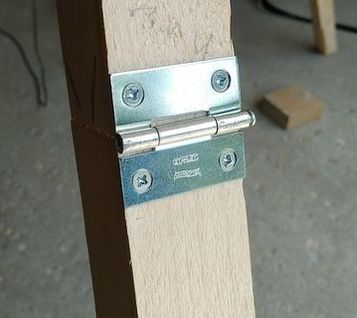
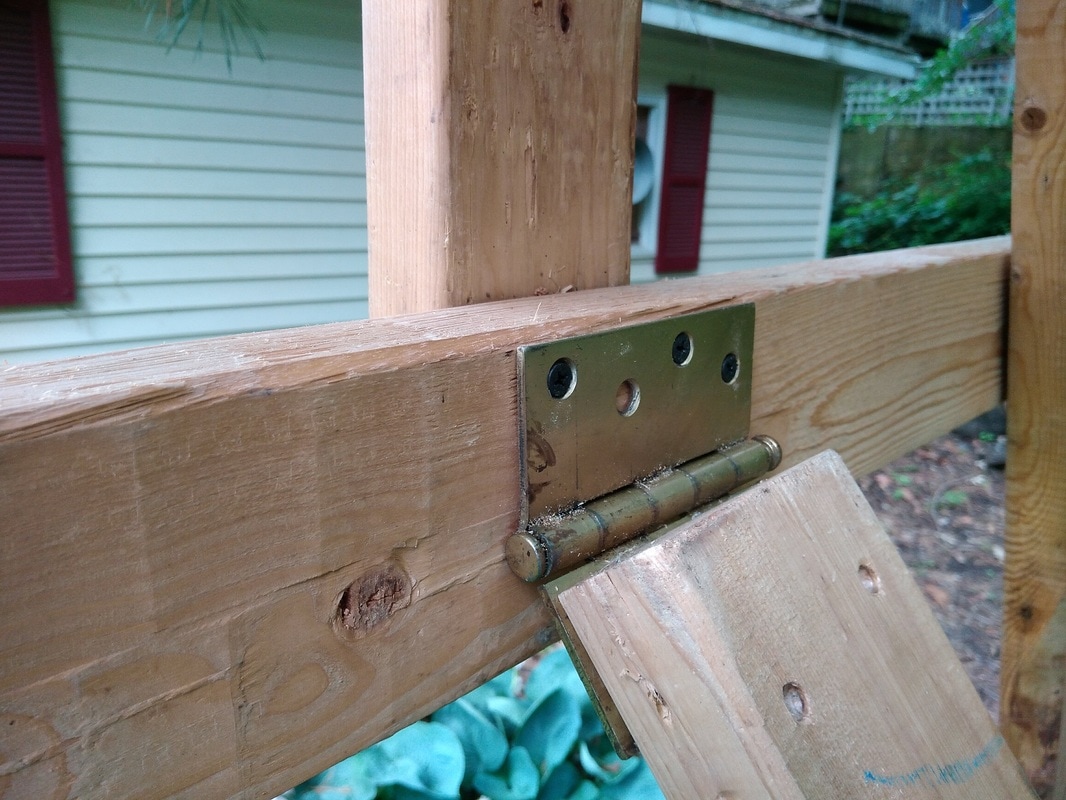
The primary hinge that provides the stability and strength to the leg. The locking hinge is on the opposite side.
The locking hinge has a removable hinge pin. So to fold up the leg simply remove the pin and fold the leg over backwards. The main concern is how to avoid losing the pin!
Completed, heavily modified TurtleDog hammock stand, ready to go in the car.
|
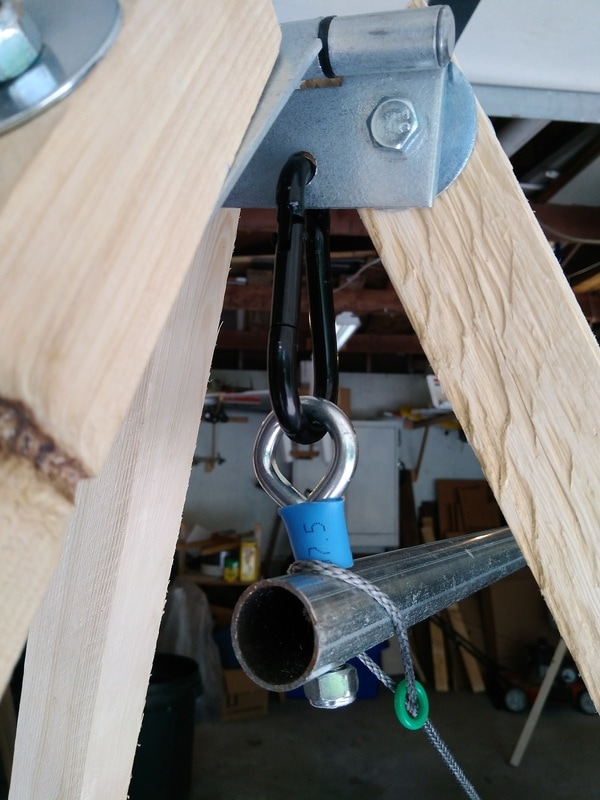
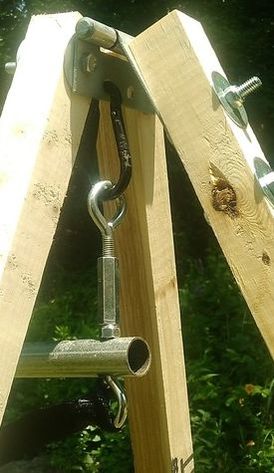
Improved hanging hardware for the ridge pole which also alows me to eliminate the strap and put the adjustable loop of the whoopie sling right at the eye bolt. The little blue sleeve is a piece of pex water pipe.
The locking hinge. It has a removable pin. To fold the leg simply remove (and don't lose) the pin and fold the leg back on itself.
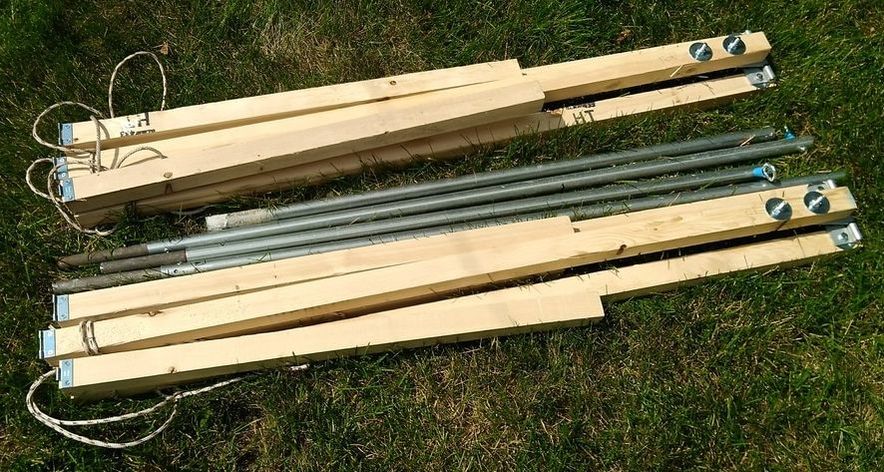
My final improvement today to make the setup portable was to cut the 14 ft ridge pole into four pieces. They aren't all the same length because it has been hacked up previously but they are all short enough to fit into the trunk of my car. I joined the pieces
|
together with a ten inch piece of old 3/4 gas or water pipe. To keep the pipe in place I riveted it to one section with pop rivets. A small bolt would work too. The photo shows the completed portable stand. I tested it out in my garage (the sun was too hot) with my ENO DoubleNest hammock and whoopie slings. It seems stable with about the same amount of sway in the ridge pole as before I cut it into sections. It'll get a true test the next few days at our son's place with grandkids. We'll keep it over nice soft grass just in case!
2017-07-03 After completing my hammock stand built from 2x4s discussed and shown below I went back to the Internet and discovered a site dedicated to the "TurtleDog" hammock stand. Not sure of the origin of that name but I suspect it is the Hammock Forums name of the guy who first posted it. There are pages and pages of stands built by many others based off the general concept of the TurtleDog stand. My stand works but it is huge and not very attractive. Further it is pretty tricky to set up as the legs like to fall outward until you get the ridgepole connected. And even then you need to run a cord from end to end to keep it from falling down on you. Once the hammock is suspended it is secure. But clearly though it is a functional, it is an inferior design.

Bill of Materials for my Modified TurtleDog Hammock Stand.
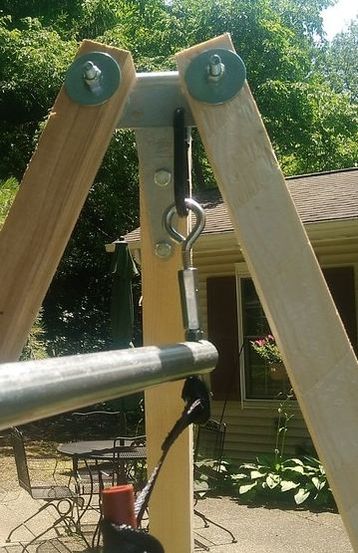
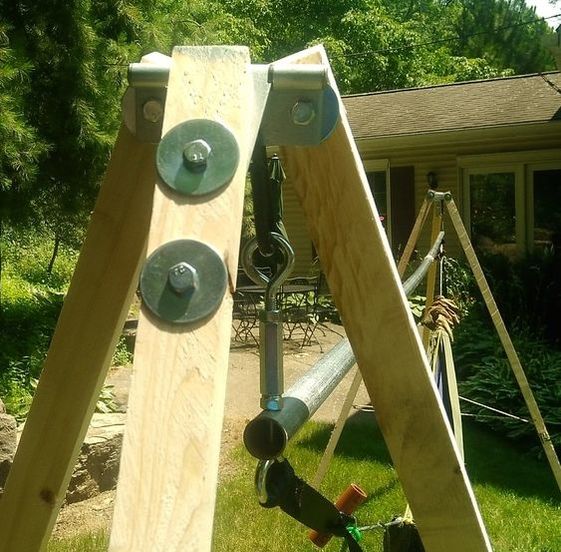
The completed hammock stand is shown at right. It is much "neater" looking than my original stand. The top rail is 14 feet of light weight, 1 inch electrical conduit. The photo below shows how I mounted the top rail to the henge. I drilled a 5/16 hole about 1" from the end of
My method of hanging the top rail to the henge using two 5/16 eye bolts joined with a coupler.
Hinge Tail attachment from the "inside".
|
So this morning I made a trip to Menards and picked up some materials to try my hand at a modified "TurtleDog" hammock stand. The Bill of Materials is shown to the left. The tools I used were a 5/16 drill bit, a small drill press, a hand drill, a 1/2 inch socket wrench and a 1/2 inch box wrench. I ended up not using the S-Hooks but used some heavy carabiners that had come with one of my SnugPak Jungle Hammocks instead. I was afraid I would lose the S-Hooks. The carabiners stay on the hinge and will not allow the top rail to be accidentally knocked off the hook. Don't know that is a big deal but I like the carabiner better. Building it took about an hour and a half.
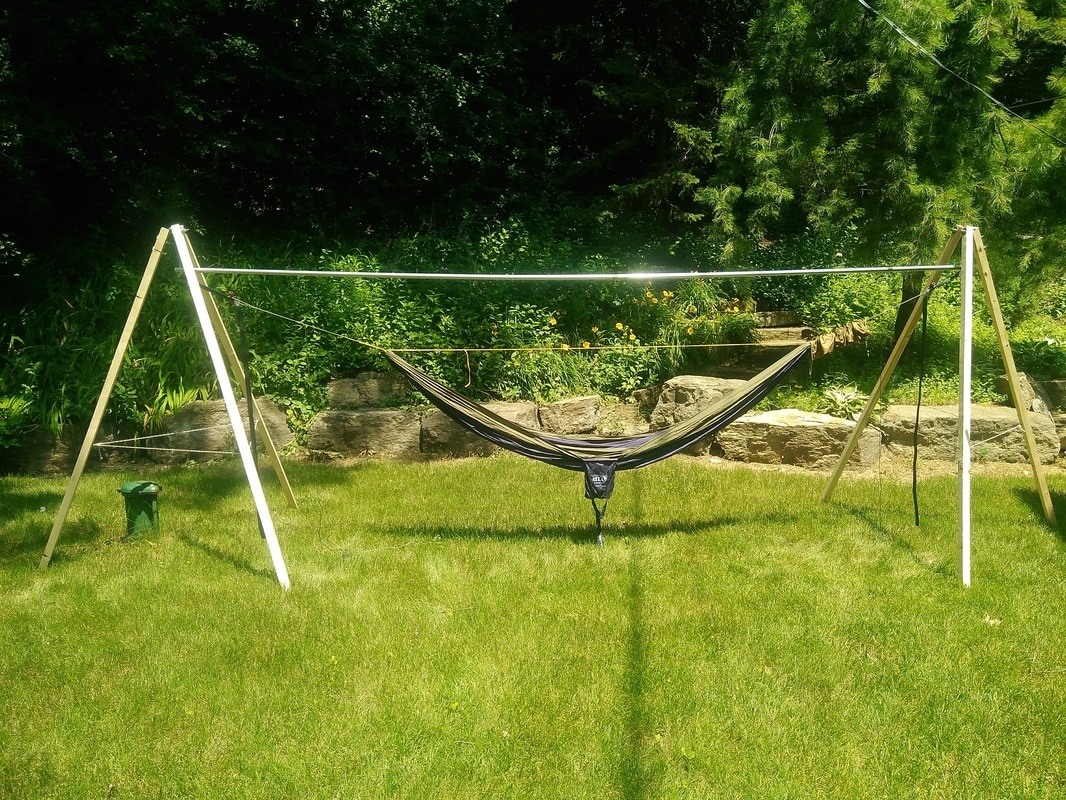
Completed modified TurtleDog hammock stand with ENO DoubleNest hammock suspended.
the ridgepole and then inserted the threaded shank of a 5/16th eyebolt through and put a lock nut on it. Then I screwed the 5/16th coupling nut on and tightened it. Finally I screwed another 5/16th eye bolt into the top of the coupling nut and tightened everything. It took a little messing around to get the two eye bolts aligned the way I wanted them.
Detail of bolts attaching third leg to the tail of the hinge.
I have tried it out with both a SnugPak Jungle Hammock and my ENO DougleNest hammock. Both work well. I think it would work better if the legs were longer. I cut them down to 6-1/2 feet partly to get rid of knots in the ends and partly because that is about the height most people seem to use from what I've read. If it were taller I could either shorten the top rail a foot or so or lengthen the whoopie slings which would give a little better suspension angle. But it works fine as it is.
The top rail sways quite a bit if you jump around in the hammock. One-inch diameter pipe is probably about as small as you would want to go. Also the hinges I got don't have a hole directly in the center so I used one off to the off-center ones. That puts a bit of a twisting motion on the stands and probably contributes a little to the swaying top rail. If I built another one I'd drill a centered hole but it is not a big enough problem to go to the trouble with this one. One final thing, the legs are spread in an equilateral triangle with 5' on a side. I attached 34 inch cord between the legs 48" down from the top of each leg to make deploying the legs easier. Someday I may attach a fabric shelf to those cords.
Overall I am pleased. It looks better than my completely DIY one, and is much lighter and easier to set up. I may see whether I can cut the legs in half and make it portable next!
|
|
2017-06-29 Since getting into hammocks I've had a problem with where to hang one at my own place. We have lots of trees but none are really conducive to hanging a hammock because the ones that are big enough are all by themselves! Somewhere along the line it occurred to me that if I had one "artificial leg" to use in place of the second tree that would work. I talk about figuring that out on my Hammock header page. That does work but it also means I have to hang where the tree is which is not an ideal location.
Looking at discussions in Hammock Forums I see I am not the only one fiddling with a solution. And many vendors sell stands. Some are for portable use, others less so. Individuals try everything from permanently setting 4x4s in the ground to building various stands,
|
My original single-tree hang setup.
|
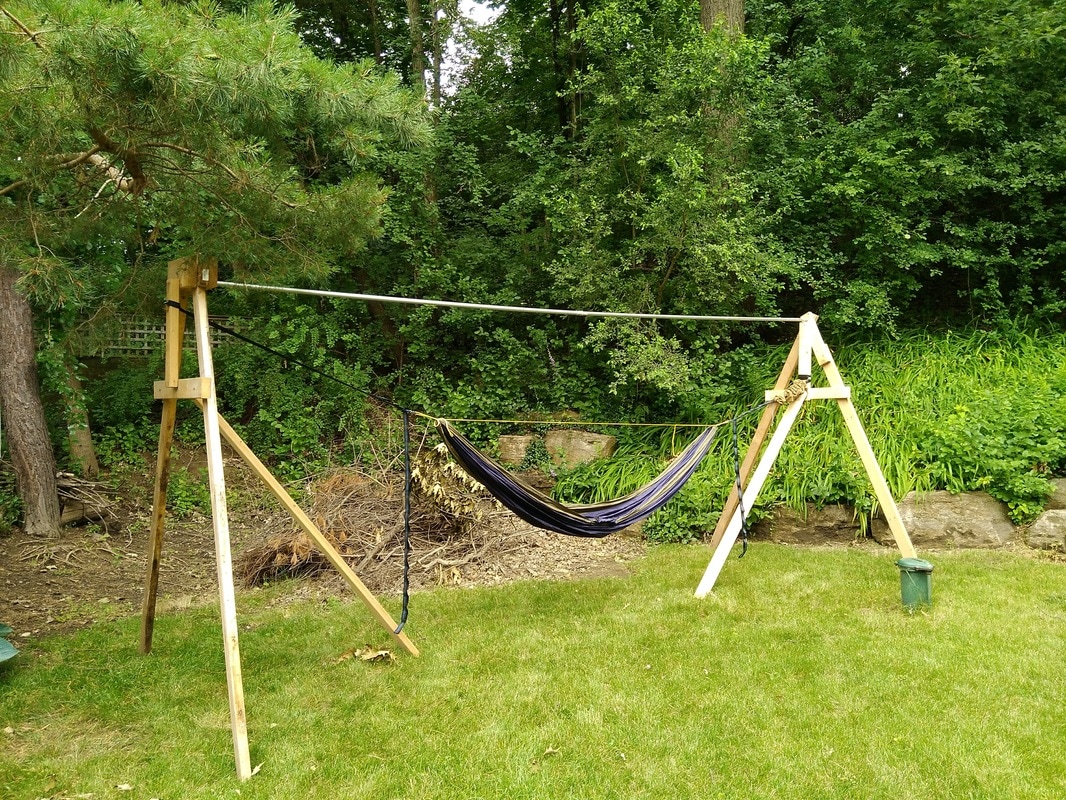
My latest hammock stand.
I attached the third lag with old hinges I had lying around. The main legs are 7' 2x4s. The third leg is a 6' 2x4. The rest of the structures are old 2x4 scraps I had lying around. I suspect I could use lighter stuff for some of it but that is what I had. The top rail is made from two approximately 8' chain link fence 1" top rail sections. I joined the two sections in the middle by cutting a foot or so length of old 3/4" water pipe which fits almost-snugly inside the top rail. I think I need to shorten the top rail a couple feet to get a better suspension angle. sixteen feet is a long ways apart for my 10-1/2 foot hammock. But it all seems to work and gives me some flexibility regarding where I can hang my hammock. So overall I'm pleased.
|
some from scratch, others using hardware sold for the purpose. So I'm not the first nor the last person to try something. A couple days ago it hit me that I could simply build another "bipod"! It would be stable sideways but it would not be stable end wise. The obvious solution to that seemed to be to add a third leg to each bipod, hinged to the main legs and at an angle. Then I debated whether to put those third legs inside or outside. The advantage of putting them inside is that it doesn't take up more space. The disadvantage is that until the hammock is hung there is nothing keeping compression on the top rail so it it fragile. I went with the inside approach. At left is a photo of the result with my hammock connected.
The third leg attached with a hinge.
|