How to Make a 1/4 Wave 20 Meter Portable Vertical Including 30 and 40 meters
Before you start
There is no such thing as a "simple" DIY antenna project. Simple conceptually? Yes. Simple in terms of materials? Perhaps. Simple in terms of getting it "right?" NO! This is a simple antenna in terms of concept. It's a 20 meter 1/4 wave vertical with a bottom coil for lower bands. Think of it as a half wave dipole with one leg, the main element, vertical and the other leg, the radial(s), stretched out on the ground. At its resonant frequency, like a dipole, it will present a near 50 ohms to the coax that goes directly to your radio.
|
As with a half wave dipole, you can make it "look like" a resonant half wave at lower frequencies by adding a loading coil to the radiating element. The more turns or greater inductance you add, the lower the resulting resonant frequency. The loading coil has a tap for each band. The 20 meter tap is at the very top of the coil, bypassing the coil. The 30 and 40 meter taps are down from the top as needed to resonate with the vertical on the desired band. There is lot's of debate about optimal length and number of radials or counterpoise wires. I've chosen four ten foot wires that are simply laid out on the ground. That's the simple concept!
|
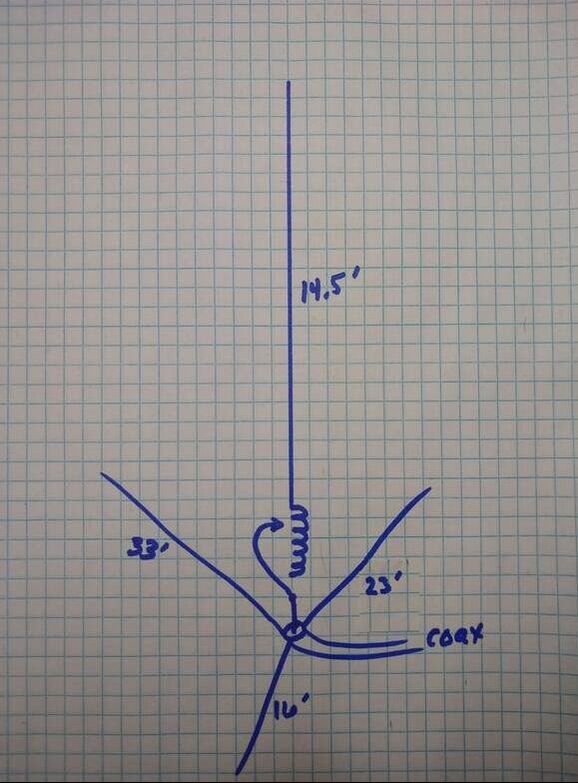
Schematic of the bottom loaded multiband, portable antenna.
|
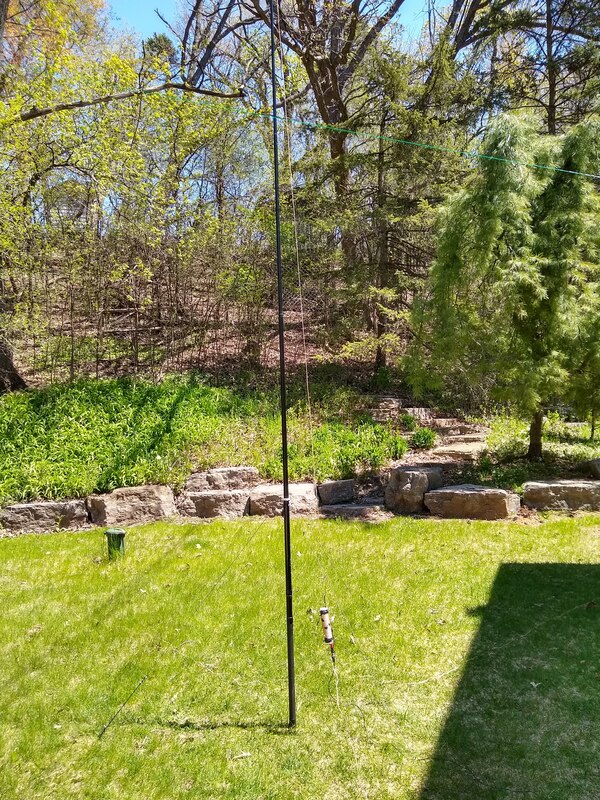
Completed bottom loaded multiband portable antenna.
|
What You'll Need
- Coil Form. I used a piece cut from a 1-1/2 inch Sink Tailpiece I got at the local hardware store for a couple bucks. It has a 1-1/2 inch outside diameter and is made from light weight plastic. The exact diameter is not critical. You might use a plastic core from kitchen wrap or something similar you already have lying around. The diameter will affect the number of turns of wire you'll need but that is all. I suggest you not cut the form to length until you have finished winding and testing the coil as the length will vary based on wire size, number of turns and the lowest frequency you plan to make it for. Give yourself some room to experiment.
- Wire for the coil, the vertical radiator and the radials. I suggest stranded rather than solid as it is easier to work with. Wire gauge is not critical. I used one wire from 24 Gauge RCA Speaker Wire pair for the coil. I wouldn't go any smaller than 24 gauge as it will be difficult to add the taps. For the vertical radiator and radials I used one strand of 18 gauge RCA Speaker wire pair.
- Brass Screw Eyes. You want the smallest screw eyes you can find. I suggest brass but that's probably not critical. I used #6 ones from our local hardware store. Smaller would have been nice but they didn't have any. You'll need one for each band. You could substitute a small screw or something. They need to be small enough to pierce but not destroy the stranded wire and long enough to allow you to clip the alligator clip to it.
- Electrical tape and shrink wrap tubing. The tape will be used to secure the winding's temporarily and perhaps permanently! That raises the point that this is probably not a for-ever antenna. It won't be particularly rugged. For that you should use stronger wire than speaker wire and something more permanent than electrical tape. The small shrink wrap tubing is for covering mistakes in trimming the elements, securing a loop at the end of the top element, strengthening any connectors you solder to the elements, etc. Another very handy thing to have is Liquid Tape. I used it to put a dab around the screw eyes where they pierced the wire to keep moisture out and slow corrosion.
- A small alligator clip. This will be soldered to the pigtail that connects the lower element to the appropriate tap on the coil for the band you select. That allows easy band changing!
- Gold-Plated Brass Bullet Banana plugs and jacks. Depending on how you make your antenna you may only need two of these or even none at all. I used four pairs to connect my upper and lower elements to the coil, to connect the lower element to the feedline and to connect the radials to the feedline.
- BNC to Banana jack adapter. I used one of these to connect my feedline to the antenna and radials. If you plan to use a feedline with PL-259 plugs you'll need a BNC to SO-239 adapter as well.
- Soldering iron/gun and solder. Straight pins. An antenna analyzer or some way to measure SWR.
Time to Build
- Begin by drilling a small hole about an inch from the top end of your coil form. Make the hole just large enough for the wire to pass through.
- Next pull a few inches of your coil wire through the small hole from the outside and tie a knot in it so it will not pull inside as you wind the coil Later you will solder a terminal to the loose end and connect it to a screw where you will will also attach the vertical radiator. The knot should be inside the coil form.
- Now cut a couple pieces of electrical tape about an inch or more long and keep them handy. And have a felt tip pen handy.
|
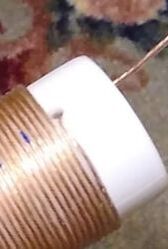
Beginning of coil winding.
|
|
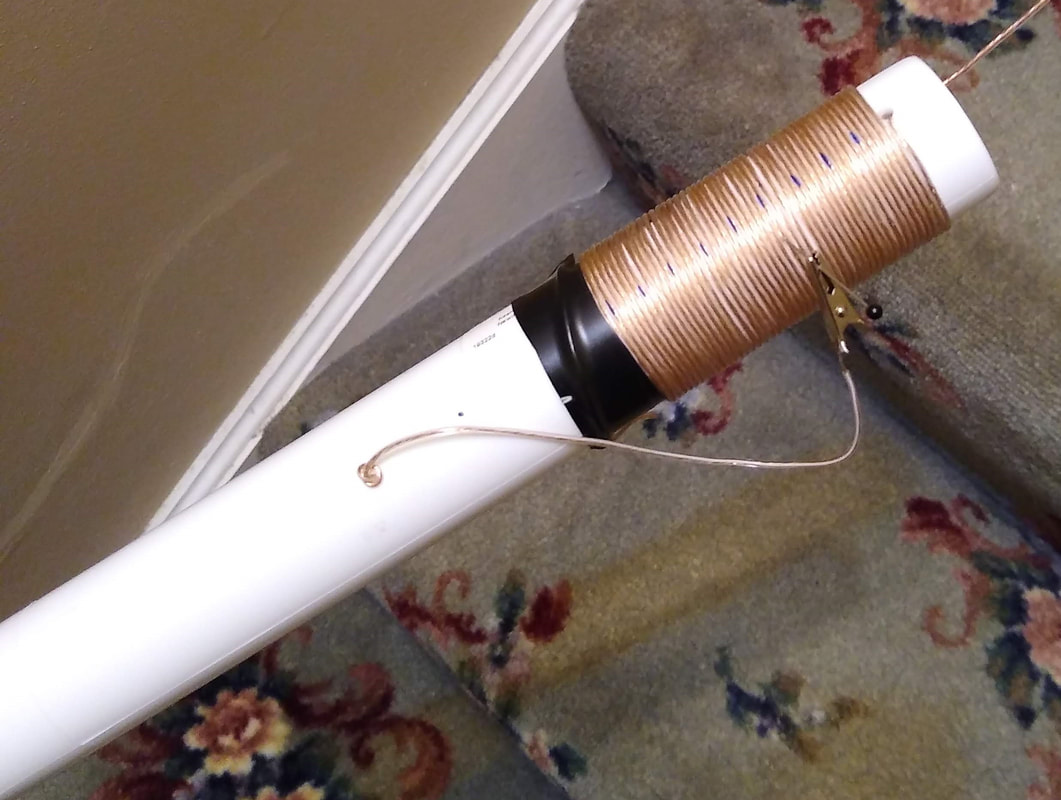
Completed winding showing the pigtail with the alligator clip.
|
- Turning your attention to the top of the coil form, drill a hole across from the hole with the coil wire for a small bolt. Trim the coil wire to a couple inches and solder a screw terminal onto it that will fit over the bolt you selected. Put the terminal on the bolt and pass the bold through the new hole and tighten securely with a nut and washer on the outside.
- Now cut about 16 feet of your 18 gauge speaker wire for your vertical radiator. Figure out how you plan to connect it to the bolt you just installed and then attach it.
- Form a loop in the top end of the 12 foot wire by bending it back on itself about six inches and tape it in place leaving a half inch or so loop for tying the end to a rope. This will make it easy to suspend the antenna during tuning. After you have finished trimming the length to resonate on 20 meters, you can trim off some of the excess and replace the tape with heat shrink tubing, making the loop permanent.
- It's time to prepare the three radials. Cut a 33 foot length, a 23 foot length and a 16 foot length of wire of your 18-gauge speaker wire. Strip 1/2 inch from one end of each and twist the three stripped ends together and solder. Now solder the twisted ends of the radials to a gold plated bullet banana plug, and shrink a 1-1/4 inch or so piece of heat shrink tube over the plug shoulder and up the wires a ways to protect the wires and give you a handle to unplug the radials without breaking them.
- Lastly, make a cut an inch or so of your 18 gauge wire and attach a terminal to one end to fit over the screw holding the pigtail and a banana plug on the other end which will plug into the BNC banana jack adapter.
You should now have the coil form with about 100 turns on it and with a sixteen foot wire protruding from the top and a pigtail coming hanging off the side and your three radials. Your small piece with banana plug will be out the bottom. You have completed the simplest and easiest part!
Hanging and tuning the antenna
Now we are coming to the fun part, hanging and tuning up the antenna. You need to decide how you are going to hang it. If you have a tree branch that is easy to get a light weight rope over, 25 or so feet up and near enough to your shack to connect a coax to the bottom of the suspended antenna, that's a good option. Another option is to suspend it from a collapsible fiberglass fishing pole or mast around 20 feet long.
- With the antenna suspended so the bottom is two or three feet off the ground, grab your BNC Banana jack connector and plug the bottom banana plug into the red banana jack which connects to the center pin of the coax connector. Plug the radials into the black banana jack which connects to the shield of your coax. Then connect your coax to the BNC jack and to your antenna analyzer or rig.
- Fan the three radials out on the ground like wagon wheel spokes approximately evenly from the bottom of the antenna keeping the center point more-or-less directly below the top of the antenna.
- Clip the alligator clip to bolt at the top of the coil, bypassing the coil.
- Turn on your antenna analyzer or rig and find where the antenna is currently resonant. Hopefully it is below 14.00 mhz. It may be way below depending on length of the vertical radiator and. Once you find the resonant frequency, trim top section (whichever you choose) an inch or so at a time until it resonates near the center of the 20 meter band, about 14.20 mhz. If by some chance the resonant frequency is above that frequency, you'll need to add wire to either the top element until it is resonant at 14.2 mhz. A suggestion is to simply fold the tip of the top of the wire back on itself until you get the resonant frequency where you want it. Then cut off some of the excess. I would leave several inches folded back to allow for future changes if needed.
NOTE: Do not make any further changes in the length of your vertical radiator while finding the tap points for the lower frequency bands. If you do you will significantly complicate the whole process. Find the resonant frequency for all lower bands by moving the tap point only.
- Next, to tune for 30 meters, push a straight pin through the 10th or 12th winding from the top of the coil. Clip the alligator clip to that pin and find where it is resonant. If it is below about 10.12mhz, move the pin up a winding and check again. If it is below 10.12mhz, move the pin down a turn. You may need to move the pin part of a turn around to form, adding or removing a half turn or so, to find the magic spot. Mark that spot with your felt tip marker.
- Repeat this process for each band for which you plan to use the antenna. It's a good idea to double check your work as now is the easiest time to make changes in tap locations. I made mine with taps for 60 and 80 meters in addition to 30 and 40 meters. I don't think the antenna is very efficient, particularly at 80 meters but it's nice to have the option.
Finalizing the antenna
It's time to finalize the antenna by adding the screw eyes, removing unneeded windings, trimming the coil form and making it all somewhat robust.
- Take the antenna down and carefully bring it to your work bench. To install the the screw eyes I found the simplest way is to get an ice pick or some other small, sharply pointed pick and carefully press it through the wire where you marked the straight pin locations. Press hard enough to make a dimple in the coil form beneath the winding. Try to get the pick through the center of the wire among the small wires without breaking too many of them.
- Choose a drill bit that is just right to make a hole that the screw eye will thread into snugly. Smaller is better than larger. Carefully press the windings away from the dimple you just made and drill a hole. Now carefully move the winding you pierced back over the hole and gently screw the screw eye through the winding and into the drilled hole. I found that if I enlarged the hole in the winding a bit by pressing the pick through the winding and into the hole before adding the screw eye it made inserting the screw eye easier and minimized damage to the wire.
- Once you have all the screw eyes in, take the antenna back outside and hang and re-test to be sure it resonates in each band as you want. If not, you can remove a screw eye and carefully close the hole in the winding and relocate locate it where it should be. I ended up doing that more times than I want to admit!
- Finally, you can trim off any unneeded windings from the bottom of the coil, leaving a little excess wire and tape both ends well to keep them in place. Then cut off the excess coil form, drill a new hole for the pigtail and reinstall it.
Put it on the air!
|
You will likely discover other things you want to do to make the antenna truly road worthy. I decided to alter mine so I could remove the top and bottom elements by installing banana jacks to the coil form and banana plugs to the ends of the elements. That makes setting up and taking down a bit easier. I mount mine on a fiberglass collapsible fishing pole and use 1/8" bungee cordage and cord locks to hold the coil and the BNC connector to the pole. I also use a short piece of bungee cord with a cord lock to attach the top of the antenna to the fishing pole. That too makes it easy to set up and gives everything a little flexibility. Whatever you do I hope you find the antenna fun to build and have success with it. I really like mine.
Technical Notes.
On my coil the 30m tap is 11 turns from the top and measures 5.75uh. The 40m tap is 19 turns from the top and measures 11.7uh.
|
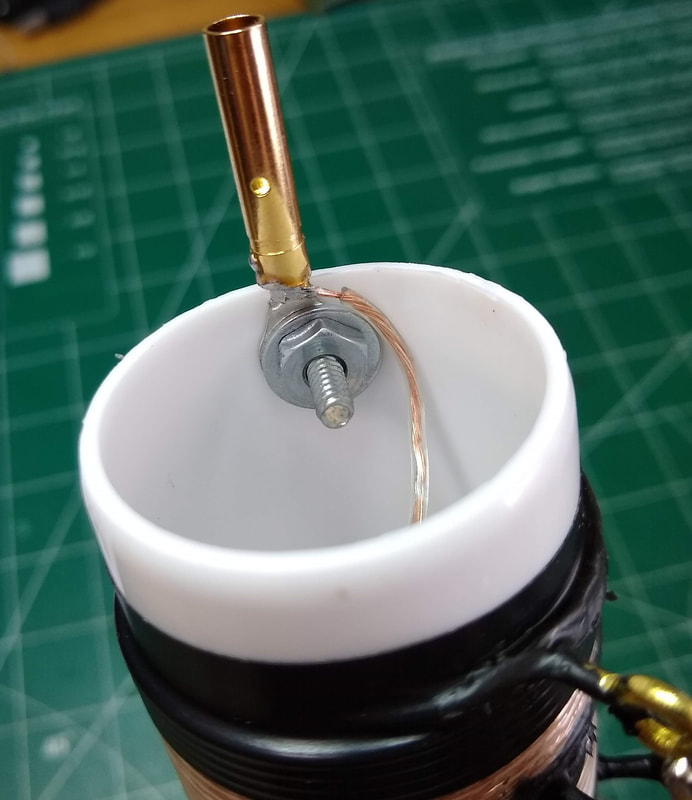
Gold Plated Banana Bullet for connecting the upper element to the coil
|