Feb 2017 - Hiking/Camping A Month of Preparations
Gaining Experience...
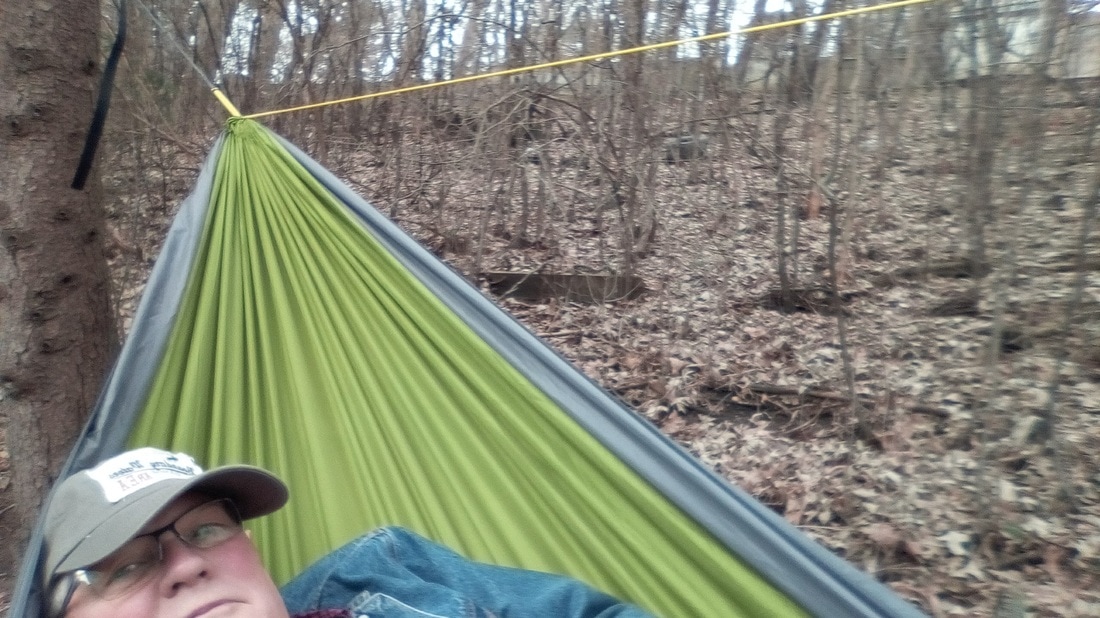
2017-02-26 Today, after church and lunch, I decided to head outside with a hammock. It was 43 degrees according to my thermometer, and quite windy with pretty strong gusts. Sorry I didn't take any photos, but I hung the Equip Mosquito hammock between a tree and my bi-pod stand (Click here to see a photo of that setup) using tree straps and whoopee slings. That went well. I then tried to put up the tarp I got off Amazon about a year ago. I was simply not happy with it. In a diamond configuration it is way too long at the ridgeline but since it is not square I just didn't like the way it covered. It looked like the wind would have way too much access to the hammock. I then tried to put it up in a rectangular configuration. Seemed too short no matter how I did it. So rather than fussing with it I used the Bear Butt Rain Fly. It covers nicely in the diamond configuration.
Then I put the Yukon Outfitters Kindle under quilt under it, grabbed the Ozark Trail 40F Climatech Mummy Sleeping Bag and climbed in. I laid there for about an hour and was very comfortable. Temperature was nice and cozy. The lay was comfortable. The combination is easy to set up, comfortable and warm (in the lower 40's) with no additions and provides adequate protection from wind. It was time to get on with the rest of life so I broke camp. That too was quite easy. The two things I missed were snake like skins for the hammock and tarp. Those just make setting up and breaking down very easy. I do have Jacks'R'Better Medium Speed Sack for the hammock and a home made version of the same thing for both, but though they work better than just a stuff sack, they are not nearly as convenient as a skin!
Dangers in the back yard
2017-02-22 As I mention below before hanging the hammock between my two perfect trees I had to clear away some brush. Actually the brush was Buckthorn. It is a very aggressive invasive species that once established can take years to get rid of. And I'm not sure you would want to hang a hammock over it as it grows so fast it might skewer your overnight! I knew that but decided to see what it would take to actually get rid of it. Well, it would take a lot! If you want some interesting reading check out The Minnesota DNR's Buckthorn page.
Today I was feeling tough so I grabbed my spade and began digging up the roots of the several quite large ones I had cut back Saturday. Wow, what a job! Those things obviously plan to make this their home and don't give up easily. One reason I attacked them is that my trimming left several nasty stumps strategically positioned to at least cause pain when I step out of the hammock. And they might trip me up which, especially in the dark, could be serious as the hillside below the hammock is so steep you can barely keep from tumbling down it even when you can see what you are doing. So now instead of stumps to trip over I have holes to break my ankle! Obviously a real hammock friendly location! But that adds to the adventure.
Stealth Hanging in my own back yard!
|
2017-02-20 Our house backs up to a 50 foot forested hill on the back of our property. It has several very large trees, a lot of trees that are 2 or 3 inches in diameter and a few individual trees that if close to another, would be wonderful hammock hanging trees. But while scouting the place a week ago I realized that two trees are perfect. They are ten to twelve inches across, 16 feet apart with only brushy stuff between them. They are right on the edge of the woods, just above the flower garden, but shielded from street view by a Japanese pine for a stealthy hammock camping location.
Almost napping in my "stealth" backyard camp.
|
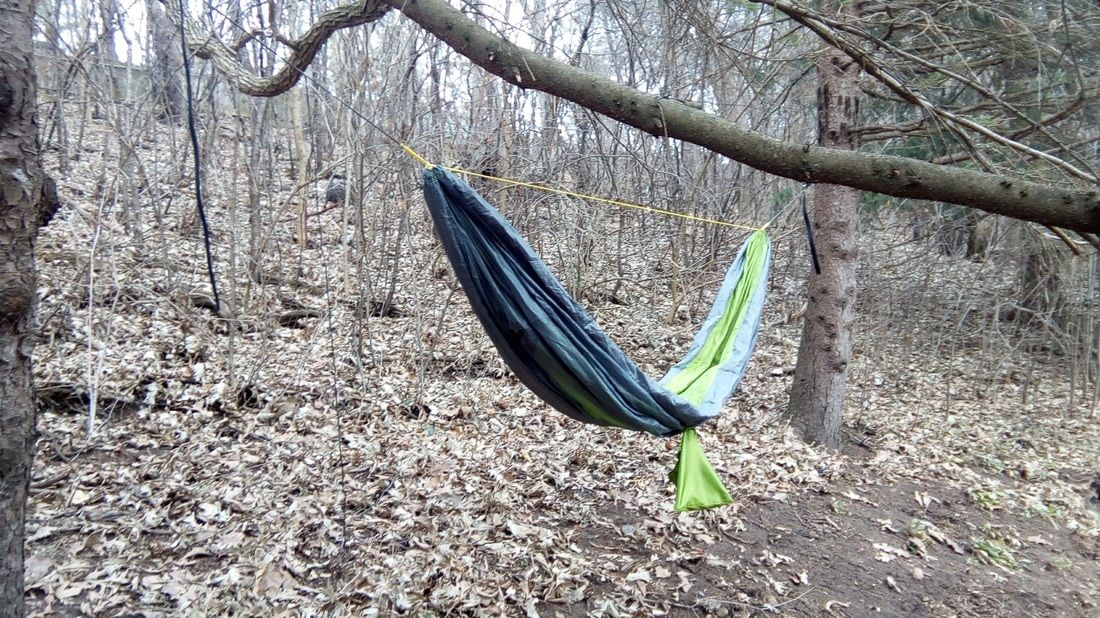
My Walmart Equip Mosquito Hammock hanging from the two perfect trees in my backyard.
So today I went out there, cut down the brushy stuff between the two trees and strung my Walmart Equip Mosquito Hammock.
Had it not been for the alarm on my phone I would have daydreamed right through a work related conference call at 3:00pm! I felt like I was in a real forest, just 30 feet from the house, what with birds flying around, squirrels chasing up and down the trees and the cloudless sky filtering through the leafless tree branches!
|
Pack Weight Comparison
2017-02-07 Thinking ahead to when I take my eleven year old grandson on a short Backpacking hike and overnight in hammocks I wanted to compare total pack weight for each of us. For him I have a very lightweight Mountaintop 35L+5L Hiking Climbing Backpack that I got on Amazon a while back. It weighs only 1.8 lbs and has a 40L + 5 capacity. My pack is a Deuter Act Lite 65+10 backpack that I got at REI a year ago. It weighs 4.5 lbs. I loaded them both up with the most likely hammock related sleeping gear as I see it now.
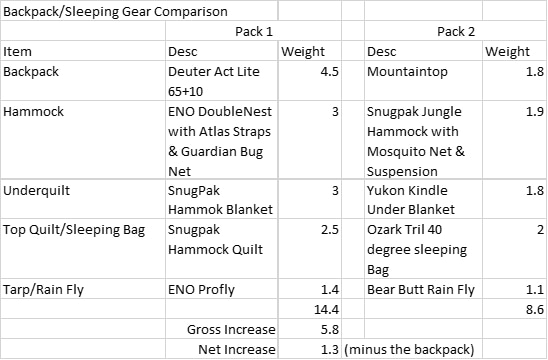
Chart showing the a comparison of the two backpacks loaded with hammock and related sleeping gear.
There is still considerable room in the Deuter pack for stove, food, etc. Perhaps enough room in the Mountaintop one for overnight clothing. But I don't want to load him down with too much so he will enjoy the trip and want to do it again!
Put the kids to work cutting wood!

|
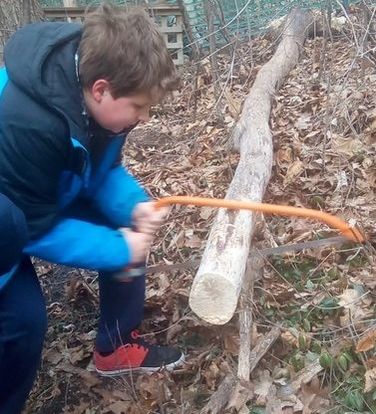
2019-02-04 We had our grandson and his friend over today. They are both eleven and have a lot of energy. So even though it was in the lower 20's and windy, I put them to work cutting wood. Sadly, one piece is all they managed to cut off! But it was fun, for me anyway! And it saved the couches in the house where they would be jumping and flopping otherwise.
|
|
Backpack Base Weight
2017-02-03 I decided to load my ENO doublenest hammock with Atlas Straps, ENO Profly tarp, ENO Guardian bug net, Snugpak top and bottom quilts and cook kit into my backpack and see what the "base weight" would be. It came out to 18 lbs. So if my target weight is 30 lbs, that leaves 12 lbs for food and clothes.
Baking Bread while camping - A new and improved cook kit!
2017-02-03 I decided that this year I would read through the Bible chronologically. I did that for several years in a row a few years back and found it both interesting and helpful. The Bible is arranged in various sections kind of like a library rather than in a historical order. For just reading, I like the chronological order as it provides sort of an overall train of thought on which to hang the various books. Anyway, as that relates to hiking, camping, etc., this morning's reading was Exodus 10 through 12 which includes the story of the Israelites leaving Egypt after 430 years. And in chapter 12 it includes very specific instructions God gave about meal preparations for their last night in Egypt. They were to roast their meat (rather than boil it) and their bread was to be baked without yeast! That got me thinking about meal preparations on the trail! Let's face it those folks probably are the premier example of extended hiking and camping, in a less than friendly environment!
|
That in turn brought to mind several videos I've watched by Kenneth Click on YouTube, one in particular where he describes the cook set he uses for baking while camping. To see it, click here. Kenneth used a simple one person mess kit modified slightly, kind of like the one pictured here to the right. His modifications are to toss out the handle and remove the knob from the small pan lid. I decided to see how including it with "My Latest Cook Kit" described below would affect the overall weight.
|
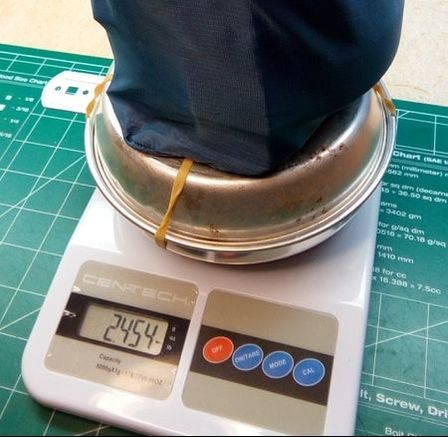
Simple one person mess kit used to "bake bread".
It occurred to me that I don't need the small cook pot, cozy and lid. The kit would be more useful for two people if instead I included the second insulated cup from the Stanley Adventure Series Camp Cook Set. These cups are double walled plastic, fairly light and best of all, they keep the coffee hot, while keeping your lips and fingers comfortable.
The net result is that this new combined kit weighs just 0.2 lbs more than the original which I think is worth it for the added baking and frying capabilities it provides without taking away any needed functionality.
Time only will tell whether any of this actually makes it into the field! But even if it doesn't it is fun to play with. In an old book on camping (Woodcraft And Camping by "Nessmuk", I think) from the early 1900's, the author makes the point that hiking and camping is an ideal year round hobby. You spend the winter playing with your gear and planning trips, then enjoy your gear and plans in the summer!
|
A Light Weight and Versatile Cook Kit
2017-02-02 In hopes that the weather here in southeast Wisconsin will improve (It has actually been a mostly very mild winter this year) I've begun playing with my gear. Hammock camping has kind of captured my imagination for the past few months. My pages on Hammocks talks about some of that. At present I have two fairly complete systems ready to go. One based on the ENO One Link Hammock Shelter System and the other based on the Equip Mosquito Hammock sold by Walmart. My 11 year old grandson says he will go hammock camping with me. We'll see!
|
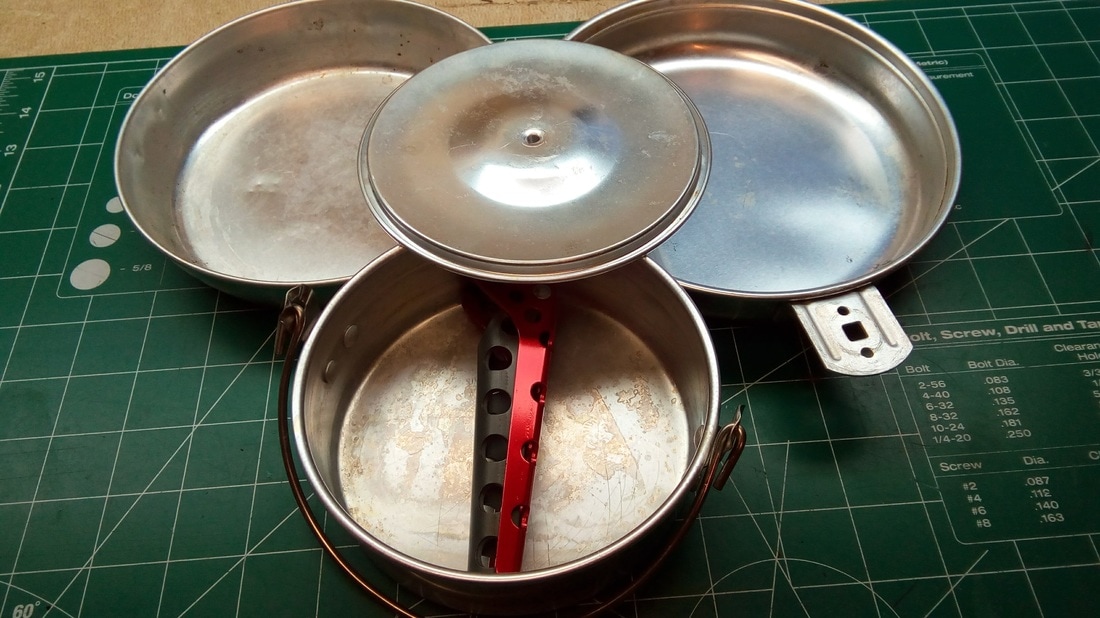
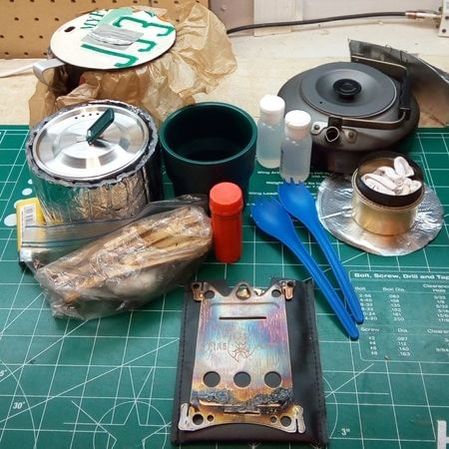
Backpacking stoves and cook kits is an ongoing interest. I think I have about five complete or partial kits made up of varying combinations of alcohol, gas cannister and wood fired stoves and pots and pans of different types. Today an Emberlit Stainless Steel Fireant Stove arrived in the mail. So I rearranged various bits and pieces of gear from my different cook kits and put together another one! The kit includes a 12 cm Imusa pot in cozy with license tag lid, small pot in cozy from Walmart with lid, an insulated coffee mug, a small Optimus Tarra Kettle, two oz of alcohol, a Fancee Feest alcohol stove with ground protector and windscreen, two sporks a lighter and waterproof match container, some kindling and vaseline soaked cotton balls and Emberlit stove.
Latest Cook Kit ready to go! Based on an Emberlit Fireant Stainless Steel wood burning stove with a supplemental Fancee Feest alcohol stove.
|
Cook Kit based on a Fancee Feest alcohol stove (right) and an Emberlit Stainless Steel Fireant stove (bottom).
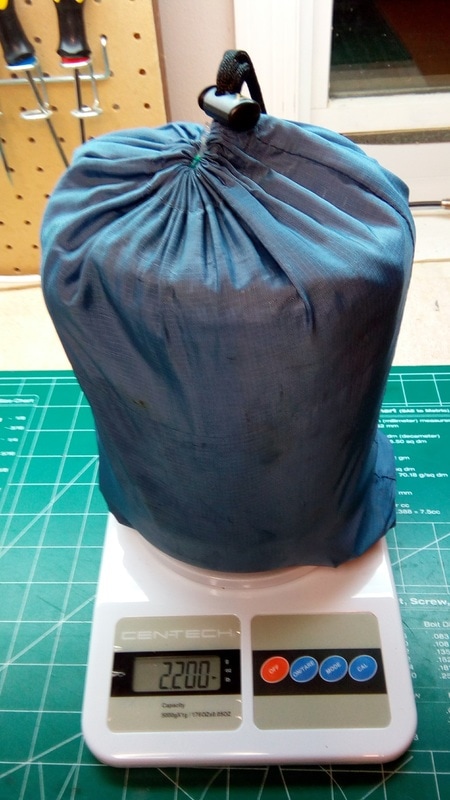
In its stuff sack and ready to go it weighs 2.2 lbs. and measures 8 inches tall and 6 inches in diameter. I couldn't wait for the weather to warm up so I took it outside, grabbed some small split wood I had in my garage for just such an occasion and boiled two cups of water in my little Optimus kettle. I didn't time it but I think it took about 10 minutes to get a boil starting not long after I lit the cotton ball. My plan was to make a cup of tea but my neighbor came by and we talked so long that in the 28 degree temperatures the fire went out and the water cooled too much!
It was fun to play with and seems reasonably efficient. The nicest part is that it comes apart and packed into its little folder measures about 4x6 inches and about 1/4 inch thick, making it very easy to pack and carry.
|