Disclaimer: I am very much a novice and experimenter. Most of what I have written below is NOT field tested. So read at your own risk! I'm recording this mostly for my own entertainment, but perhaps it will be helpful to someone else. I love to watch YouTube videos about all of this but I find that many of the experienced hands who do have a lot to teach guys like me accidentally make assumptions and use words terms that I am unfamiliar with so I'm often left guessing. I'm the same in the areas of technology I am experienced at so I'm not criticizing them.
Backpacking Food
Oatmeal Based Breakfast
2018-06-19 I really like the DIY oatmeal breakfasts on this web site. I often eat variations at home. Click here for some recipes.
Bacon Ranch Chicken Salad Wrap
2017-04-24 I ran across a set of four collaboration videos on YouTube of favorite backpacking meals. A Bacon Ranch Chicken Salad Wrap by Zombie Nation caught my attention as a potentially easy, tasty on trail lunch and tried it. It was really good.
Santa Fe Cheesy Beans and Rice
Solving the crumbly cornbread problem
2017-02-09 One of the nice things about the camping community is that we like to help one another. That happened to me again today. I mention below that my attempt to make cornbread generally following the ideas that Kenneth Click demonstrates in his videos turned out well except that when I turned it over I pretty much destroyed it. So I late last evening contacted Kenneth in the comment section of one of his YouTube videos and asked him exactly how he does the turnover. This morning he referred me to another of his videos where he goes into detail called Cornbread Step by Step.
|
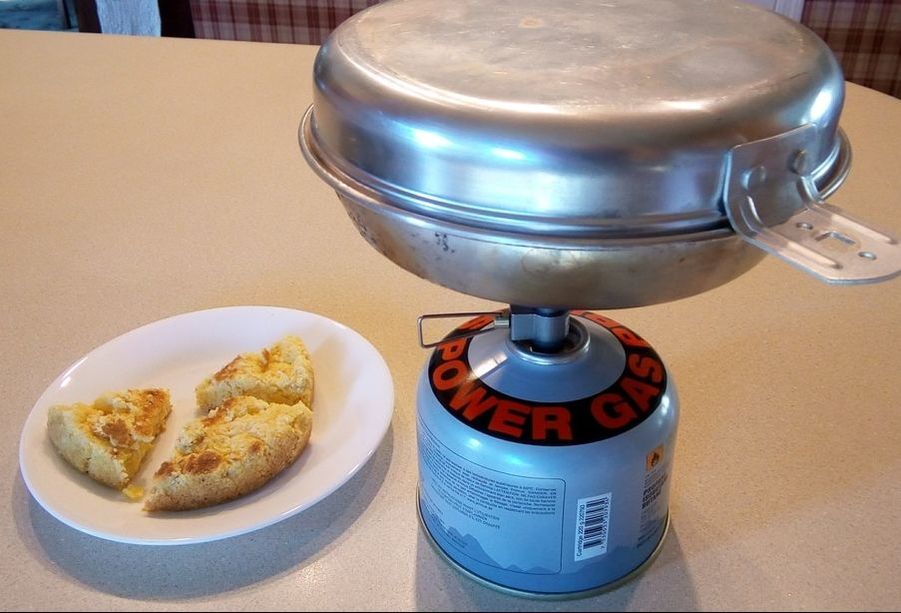
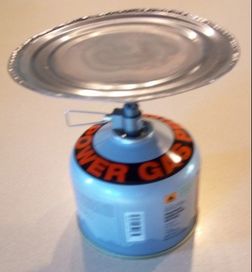
One final thing. I saw something on a YouTube video some time ago about how to avoid having a hot spot on your skillet or other pan when using very small canister stoves. So I tried it. I cut the top off a large coffee can, turned the edge over so it wouldn't be sharp and then put it on top of the stove between the burner and my aluminum pan. It seemed to work very well with no hot spot evident on either the pan or the cornbread.
|
It's too cold here today to test it outside so I rigged up my little BRS Ultralight Titanium Camping Gas Stove. Then I mixed up a batch of Jiffy cornbread mix and gave it a try! Worked nicely. I think my mix was just a bit too dry but at least it stayed together, did not stick to the pan and with a bit of molasses poured on top was "good eaten" to quote another Youtuber. So watch that video if you want to be a successful baker on the trail whether cooking with wood or gas.
|
Cornbread Concoction at 27 degrees!
|
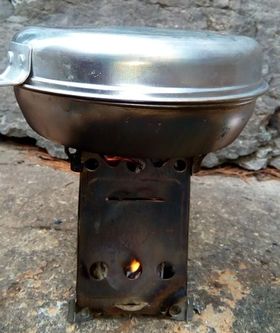
2017-02-08 Inspired by the videos of Kenneth Click on YouTube, particularly one where he describes baking a cornbread dish for dinner, I decided to try something similar myself using my little Emberlit Fireant stove I got recently.
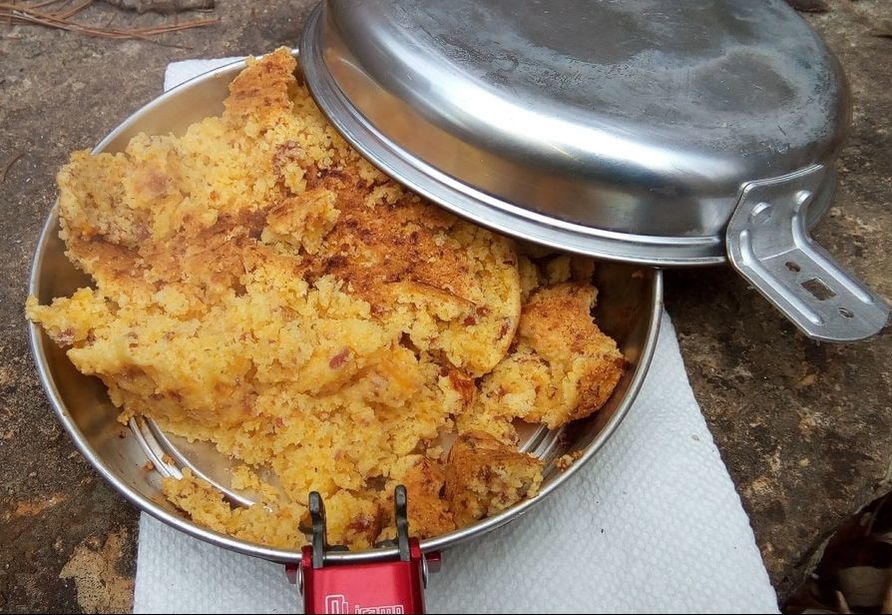
I used a cup of Jiffy Cornbread mix, 1/3 cup of grated sharp cheddar cheese, 1/3 cup of grated summer sausage (I had to grate that myself) and a single small yellow pepper. After stirring all the "dry ingredients" I started adding water, a little bit at a time until it was sticking together well but not sticky or wet.
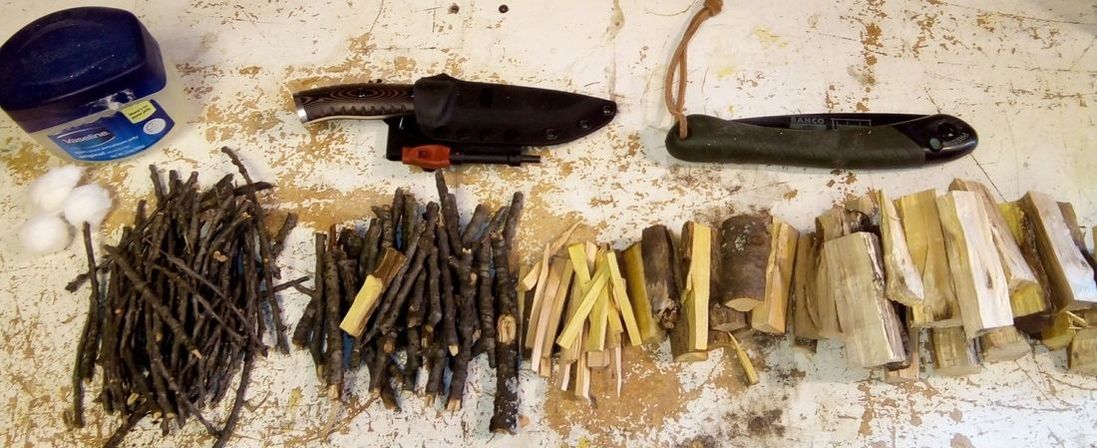
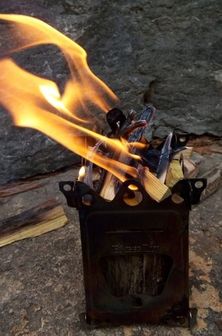
Earlier I had prepared some wood to use to start and build the fire. And I had some cotton balls loaded with vaseline as my starter. I've seen a number of people light their Emberlit stove. Some put the cotton ball in the bottom, ignite it and then put kindling and larger pieces on top of that. Others load fairly large pieces of wood, either 1/2 to 1 inch "logs" or split pieces about 3/4 to 1 inch across and about 3-4 inches long standing on end in the firebox. Then they put kindling on top of that and finally the cotton ball on top of that. I elected the latter approach. I wasn't sure how it would work but it worked well and only required one load of wood to bake my bread, burning about a half your or 45 minutes.
|
While the stove was warming up, I set up my Fancee Feest stove with a little kettle to heat some water for a cup of tea. The temperature was 27 and I had the alcohol outside for about fifteen minutes so it was a bit hard to light but once going it heated the water in only about ten minutes, faster than I had expected. By the time the corn bread was ready most of the tea was gone.!
|
|
After about ten minutes the stove was burning well so I put the makeshift oven loaded with the cornbread on top and began the wait. The way it works (watch Kennith Click's video) is that you put it on the stove until you think it is time and then flip it over and finish it after flipping it. So I waited, maybe ten minutes and checked it. I'm not a baker so it wasn't clear to me whether it was ready or not. It had raised about double its original size and the top was slightly softer than spongy, so I waited a few more minutes.
My flipping operation was anything but graceful and the result was kind of a crumbly mess in the pan. But nothing to do but put it back on the heat, so I did! About five minutes later I couldn't stand it so I took it off the fire.
|
Like I said it was a crumbly mess. But it was cooked, some even slightly crispy and tasted pretty good if I do have to say so myself. And no one else was around so you'll have to take my word for it! If I were doing it again I'd probably leave that yellow pepper out or substitute something else. There wasn't much of it but the taste seemed a bit out of place. All in all I'm pleased with my outdoor, Emberlit stove/cornbread experiment. Would be a nice supplement to a dehydrated meal on the trail.
|
More on dehydrated Chili
2016-08-20/21 Yesterday I decided to make up the three bean chili that I had gotten at Aldis some days earlier. So I got some 7% lean ground beef, fried it down to remove as much of the 7% fat as I could and then combined it with the chili mix along with a can of tomato diced tomatoes, reducing the amount of water called for on the chili package. It only took about 45 minutes and the immediate result was not bad. The pre-packaged mix didn't produce as tasty a chili as what my wife and I make from scratch, but not bad. And it is quick and easy!
Then I dehydrated it which took about six hours or so. To help with later re-hydrating I measured out a serving (about 1-3/4 cups and then weighed it prior to putting it on the dehydrator tray. It weighed in at 14 oz. After it was dehydrated it weighed 3 oz. which works out to about 1-1/4 cups of water needed to re-hydrate.
Today for lunch I decided to have that and see how it turned out. I also wanted to play with my wood-gas stove. Results? I was happy with both how the wood gas stove performed and the re-hydrated chili. As to the stove, I've been cutting up and splitting wood for it for quite a while now so all I had to do was get a Vaseline loaded cotton ball, a small handful of split sticks about twice the size of toothpicks, and another handful of larger split pieces, maybe about 1/2 to 3/4 in. by 2 to 3 inches. Starting with that I had 3 cups of water boiled and re-hydrating the chili in 30 minutes. Within 45 minutes of starting I was eating it! And my shirt didn't even smell of smoke! If you have the right wood that wood gas stove works really well.
As to taste and texture. I don't think there was any noticeable difference in flavor from the fresh batch yesterday. Texture wise, the dehydrated beef was a bit chewy or almost hard. That seems to be the case with all the ground beef I have tried to make. Overall I'm happy with the results.
Thoughts on dehydrating corn...
|
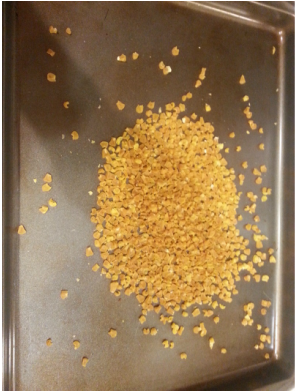
2016-05-26 In preparing for the two day one night backpacking trip with my grandson we had a discussion about food. I'd like the eating experience to be positive, or at least not a big negative. He likes mashed potatoes so that is an easy one. A dollar package of dehydrated potatoes does the trick. For meat/protein he likes jerky and beef sticks. That too is pretty easy. Then came vegetables. He likes corn which is a bit harder to just buy off the shelf. So I decided to play with my dehydrator again. I had dehydrated some frozen peas, broccoli, green beans, and even corn some months ago which turned out pretty well. But I thought it would be interesting to dry some canned corn as it tends to have a bit more of a salty flavor and even I like the taste of canned corn better than frozen unless it is dressed up a little.
I opened and drained a 14.5 oz can and spread the kernels on three trays in my dehydrator. Six hours later it was hard as rocks and the finished weight was 1.8 oz, about 90% reduction in weight. Since the net weight was 14.5 oz I guessing about two cups of water (14 oz by weight) would be needed to re-hydrate it to approximately its original state. I think I'll experiment with that prior to hitting the trail! |
Macaroni and Cheese Enhanced and complete Cook Kit
|
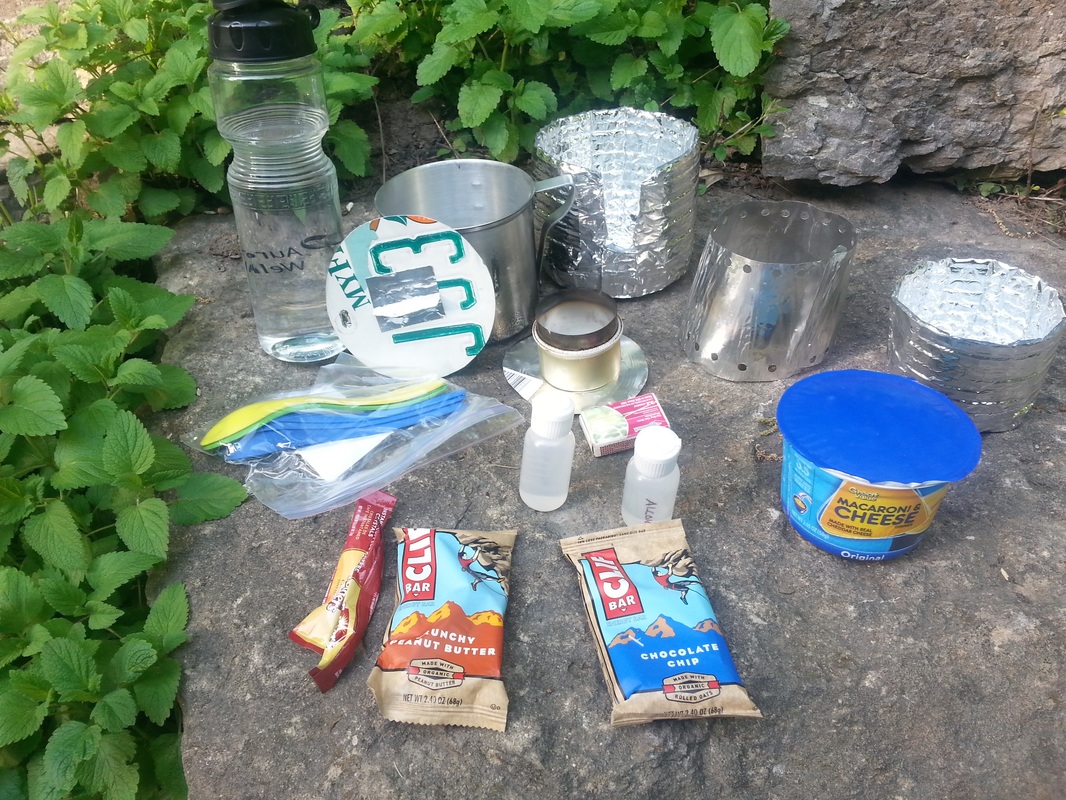
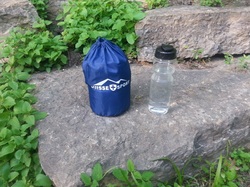
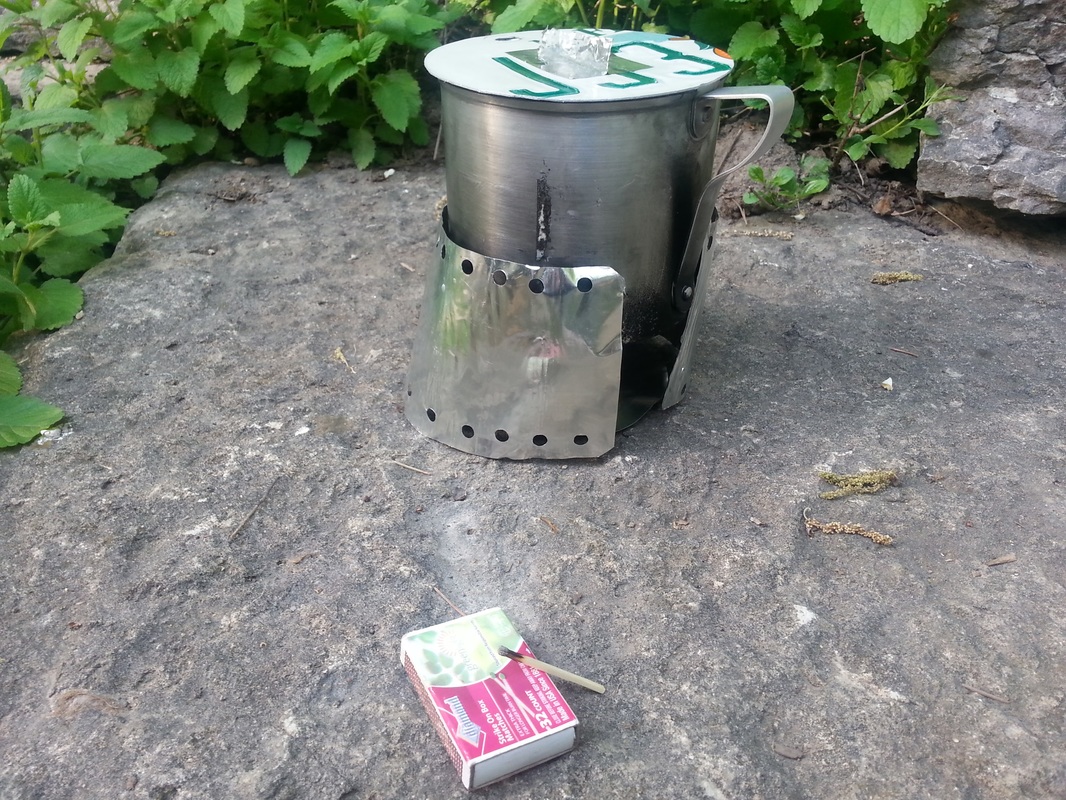
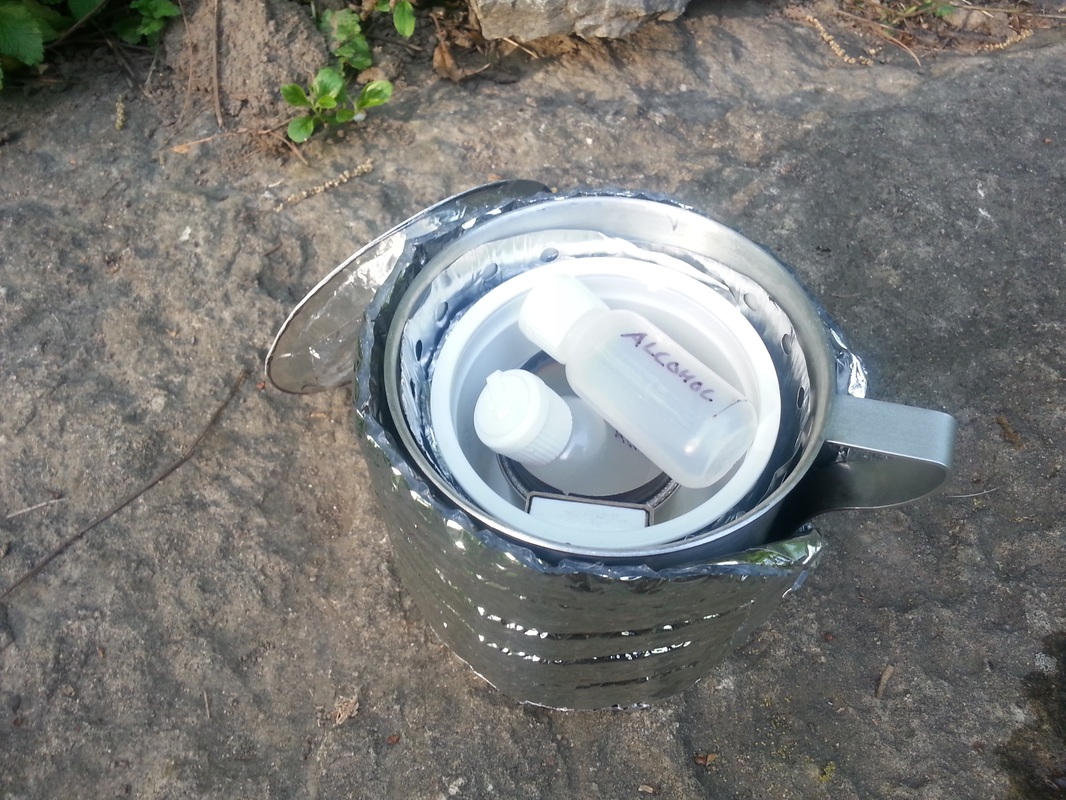
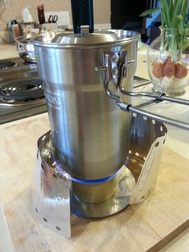
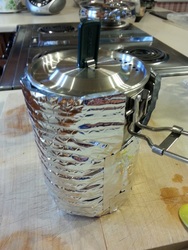
2016-05-23a Late this afternoon I was "home alone" and decided to try out my "complete cook kit." I put that in parenthesis because I realize NO cook kit is ever complete! anyway This one, weighing 1.2 lbs in its stuff sack consists of a 1200ml Imusa pot with home made license tag insulated lid and reflectix cozy, Fancee Feest alcohol stove with 4 oz of alcohol and two small boxes of matches, a small aluminum disk to put the stove on along with a wind screen, two empty Walmart Macaroni & Cheese cups with reflectix cozy's, a small ten-count travel pack of wet wipes, two instant coffee packs and two crunchy peanut butter cliff bars (these last two items to keep the hungry hikers happily occupied while the water comes to a boil! And oh yes, a couple sporks. (The Mac & Cheese wouldn't fit in the stuff sack.)
The process begins with opening the pack and spreading out the contents for a photo op!
|
After giving the other party one of the Cliff bars and opening one for yourself, it's time to pour a cup and a half of water into the pot, put it on top of the Fancee Feest stove which you just filled with one oz of alcohol and lit and then add the wind screen.
Continue eating the Cliff bar until steam bursts forth, about 4 minutes.
|
|
As the water was coming to a boil I remembered that I had some ground beef and a variety of vegetables in the freezer that I had dehydrated several months ago. So I chose about a tablespoon of each and poured them into one of the empty macaroni & cheese containers.
Conclusions: The aluminum Inusa pot with insulated cover is a faster container for boiling water than the Stanley pot. The addition of the one cup increment indentations on the pot make it much easier to use. The Cliff bars are a must to keep the growling stomach under control for the fifteen minutes to half an hour it takes to prepare the meal! The Walmart plastic Mac & Cheese containers serve very well as very light weight, inexpensive cups to pack and use. The addition of the Refletix cozy keeps them hot as well as protecting your fingers.
The Imuse pot based cook kit is reasonably compact and versatile and not too heavy. |
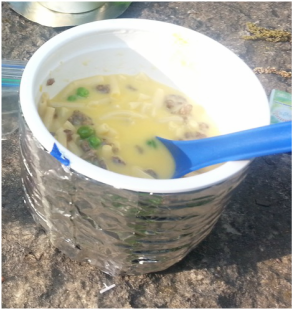
Fit for a King? Well, perhaps not but it tasted pretty good. By using a little less water than specified on the Mac & Cheese container and adding the meat and peas it was definitely better than the mac and cheese alone.
|
Once the water came to a boil I poured about 1/2 cup into the mac & cheese container and about 1/4 cup into the container with the ground beef and peas. I covered both and, stirring occasionally let them sit for about five minutes. then I added powdered cheese and combined the peas and ground beef together, stirred, covered and let the whole sit for another five minutes or so until the macaroni was reasonably tender.
|
Macaroni and Cheese
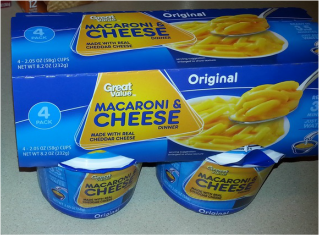
2016-05-23 A few days ago when my wife and I went for a hike in the Seno Woodlands Area near our home I re-hydrated Mac and Cheese in the little cups from Walmart. I had done it at home some weeks ago with reasonably good results so decided to try it on the trail. Turned out well. You do have to wait quite a while for it to be soft and ready to eat but it's worth the wait. Next time I think I'll use just a little less water than it specifies as it was fairly "runny" but it does work. The light weight and integrated, reusable cup makes it a good choice if space it not at too much of a premium.
18th Century Ships Biscuits (or Hard Tack as it was later known) a fail!
|
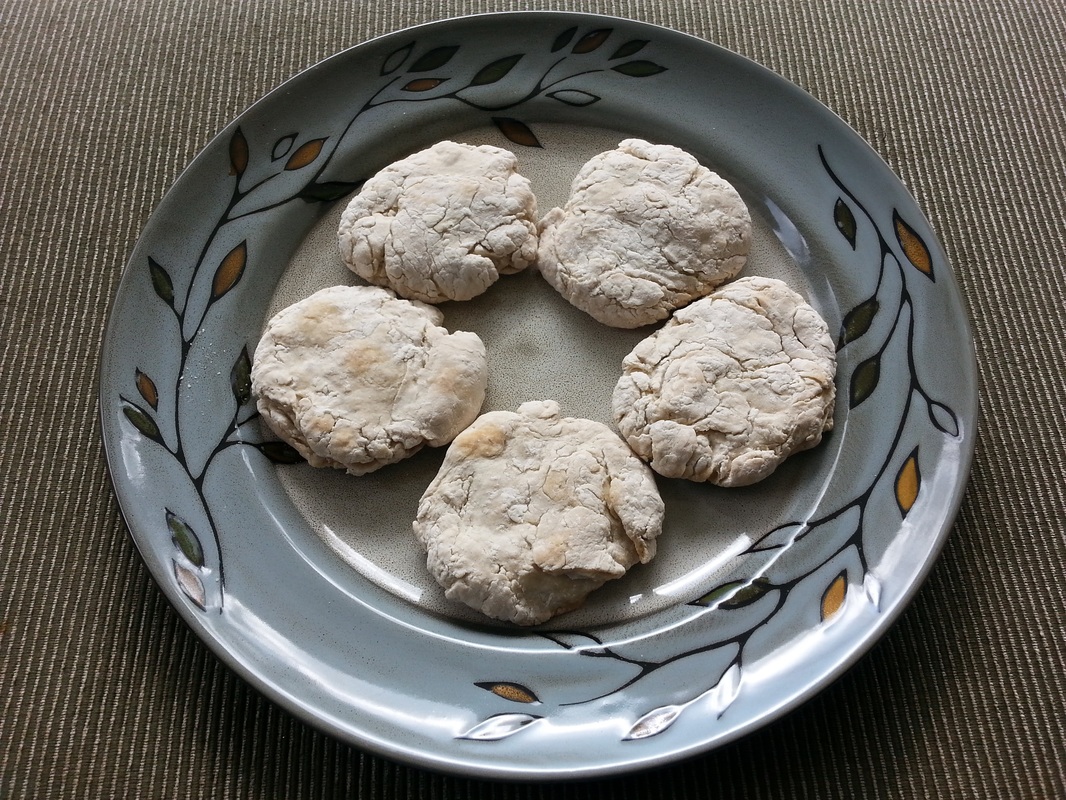
2016-04-24 Saturday night I stumbled across a very interesting YouTube channel, Jas. Townsend and Son, Inc.. At least in part is focuses on 18th Century Cooking and the first video I saw was how to make 18th Century Ships Biscuits. I recall reading about sea biscuits in some of the historical accounts of exploration in the southern hemisphere. So after watching the video I decided to give it a try. The result is at left, four rock hard flour/salt/water concoctions backed for about an hour at 350 degrees. A recipe I found online was almost identical to what the video described and is what I ended up using.
As you can tell from the picture I forgot one step, poking holes in the biscuits before backing them. I don't know if that is why, but when I tried to eat one tonight in my chicken soup I discovered that though it seemed hard as a rock and dry as a bone, in fact it was tough inside rather than brittle. It was essentially inedible. I don't think a chain saw could damage it. So I tossed them out the back door for the squirrels. Wonder if they will be able to eat them? |
Taco Soup, another potentially good trail food
|
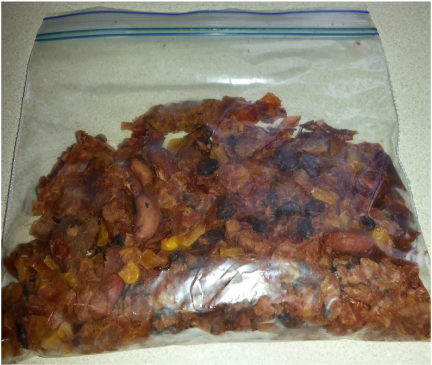
2016-04-05 Yesterday for lunch with my wife's sister and her husband who were visiting us from Washington State we fixed taco soup, kind of a chili but with taco seasoning instead of chili seasoning. It is really tasty. So, with the leftovers I decided to dehydrate a serving and see how it would reconstitute. For a serving I chose 12 oz. of soup and spread it over parchment paper on two trays in my dehydrator. Five hours later it was nicely dried. The finished weight was 2.5 oz, about an 80% reduction.
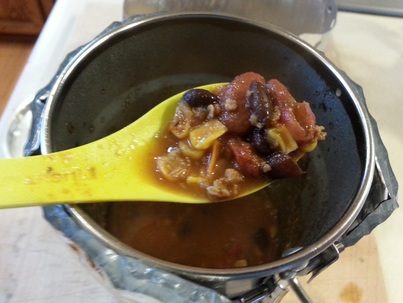
One of my questions has been how much water to use to reconstitute home dehydrated foods. So this time I kept track of the weights. Subtracting the 2.5 oz. dehydrated weight from the starting weight of 12 oz. I determined that 1-1/4 cups water weighs 9.5 oz. (the weight lost to drying) and should return the soup to its original weight. Next came re-hydrating the soup. It took about 20 minutes from the time I lit my Fancee Feest stove and put the 1-1/4 cups of water on to heat, until the beans in the soup were soft. I brought the water to a boil, then dumped the 1.5 oz. bag of dried soup in and let the 1/2 oz. of alcohol burn out, maybe a total of ten minutes. I then put the Stanley pot in the cozy I had made for it and let it sit for another ten or so minutes., stirring and checking the beans. Just finished eating it and the taste and texture is so close to the original that I don't think you could tell the difference. I think perhaps adding an amount of water with weight equal to the weight reduction during dehydration may be a good way to determine the amount of water needed. |
I'm pretty happy with the way it turned out and may play around some more with soups and stews. This would taste really refreshing on the trail! And, by the way, I lit the stove with my DIY igniter. I discovered that you need to hold the igniter close to the surface of the alcohol to make it work well. One or two clicks does it!
|
Sloppy Joes for the trail?
2016-03-31 For dinner last night we made a Sloppy Joe recipe using ground turkey instead of ground beef as specified. It turned out very nice. I decided to dehydrate the left overs which seemed to go well in my Nesco Food Dehydrator. So at noon today I decided to re-hydrate it and see how it turned out. Except for the fact that I used too much water making it very "liquidy", it was great. My wife and I both thought it had not lost any of its flavor. I think I'll try it again being careful not to use too much water. Wish I knew how to judge the amount of water needed as this is not the first time I have either used too little or too much. And by the way, the recipe we used (click link above) is one of the simplest and best we have found anywhere.
Testing some options
2016-03-30 Last night I mapped out a plan to take my ten year old grandson on his first backpacking excursion. It involves about 2-1/2 miles from the parking spot to the campsite, an overnight (after setting up camp) and then hiking back to the car next day a different route with perhaps a side hike thrown in. One concern I've had as I contemplate this trip is food. I want to make it as "authentic" as possible based on my own backpacking trips but also has to be something he can at least get down if not enjoy! My wife and I talked it over and the idea of mac and cheese came up.
|
But is if feasible with a boil only stove setup? So today I got some Walmart Great Value Macaroni & Cheese dinner packages, some Peanut Butter pop tarts and a couple other things to test out. the mac and cheese container says it takes 3.5 minutes in the microwave. Would it work with just boiling water? After pouring the prescribed amount of boiling water in, stirring and letting it sit in a cozy for ten minutes I've concluded that at least this brand and package is NOT feasible. I finally gave up and stuck it in the microwave. It took at least two minutes on top of the ten I had already waited for it to become chewable without sticking to your teeth!
On the other hand, the peanut butter pop tarts were quite good! On another day I'll try another mac and cheese option! |
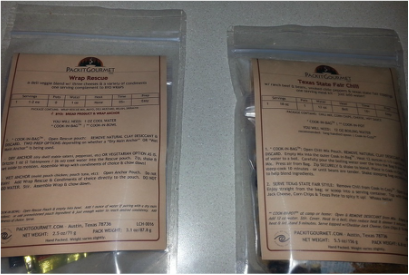
The day was not a total loss. In the mail were two food packets from PackitGourmet that I ordered a few days ago. One is their Texas State Fair Chili. The other is called Wrap Rescue. Can't wait to test them out.
Dry Baking
Stove considerations for dry baking. An issue with dry baking is to keep the heat hot enough to bake but not so hot it burns things. As I explained below I have mostly used my gas canister stove. That is because you can adjust the flame on those. I did baked a blueberry muffin using my Fancee Feest alcohol stove as the heat source. It worked but the Fancee Feest stove is really too hot. It needs a simmer ring to avoid burning the muffin. I managed by pulling the pot off the stove every few minutes. Clearly an option but not as nice as using the little gas burner which can be turned down very low. I also tried the Wick stove intro kit from Minibulldesign Cult. It worked better than the Fancee Feest because the flame is not as hot. One could also raise the pot higher using it which would allow for adjusting the heat as well. It would be interesting to try baking on a wood burning stove.
 Fresh biscuit, scrambled egg & Spam.
mmmmm good!
2015-12-16 Wow, that is a very good breakfast! A Fresh biscuit with marmalade and scrambled egg with Spam. It doesn't get much better than that!
I think I'll get some powdered eggs and see if the same idea could be implemented with that and real bacon bits. Imagine sitting down to that after a good night's sleep under the stars!
This is a little more trouble than just dumping a bag of oatmeal or other gruel into a pot of boiling water but the reward is worth it.
It's kind of amazing what you can do with simple ingredients, tools and equipment. One realizes that our microwave ovens, stoves and the like are very convenient but one can do quite well with much simpler things.
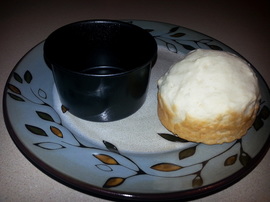 Finished biscuit beside baking pan
2015-12-16 I've been thinking about biscuits in the wild for several days after my successful experiment with the blueberry muffin mix. So this morning I put 1/3 cup of Bakers Corner (Aldi brand) Baking Mix in a small bowl and added just enough water to make it into a sticky ball of doe. The box called for milk but on the trail one wouldn't likely have fresh milk and I didn't have any powdered milk in the house so just went with water.
I then put mix into my little thrift store two inch pan, set that on the gingerbread cookie cutter in the bottom of my cook set pot and put the whole on my little gas stove, set at a low burn. Fifteen minutes later a slight tap on the top of the biscuit indicated it was firm so I took it off the burner. The top of the biscuit was still white but the bottom and sides were nice and brown and it had pulled away from the sides of the pan.
I then put mix into my little thrift store two inch pan, set that on the gingerbread cookie cutter in the bottom of my cook set pot and put the whole on my little gas stove, set at a low burn. Fifteen minutes later a slight tap on the top of the biscuit indicated it was firm so I took it off the burner. The top of the biscuit was still white but the bottom and sides were nice and brown and it had pulled away from the sides of the pan.
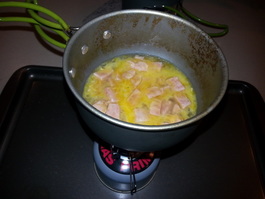 Egg-Spam mix on the stove
While the biscuit was baking the thought of making an egg dish came to mind. So I got an egg, some chopped up spam that was in the refrigerator, mixed them together. To give it some flavor I added a bit of powdered onion and a little garlic salt. Then I poured the mix into my cook set shallow pan/cover after spraying it with olive oil and set it on the burner at low heat with a cover on.
About five minutes later it looked "done". It was a little difficult to get it out of the pan without scratching the anodized surface but I managed. A plastic or wood implement would make removal easier. The finished result of both the baking and this egg preparation is shown above.
About five minutes later it looked "done". It was a little difficult to get it out of the pan without scratching the anodized surface but I managed. A plastic or wood implement would make removal easier. The finished result of both the baking and this egg preparation is shown above.
2015-12-15 I decided to try dehydrating some vegetables and see if I could make a tolerable stew. So I sliced a carrot, a stock of celery, a small onion, half a green pepper and a couple small potatoes into thin slices. Several web sites suggested that they may be better steamed prior to dehydrating so I steamed them in our steamer for 15 minutes (too long I think), then put them in the dehydrator for about four hours. They looked awful! But I decided to try to make the stew anyway. So all of that plus some of my hamburger gravel went into a pan along with one beef bullion cube and a little pepper. It took about ten minutes on low heat to get a decent texture. Then I added a couple tablespoons of couscous to give it a bit of thickness. Then we tried it! Even my wife agreed it wasn't bad, maybe even good. I'll probably play around with the seasonings a bit, and certainly won't steam the vegetables so long but otherwise it would make a tasty meal on the trail. I did all of this in the kitchen but I think if you started with assembled packets of dried vegetables and dried hamburger and seasonings it would be very easy to do in camp.
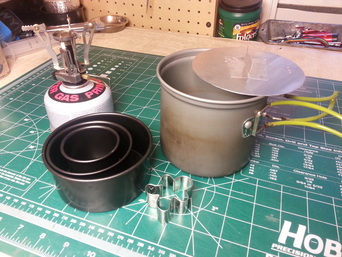 My dry baking setup
12/11/15 One thing that has interested me is dry baking with a portable stove and pot. So I decided to give it a go a couple days ago. While at our local Love Inc. thrift store I saw a little three-pan set of baking pans, one 4 inches, another three inches and the final one two inches in diameter. They are two inches deep and have a non-stick coating. They were probably sold with a toy backing set or something. I had a package of blue berry muffin mix so put 1/3 cup in a bowl and stirred in just enough water to make it like a bread dough. Then I sprayed the two inch pan with olive oil and dumped the muffin dough in. After putting a little gingerbread cookie cutter in the bottom of my pot I set the pan with dough on that, put the lid on and put the whole thing on my little gas stove with the flame real low and watched it. About ten minutes later I had a nice blue berry muffin. It was a bit "browner" on the bottom than most but not burnt and tasted really good! My conclusion? It works! Whether it is worth the trouble or not on the trail is another question. But oatmeal does get a bit boring!
Dehydrating Food
12/6/15 So far on the backpacking trips I've gone on with my son we generally took along freeze dried hiking food purchased from REI, Walmart, etc. Of course we had Cliff Bars and other trail foods as well. Looking on YouTube I began to get interested in trying to prepare my own food. Dehydrating looked really interesting. So on a recent trip to a Goodwill store I found an old Mr. Coffee food Dehydrator for six dollars. The motor was sluggish so I took it apart and lubricated the bearings and it seems to work fine now. After playing around a little with it I did some vegetarian chili. It seemed to dry out nicely. I tested one batch with boiling water and it rehydrated well. I don't think I could tell the difference between the original and the rehydrated. I failed to weigh it before or after so don't know what I gained by it other than the fun of doing it.
Next I did some ground beef. I started with one pound of 93% lean (or 7% fat) ground beef. It was kind of expensive but gave it a try anyway. I fried it down, drained off the fat, rinsed it in hot running water and then heated it again with no measurable fat removed the second time. The weight after that was ten ounces. Then I put it in the dehydrator. The resulting weight when finished was three ounces, a reduction of over 80%. I haven't rehydrated any of it yet so don't know if it is edible! I didn't put any seasoning on it.
Next I did some ground beef. I started with one pound of 93% lean (or 7% fat) ground beef. It was kind of expensive but gave it a try anyway. I fried it down, drained off the fat, rinsed it in hot running water and then heated it again with no measurable fat removed the second time. The weight after that was ten ounces. Then I put it in the dehydrator. The resulting weight when finished was three ounces, a reduction of over 80%. I haven't rehydrated any of it yet so don't know if it is edible! I didn't put any seasoning on it.
