Keeping Warm in your Hammock
Real Experience with "inexpensive Under Blankets/Quilts"
|
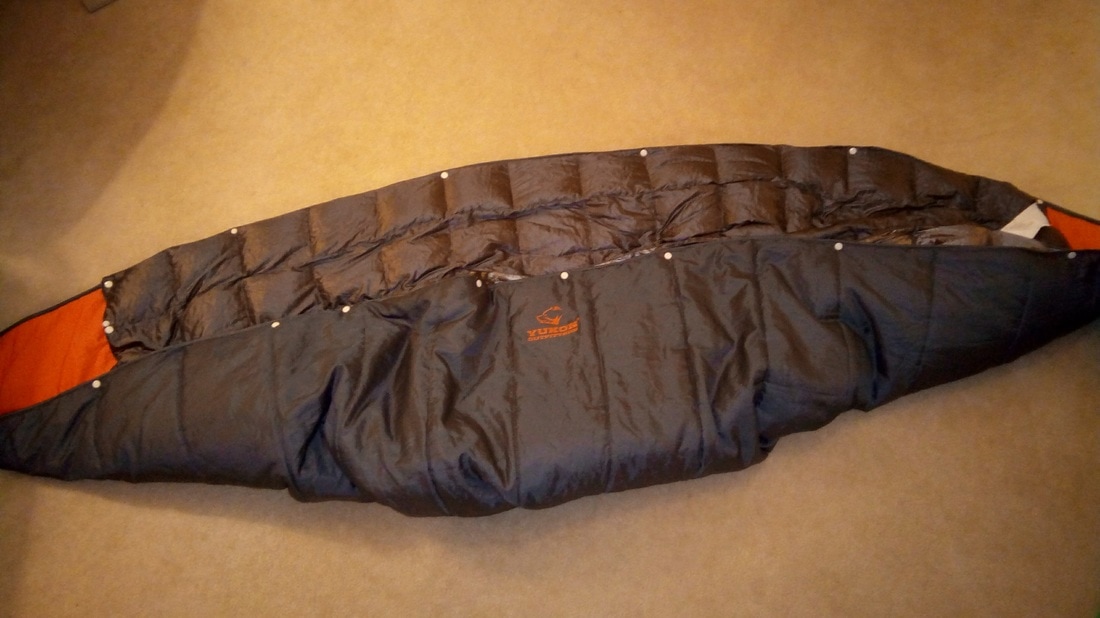
2017-05-08 This past Thursday through Sunday my two son's and I went backpacking using hammocks in the Porcupine Mountains Wilderness State Park in the Western Upper Peninsula of Michigan. I used my ENO DoubleNest hammock and Yukon Outfitters Kindle Under Quilt with an extra Costco Packable Down Throw attached to the inside of the under quilt for extra insulation. I had experimented with a similar concept back a while ago so I only had attachments along one side of the under quilt and one end of the down throw. Knowing the temperatures were likely to be a bit colder than I had played with I decided to take along some metal clips so I could attach the second end of the throw to the other side of the underquilt, essentially lining the entire underquilt with the throw. The final night got down to 27 degrees and when I awoke about two in the morning to use the privy (in a manner of speaking) it was very cold. I noticed a significant cold spot on the right side of my under quilt caused by the clips giving away allowing the throw to drop from that side to the bottom of the
|
under quilt, leaving that side with ONLY the underquilt for protection. When I reached down and pulled the throw up over the side of the underquilt I felt warmth immediately! So tonight before putting the gear away I decided to redo the whole concept using snaps along both long edges of the both the underquilt and the down throw. I think this will work very effectively giving more length of coverage and keeping the throw in place. It would even not be difficult to add snaps and add a second down throw if needed. Not sure when I'll get to test it again at or below those temperatures but I'm very optimistic based on my real life experience of two nights. We cheated on the middle night of our trip and stayed in one of the small cabins along the Lake Superior trail, which was also fun!
My two sons each used a Snugpak Hammock Under Blanket and a Costco Packable Down Throw. They had less difficulty keeping the throws in place with the metal clips but kept cozy warm. One of my son's and I were using 20 degree down sleeping bags and the other had some other brand rated at about 15 degrees.
2017-03-07 Yesterday, it was in the 50's and very windy. So I took my ENO DoubleNest hammock to the garage (keeping the door open) and hung it with the Snugpak Cocoon. I had only tried that combination a couple of times before. Now, having decided to take both a sleeping pad and an under quilt on our upcoming Porkies trip, the question I was contemplating is whether to take the cocoon rather than an underquilt and sleeping bag or top quilt for one of the setups.
The Snugpak Cocoon is simpler to get into and out of as it doesn't move all over the place. Once in it feels pretty much like a sleeping bag as the loose topside lays on your body kind of like a bag or top quilt would. I find it a bit confining or closterfobic at the head end. It is wide enough but figuring out how to use the zipper near your face is not straight forward. Unlike a bag or top quilt you really can't tuck it up around your chin, head and face leaving your nose open to the fresh air as with a bag or quilt. Also, the zipper comes from both ends so you get kind of a vertical slit above your face. It feels like you would suffocate if you zipped it closed. So, still thinking about whether I want to take it instead of an under quilt and top quilt on our upcoming Porkies trip.
2017-03-06 Saturday, it was in the 30's so I gave my DIY Under Quilt (see below) another chance. I like the way it connects to the hammock and it even looks halfway decent. But after lying in the hammock with it my shoulders just would not stay warm! Not sure why not. The rest of me was fine. Perhaps the down was not distributed well toward the head end? I am about to become convinced of what so many Hammock Forum participants have said, just go buy a really good cold weather under quilt! So I'm in a quandary as to how to be prepared for the Porcupine Mountains hike in May. If only I were a profit or the son of one so I knew "exactly" what to expect....!
The Sleeping Pad Option
2017-03-06 I'm still mulling over the best options for 20-30 temperatures. One thought is to combine the Snugpak Cocoon (4lb) with the Therm-a-Rest Trail Scout sleeping pad + wings (2lbs). Total weight would be six lbs, but that would eliminate the need for the 2lb sleeping bag. So the total sleeping weight would be about the same as using the pad+wings with the Yukon Outfitters Kindle Under Quilt or the Snugpak Hammock Quilt, both weighing 1.8lbs) plus 2lb sleeping bag. My base pack weight (backpak plus the cocoon and pad with wings) is 15lbs. So it seems the question is which would be most convenient for both packing and setting up.
|
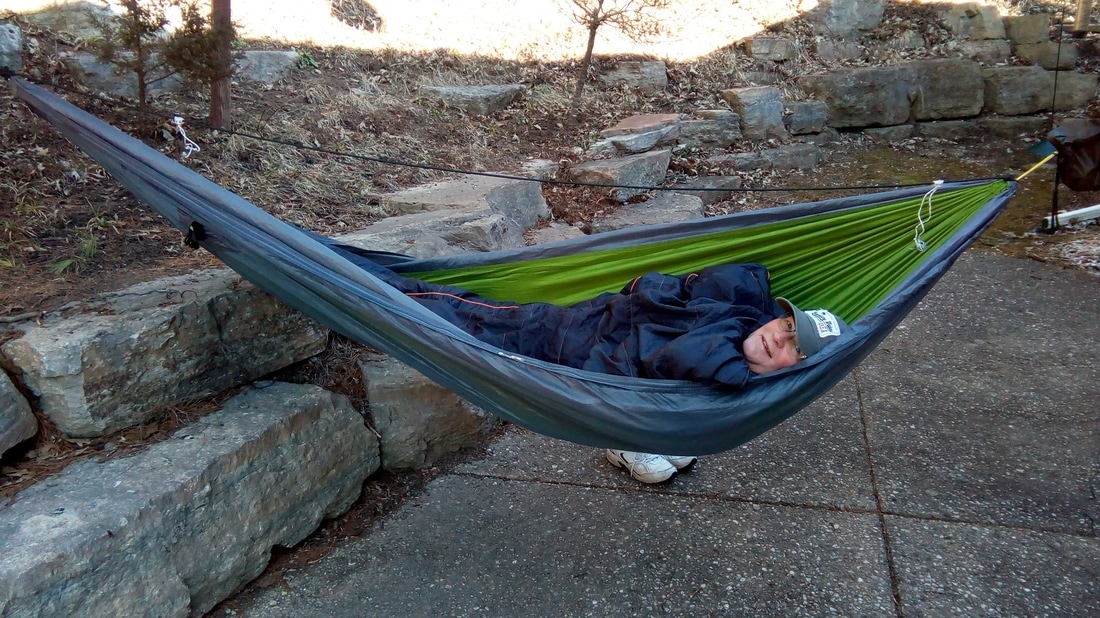
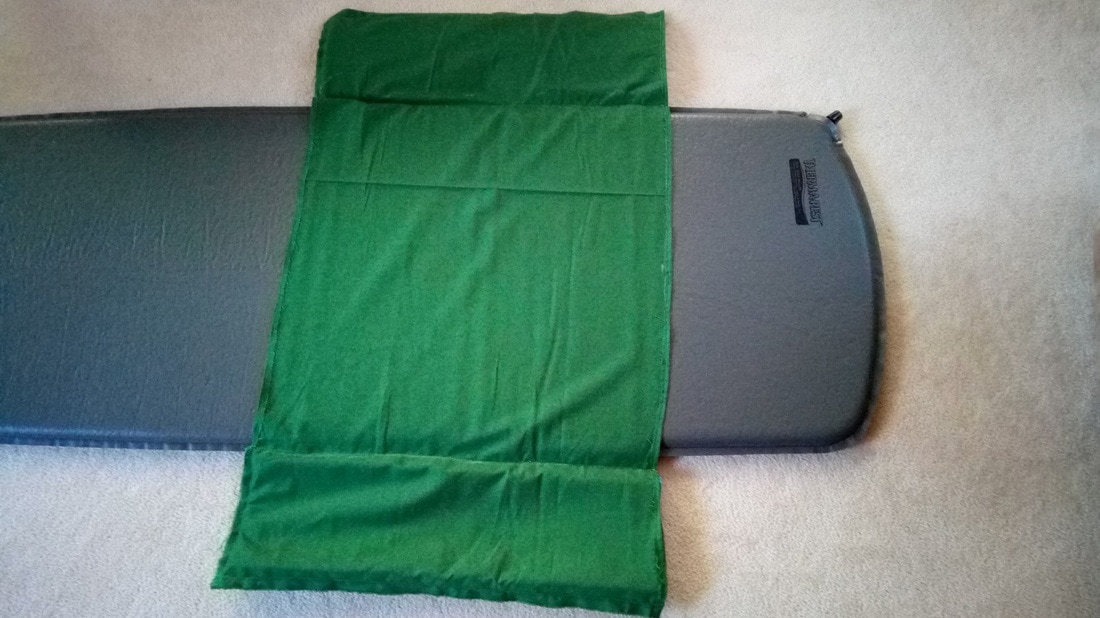
2017-03-03 I worked a trade with my wife today, actually it was her proposal. I cleaned her car and she sewed a sleeve to add "wings" to my Therm-a-Rest Trail Scout sleeping pad. The wings are six inch wide pieces of closed cell foam cut off the end of a blue foam sleeping pad. The sleeve Sharon sewed has a pocket that holds a foam pad on each side of the Therm-a-rest self inflating sleeping pad.
|
I couldn't wait so I took the Therm-a-Rest Trail Scout sleeping pad with newly attached wings outside to test in my Equip Mosquito Hammock in the backyard. The temperature was 30 degrees. For top cover I used an Ozark Trail 40F Climatech Mummy Sleeping Bag. My clothing was wool socks, blue jeans, an insulated shirt and my Boundary Waters cap! Sharon humored me and took a couple photos. My initial conclusion is that this works.
|
The pads and sleeve add about 7 ounces to the weight of the Therm-a-rest pad so if it will work stand-alone, that (combined weight of pad plus sleeve is 2 lbs) is about the same or slightly less than the solution than any of the under quilts I have. And if I need both an under quilt and the pad, the additional weight of the pad is not a deal breaker for the added security. So another option to think about.
2017-03-02 Last night was to be a pretty cold night so I wanted to check out my new arrangement using the Costco Packable Down Throw and Yukon Outfitters Kindle Under Quilt. It was about 40 in the garage when I "tucked in" my Snugpak Jungle Hammock with integrated Mosquito net and Ozark Trail 40F Climatech Mummy Sleeping Bag at about 10:00pm. All felt pretty nice and cozy. I had the down throw set up so it wrapped around my bottom and top side. I actually drifted off to sleep pretty quickly. At about 11:00 I awoke with that "full bladder" feeling (why did I drink so much tea earlier in the evening?!) but laid there for a bit just to assess my warmth factor. Everything except the area around my shoulder blades felt warmish. But my upper back felt coolish.
After tending to my biologic need and returning to the hammock I tried to adjust the Kindle Under Quilt. That was quite a challenge as with the slippery Down Throw attached to it, it just didn't like to stay in place which may have contributed a bit to the cold shoulder syndrome. Again I drifted off to sleep, only to be awakened a little after midnight with both the bladder and cold shoulder feeling. Thinking about the warm and welcoming bed inside I gave it up!
When I awoke this morning in my nice warm bed I had that terrifying feeling that I've wasted all my time and money on these hammocks! Then I started thinking about the possibility of using the sleeping pad I use in my tent. I've used it in temperatures into the 30's maybe even the 20's and been impressed with how warm it is. It's a Therm-a-Rest Trail Scout. So, this morning I removed the Yukon Outfitters Kindle Under Quilt and put the Therm-a-Rest Trail Scout pad (self-inflated, no air added) into the Snugpak Jungle Hammock with integrated Mosquito net. With the Ozark Trail 40F Climatech Mummy Sleeping Bag in hand I started the settling process which is as if not more involved as trying to get the underquilt situated. I had watched a new video by Shug about dealing with the calf ridge in a hammock earlier this morning and noted he several times made the point that the foot end needs to be hung higher than the head end of the hammock.
After fiddling a while with the pad I decided to give that a try. So I adjusted the whoopee slings on both ends until the foot end was about a foot higher than the head end. The effect of moving my meet a bit close to the center and wider part of the hammock seemed to help. I laid there for about half an hour and noticed right away that my backside was warming, including my shoulders. It was about 35 in the garage. So, maybe I haven't wasted all my time and money on hammocks. And in that brief time I kind of convinced myself that though using a sleeping pad is not as "cool" as an underquilt, it isn't all that difficult And if it works....
Making adding a Costco Packable Down Throw workable
|
2017-03-01 There is light snow falling as I type this! That's good as it means the temperature is around freezing so I can continue testing of my attempts to use a Costco Packable Down Throw to lower the effective temperature rating of my underquilts.
Here is the idea. The down throw as purchased is about 60 x70 inches. I discovered the other day that the 70 inch length is long enough to reach from one side of the hammock around under the hammock (between the hammock and the underquilt) and back across the top with a little left over to tuck in. The 60 inch width is not quite enough to give full body coverage but close.
That seems to add considerable warmth to the underquilt. Perhaps taking an underquilt that is comfortable in the lower 40's down to maybe the mid to lower 30's. And since that down throw is very light (about 1 lb) and compresses down very small, that approach adds very little weight and bulk to a backpack load.
In my initial tests yesterday discussed below I just used some tarp clips I had on hand to attach the starting edge of the throw to my underquilt.
|
|
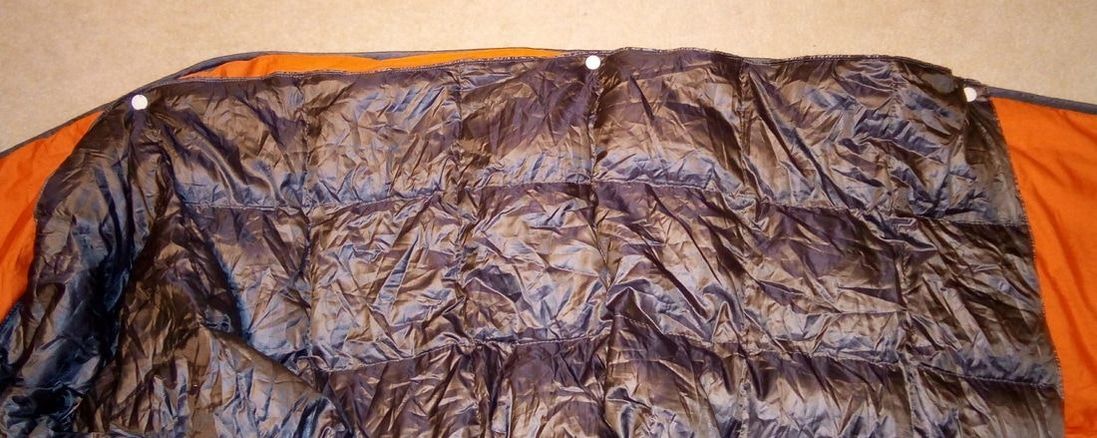
Since the idea seems to work I decided to attach plastic snaps to the edge of the my Yukon Outfitters Kindle Under Quilt and the edge of the down throw to make attaching it easy. I used the Dritz Plastic Snap Fastener Pliers and Dirtz 20 sized snaps as that is what Walmart had available. They seem to work well.
I also added snaps to my Snugpak Hammock Under Blanket which also seemed to work well. So initially I am pleased with this arrangement. It's relative inexpensive, very easy and does nothing to harm either the underquilt or the down throw.
|
Testing my "Keeping Warm" Options
2017-02-25 Our spring-like weather is gone for a while anyway. And today the Snugpak Hammock Cocoon came in the mail. So with my modified Costco Down under quilt finished, I decided it is time to test everything to see how they perform. The temperature outside was in the 20s and in the garage where I did the tests it was 38. That's not bitter cold but at least gives me an idea of how things are working. Here is what I tested, or perhaps a better term is "played with!"
- Snugpak Cocoon (4lbs)
- Modified Costco Packable Down Throw underquilt (1.5lbs)
- Yukon Outfitters Kindle Under Quilt (1.8lbs)
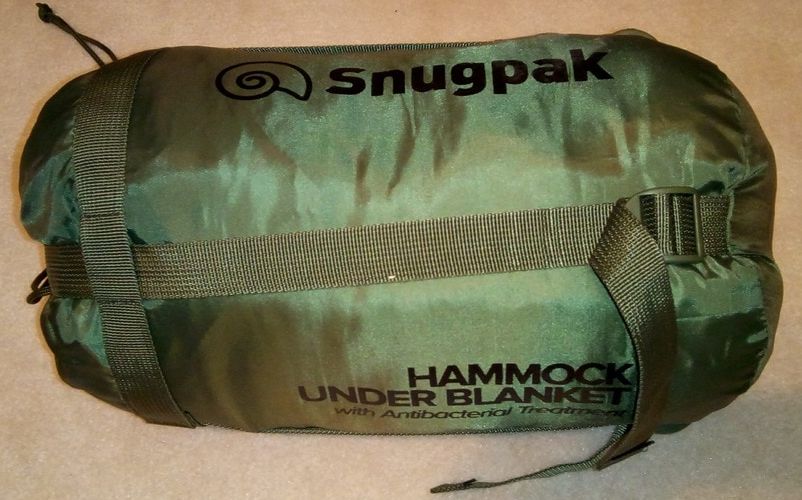
- Snugpak Hammock Under Blanket (3.2lbs)
Though I have the Snugpak Hammock Quilt I decided to use my Ozark Trail 40F Climatech Mummy Sleeping Bag for all the tests to reduce the number of variables. It has a nice footbox and is easy to use as a top quilt. I also wanted to check my various combinations of under quilts with it as it may be used on the Porcupine Mountains Wilderness State Park trip in May. The temperature on that trip may be in the mid to upper 30s. I used my ENO DoubleNest hammock. And I wore the same clothes for all tests: a flannel shirt, very light down vest, blue jeans and medium weight wool socks. I also had a pullover knit hat.
The Snugpak Cocoon
The Snugpak Cocoon mounted over and attached to the hammock suspension without much trouble. I had a ridgeline on my hammock so had to detach and then reattach it after putting the cocoon on. Since it is a fully enclosed cocoon I did not use the sleeping bag. I've never tried a cocoon so wasn't sure how I'd like it. But I have to say it was pretty neat. You feel all cozy and secure. This one doesn't have any "window" and can be zipped completely closed by the full length zipper which can be zipped either way. It warmed up right away but after a while my back felt "unwarm". Not cold but slightly uncomfortable. I gave it about half an hour and decided that wasn't going to work. That is similar to the experience I had with the Snugpak Under Blanket recently when I tried it outside at about the same temperature.
I decided to try putting an unmodified Costco Packable Down Throw between the cocoon and the hammock and try it again. That worked. Almost immediately I felt warmth instead of cool on my back. Further, the Down Throw is large enough that it wrapped around the hammock with considerable of it on top of me. It was really warm and cozy. I believe you could use that combination down into at least the lower 30s, maybe even into the 20s. It also gives you some options with very little extra weight, weighing only one pound.
Modified Costco Packable Down Throw
You can see my modifications to the Costco Down Throw below. I was anxious to see what it would do. It is a 3/4 length under quilt. Loft is about 3 inches (on a good day) and it is 48 inches wide and 56 inches long. I added six brass eyelets on each end spaced roughly 12 inches apart. I wasn't sure how to suspend it so decided to try putting a shock cord loop through the outer two pairs of eyelets and another loop through the inner two eyelets. That worked very well, allowing me to adjust the sides to be relatively high and tight while just snugging the middle up against the hammock.
Two comments about my modifications. First, when I removed the down from the three now removed tubes from the original Costco Down throw I transferred it into the three center tubes of the remaining eleven tubes. My theory was that it was higher quality than the feather/down combination from the jacket and that those center tubes were the most important. Second, before transferring the feather/down from the jacket I shook all the original down to one end of the tubes. The result is that roughly one half of the length of the modified quilt has high the original high quality down with the other half filled with the lower quality feather/down mixture.
I mention that here as when I put the quilt under the hammock I put the higher quality end toward the head end theorizing that was where I needed the most warmth. There you have it!
That being clear, I climbed into the hammock using the sleeping bag. Immediately I could feel the warmth on my back. My top side wasn't as warm as I like so I pulled an unmodified down throw on top and then was very warm and cozy! Even my feet were OK. I'm guessing if one slept all night you'd want to add second pair of socks but I'm not sure you would need any additional insulation. The under quilt reached from my head down to my knees. I am very pleased with this setup's performance.
Yukon Outfitters Kindle Under Quilt.
Next was the Yukon Outfitters Kindle. It is VERY EASY to mount, simply put the shock cord loop through the caribiner at the end of the hammock and you're done. So I climbed in with the sleeping bag. It wasn't quite as warm as my modified down throw but close. Once again I needed a down throw on top. If one got cold you could put it between the under quilt and the hammock as I did with the Snugpak Cocoon with plenty left for top cover. I didn't do that as I was warm as it was.
Snugpak Hammock Under Blanket.
Finally, the Snugpak Under Blanket. Since I had tried it outside, I pretty much knew what to expect. It felt cool just like the cocoon. So, as with the cocoon, I put an unmodified Costco down throw between the under blanket and the hammock, wrapping the excess on top. That worked.
A Discovery regarding using s supplemental blanket with an underblanket
As I was testing the Snugpak Hammock Underblanket I discovered that if I would line up one edge of the down throw even with one edge of the under blanket, the down throw was long enough to wrap around under the hammock, back over my body and then tuck in around my body. That is a very workable arrangement. In fact I think I will attach plastic snaps to the edge of the down throw and the edge of my under quilts making it really easy to attach the down throw when needed.
2017-02-15 Monday was a reasonably warm day, in the 40s and was to go down to the mid 30s overnight. So I decided to try sleeping outside in my ENO Doublenest hammock with the Snugpak Under Blanket and Snugpak Hammock Quilt and see how they would do. I "bed down" around ten pm when it was about 37 degrees. I noticed right away that my back was chilly but decided to give it time to warm up. The Hammock Quilt seemed warm on the top side but after about 45 minutes my back was still chilly. Wisdom seemed to be to give it up. Glad I did. It took me all night and part of the next day to really feel completely warm again. The temperature when I came in was 35. Clearly the Snugpak Under Blanket is not good down that far, at least for me. I want to try the same test with the Yukon Outfitters Kindle hammock under quilt. It is rated a little lower and in my previous tests in the garage it seemed warm. By the way I had the ENO Profly tarp pitched very low over the hammock and though it was breezy, I didn't feel much breeze on my face.
Snugpak Under Blanket: Today (2017-01-14) I received the Snugpak Under Blanket that I ordered a few days ago through Amazon. And since I have pretty much completed the rest of my hammock kit I took the ENO DoubleNest hammock and Snugpak out to the garage, which was about 35 degrees, and hung them up. The hammock with the straps, whoopee slings and ridgeline went up smoothly and quickly. Probably not quite as easy as using the original Atlas Straps that came with it but nearly so.
|
Then I extracted the Snugpak Under Blanket from its stuff sack and stretched it out in the hammock. Referring to the instruction sheet I set about to hang it too. I have a whole bag of cord locks so decided to use those instead of tying knots in the shock cord as they suggest. Otherwise I pretty much followed their instructions, connecting the inner two shock cords to the carabiner that connected the hammock to the whoopee slings and the outer loops round the toggle where the whoopee slings joined the tree straps. All seemed snug but also capable of moving freely with the hammock so I climbed in.
I didn't have a top quilt or sleeping bag, just my fleece jacket and blue jeans with cotton socks, but after lying in it for about 15 minutes I began to feel warmth beneath me, a good sign. I was able to lie diagonally in the hammock and stay completely covered by the
|
under blanket. Being full length my whole body was protected from beneath. If I'd had a pillow and top quilt I'd still be in the hammock sound asleep! I'm very pleased with this initial experience.
2016-12-08 After my winter night in the hammock I decided to spend more time researching DIY underquilts. That led me to remove the sleeves my wife had sown into the edges of the Costco Packable Down Throw that I used as an underquilt. That was for a couple reasons. First, the way I did it might work for summer or late Spring/Early Fall use when the temperature doesn't get below about 50 degrees. But for colder nights I doubt it would work based on the various experiences of others that I read about or watched.
Second, I realized that by simply folding over the first row of squares I did get a sleeve to run the line supporting it, but I was wasting good down by doing that. It would seem more effective to slow a sleeve of nylon onto the edge. Finally, after looking at the significant work others have put into trying to make these things into quality, relatively low temperature underquilts I realized I am not THAT committed to either serious winter camping or to the amount of work required, with the risk of still not being happy. So I think I've abandoned the DIY underquilt idea altogether! Time will tell.
2016-10-28 This afternoon was nice so I set up the hammock, tarp and underquilt. By adjusting both the positioning of the underquilt, the length of the suspension cords, and gathering the ends it fit up nicely around the bottom of the hammock. I laid in it for while just to see how it all felt, and unexpectedly went to sleep. It is quite comfortable! One of these days I'll give it a real try.
|
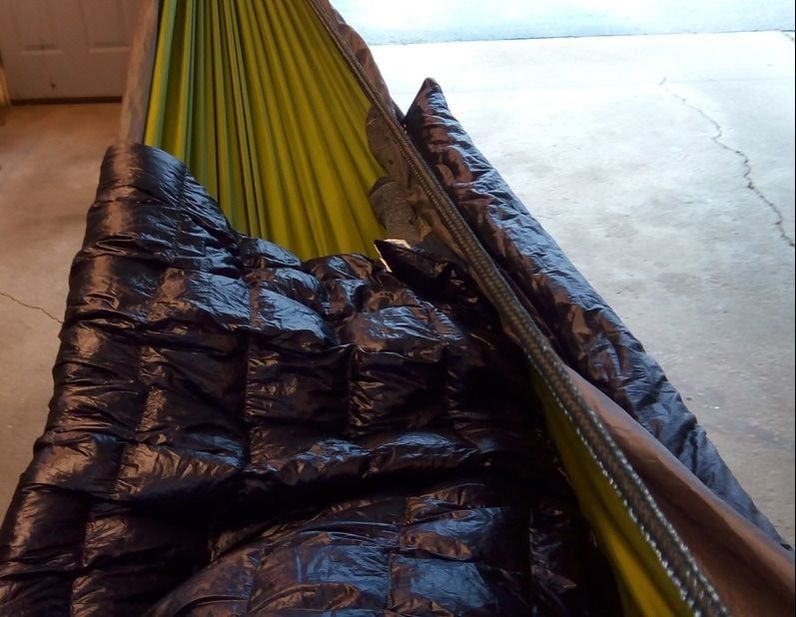
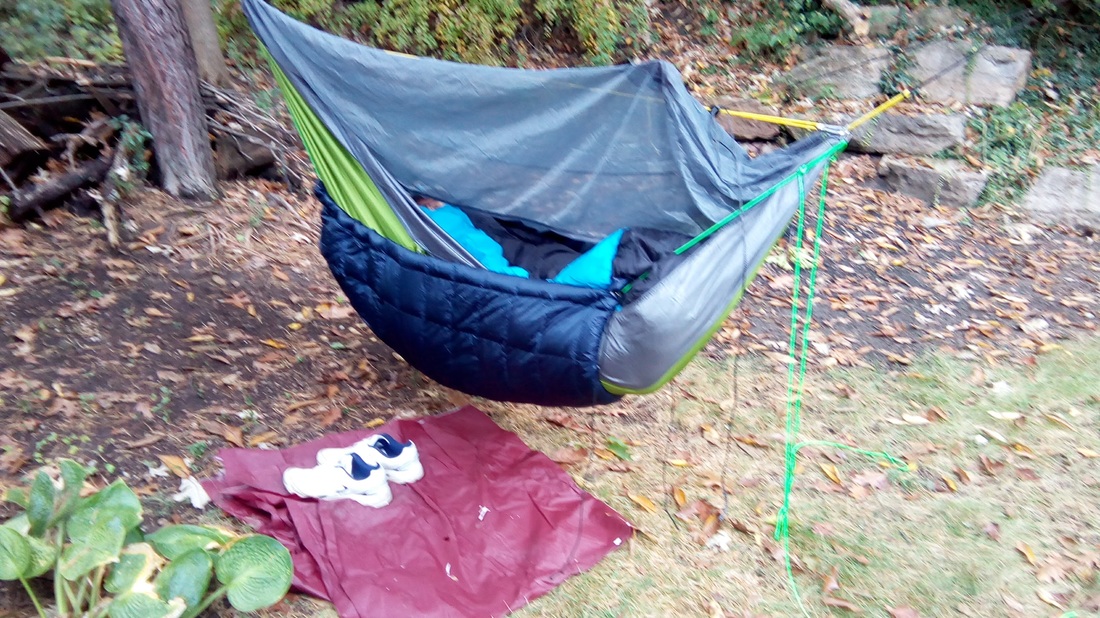
2016-10-27 Well, all the pieces came together for my underquilt so I set up the hammock and fiddled with the underquilt. It more or less works. I still need to figure out exactly how to adjust it and where to position it beneath the hammock. It is hard to tell what is going on when you are in the hammock so I had my wife take this photo. My head is to the left. It seems I need to move it a bit more toward my feet and I think I need to loosen the shock cord around the head end to allow the whole thing to "climb" up onto the hammock a bit more on that end so it will snuggle up against the bottom of the hammock. I did notice an air gap beneath the head end of the hammock which that may cure. it is pretty lightweight so I'm unsure at how low a temperature it would keep you warm. It was in the 40s yesterday and seemed warm enough. More testing!
|
