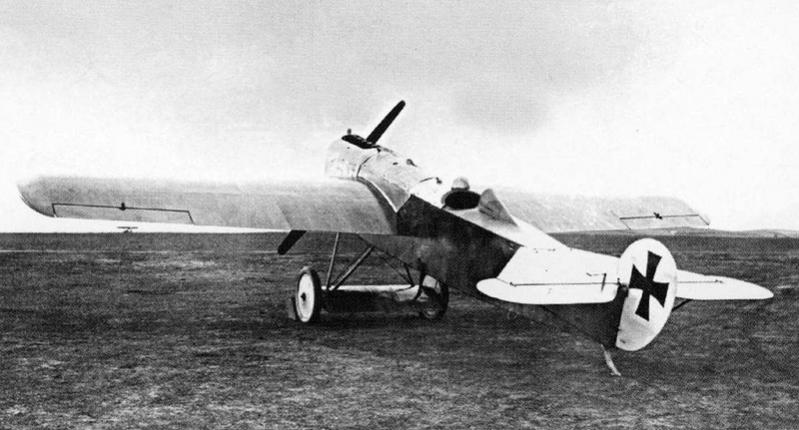
Fokker V.23

Ready for Spring 2015
|
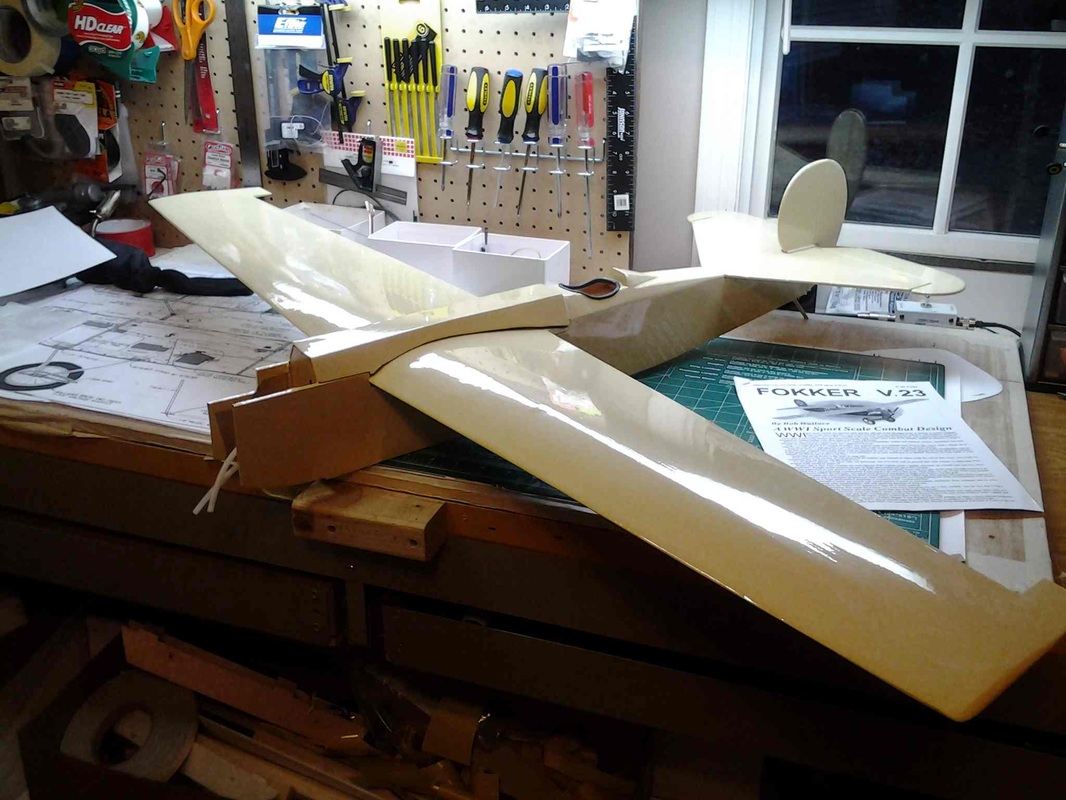
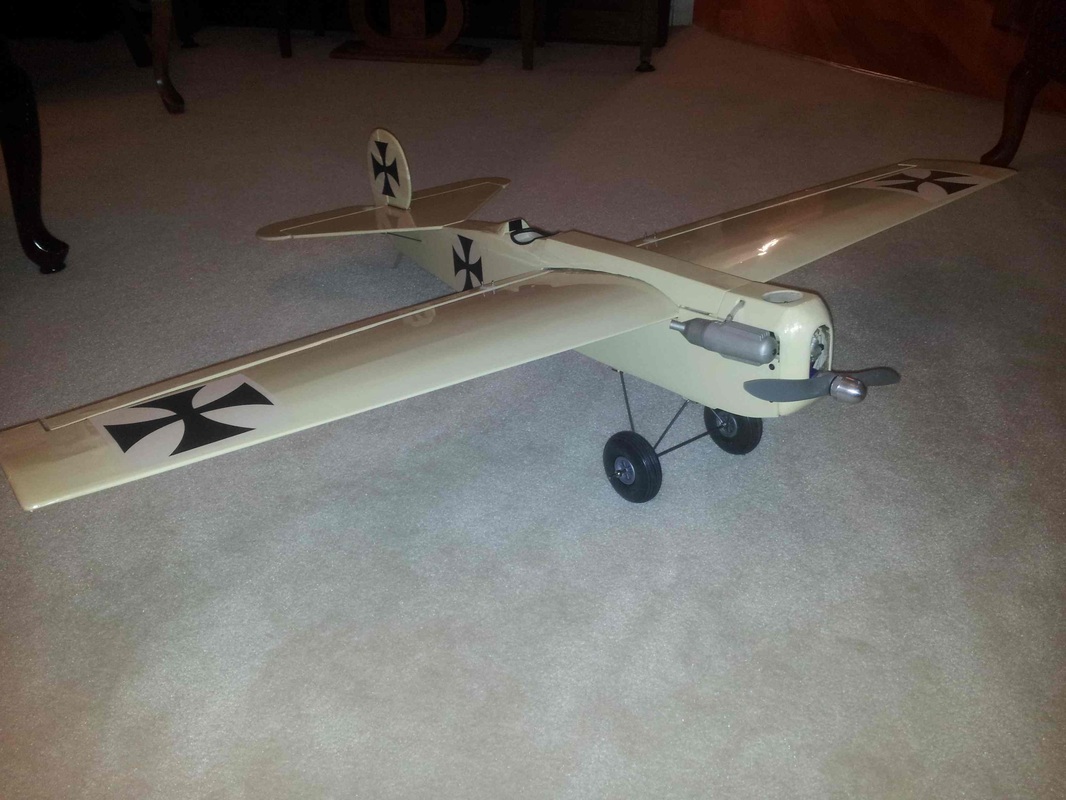
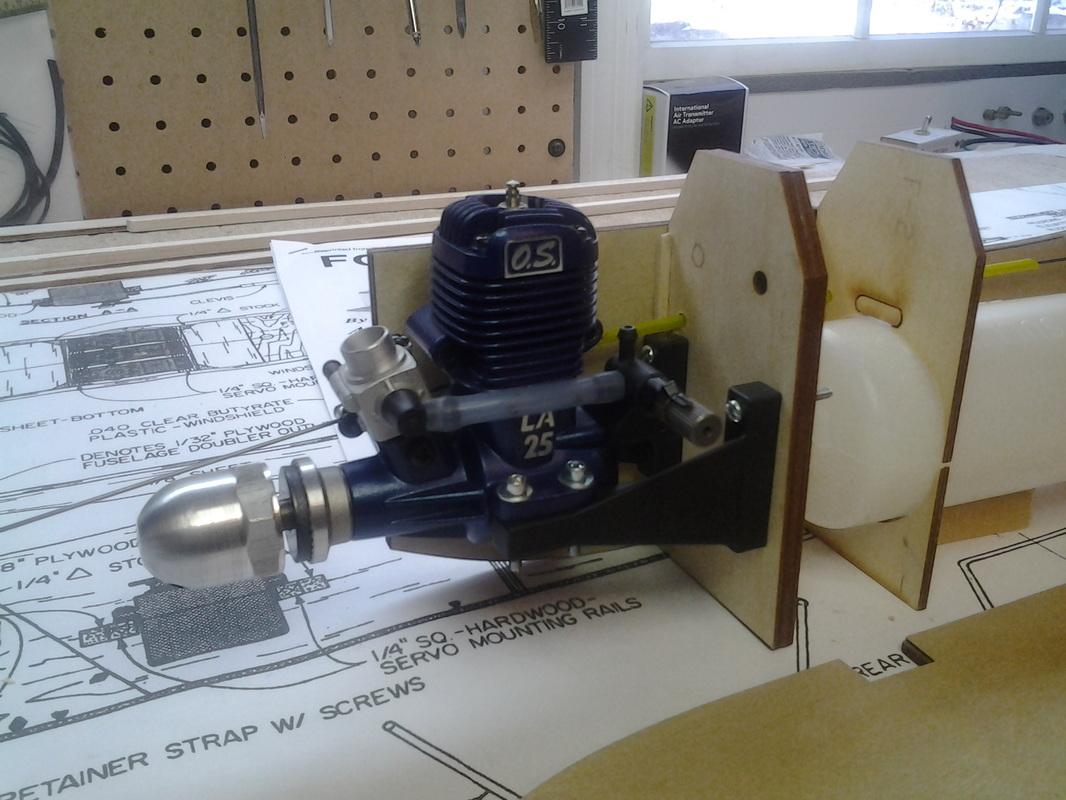
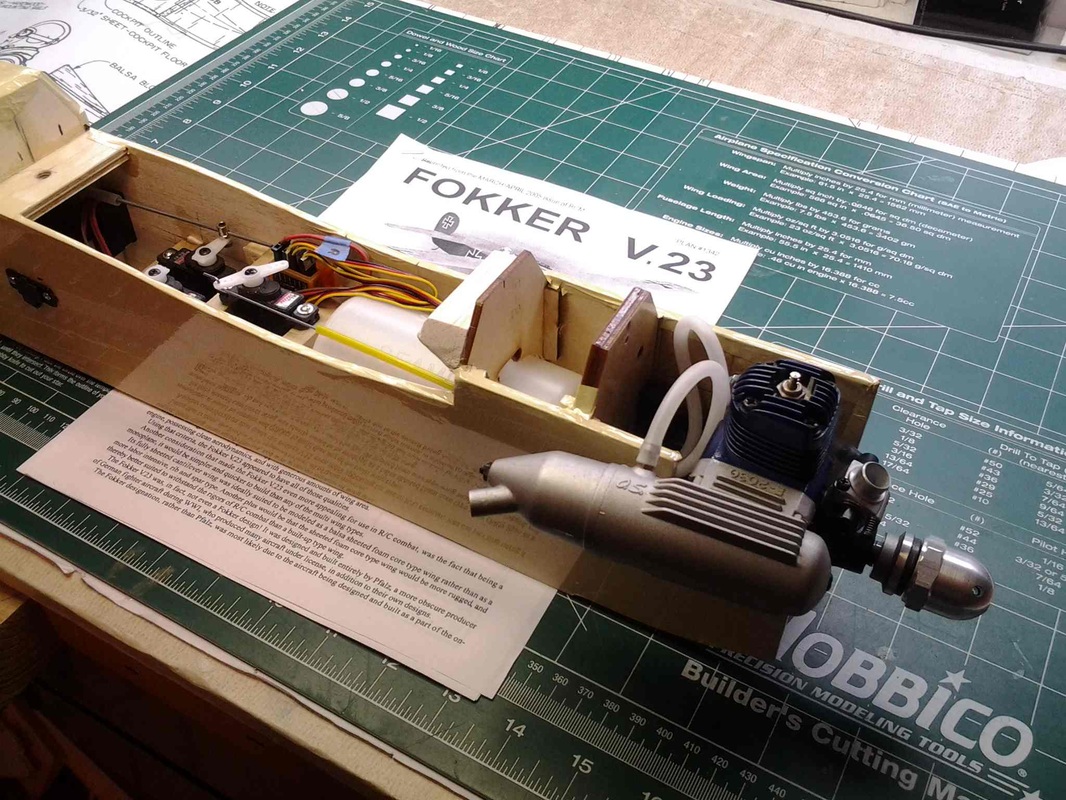
My newest short kit project is a Fokker V.23 WWI Combat Sport Scale plane designed by Bob Wallace. After having a good experience with Laser Design Services offering of the Cessna 170 by Berkeley I decided to give this one a go too. I have the plans from Laser Design Services plus a construction article by Bob Wallace published in the March/April 2005 issue of RCM. It references their plan number 1342. Got a nice OS LA 25 2 stroke engine off eBay for it. Looks nearly new and runs very well.
|
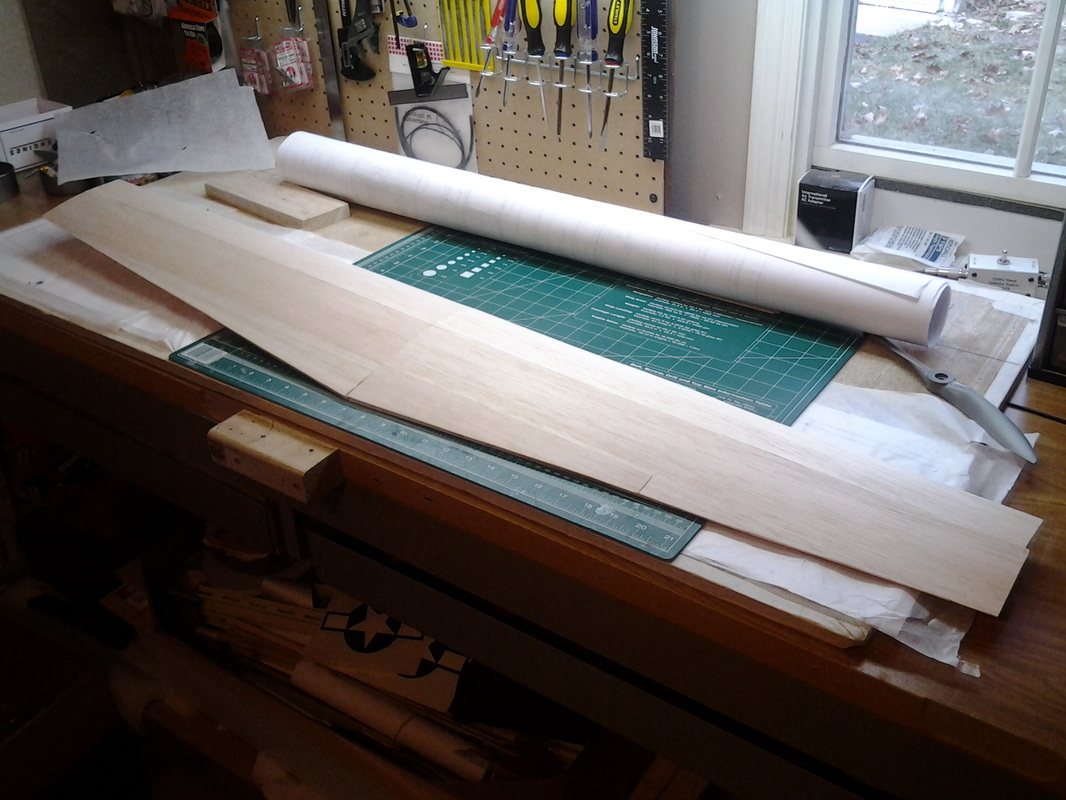
11/14/14 Decided to get serious about this plane last evening and laid out and studied the plans. The original design called for a foam core wing but the short kit from Laser Design Services includes the plan and most material to do a built up wing. So that is where I am going to start. The wind is quite thin and is built as one piece so I am concerned about how to make sure both halves are identical to avoid any twisting. I've experienced the "devastating" results of a twisted wing!


|
11/14/14 Well, making progress on the wing. It's now framed and sheeted on the topside. I think it is turning out well. Am contemplating how I want to handle the ailerons before putting the bottom sheeting on.
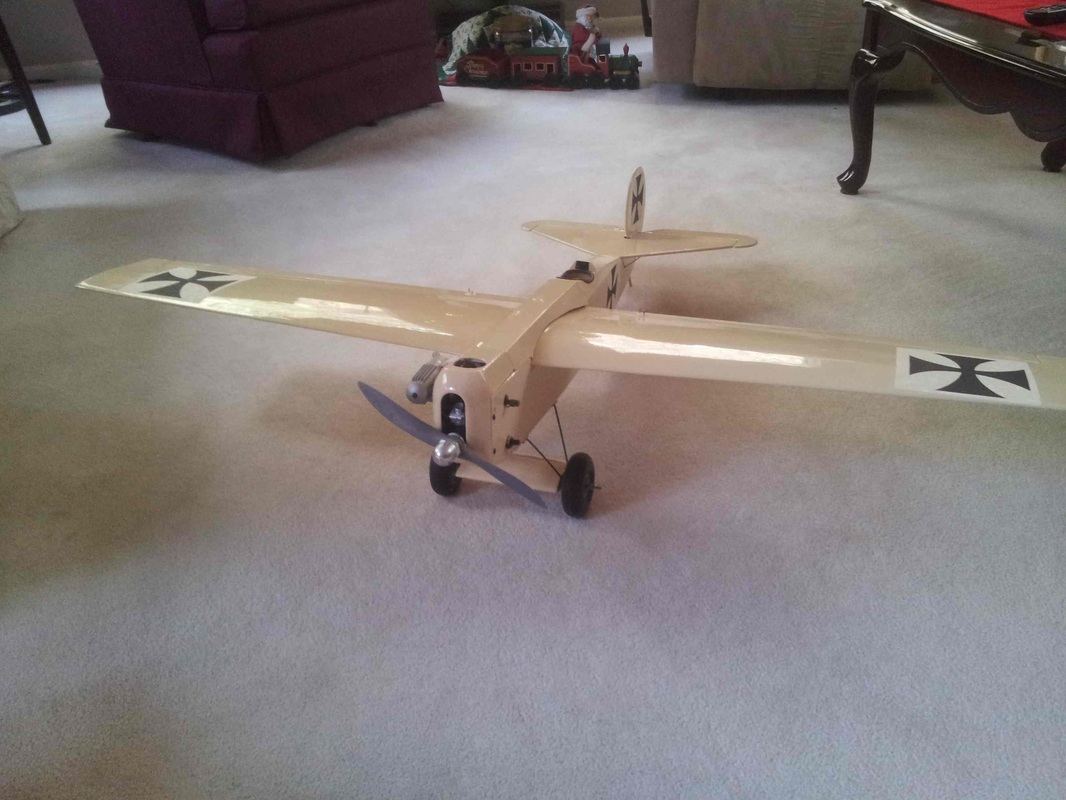
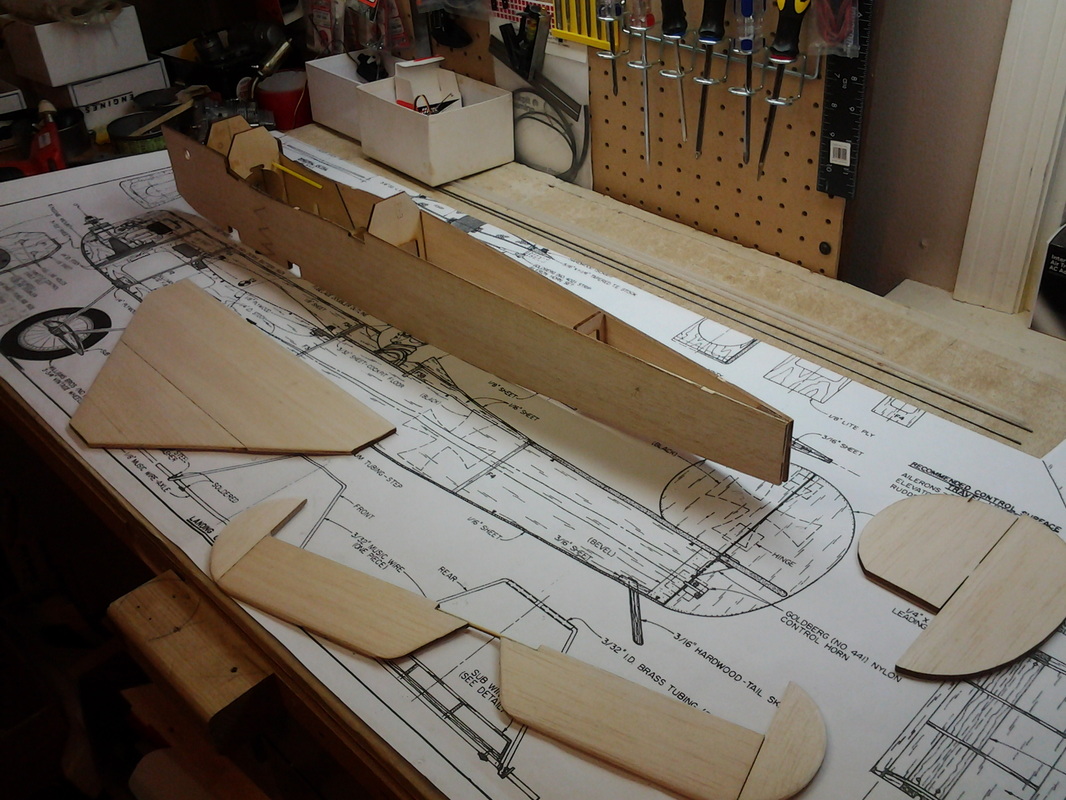
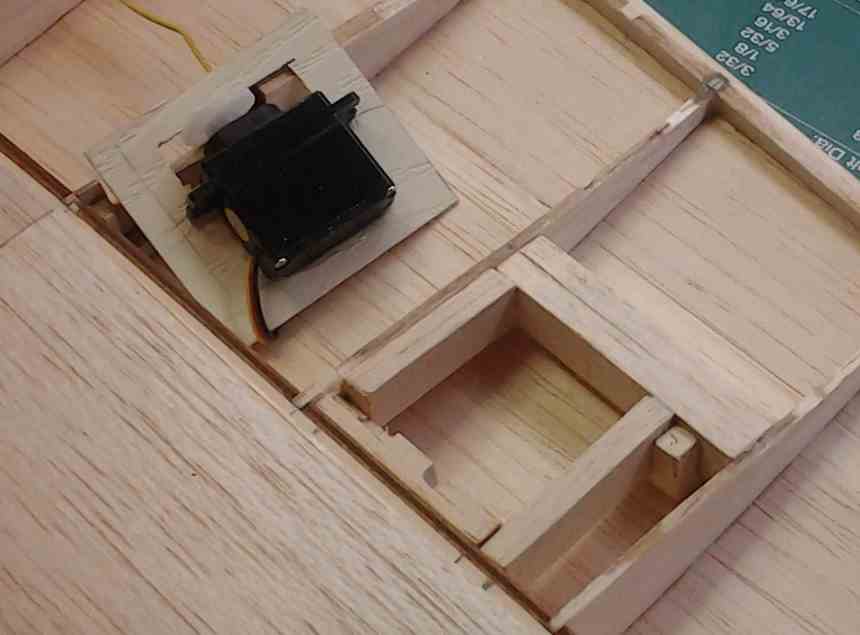
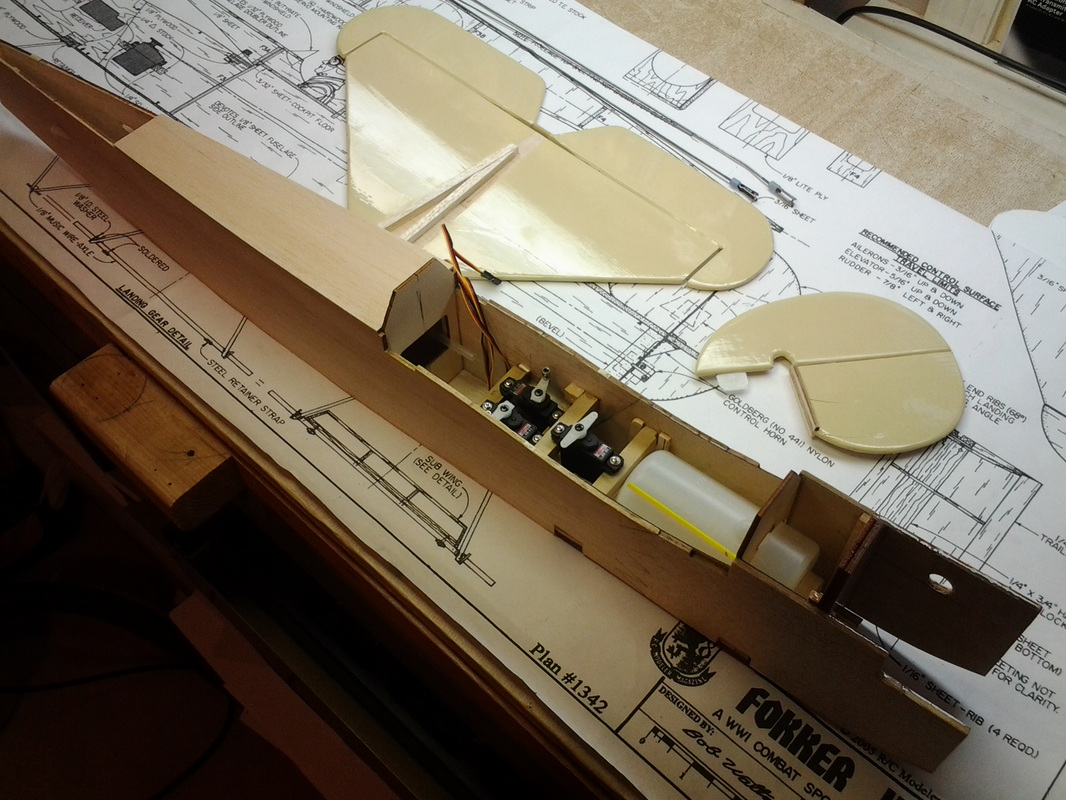
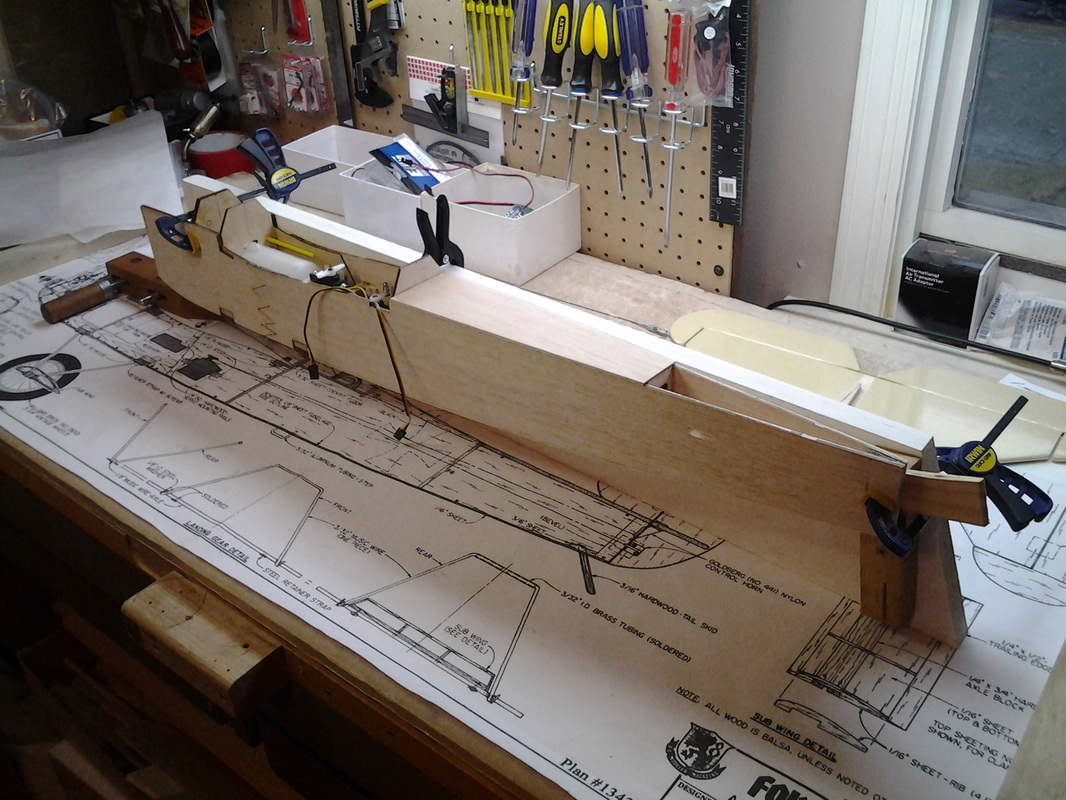
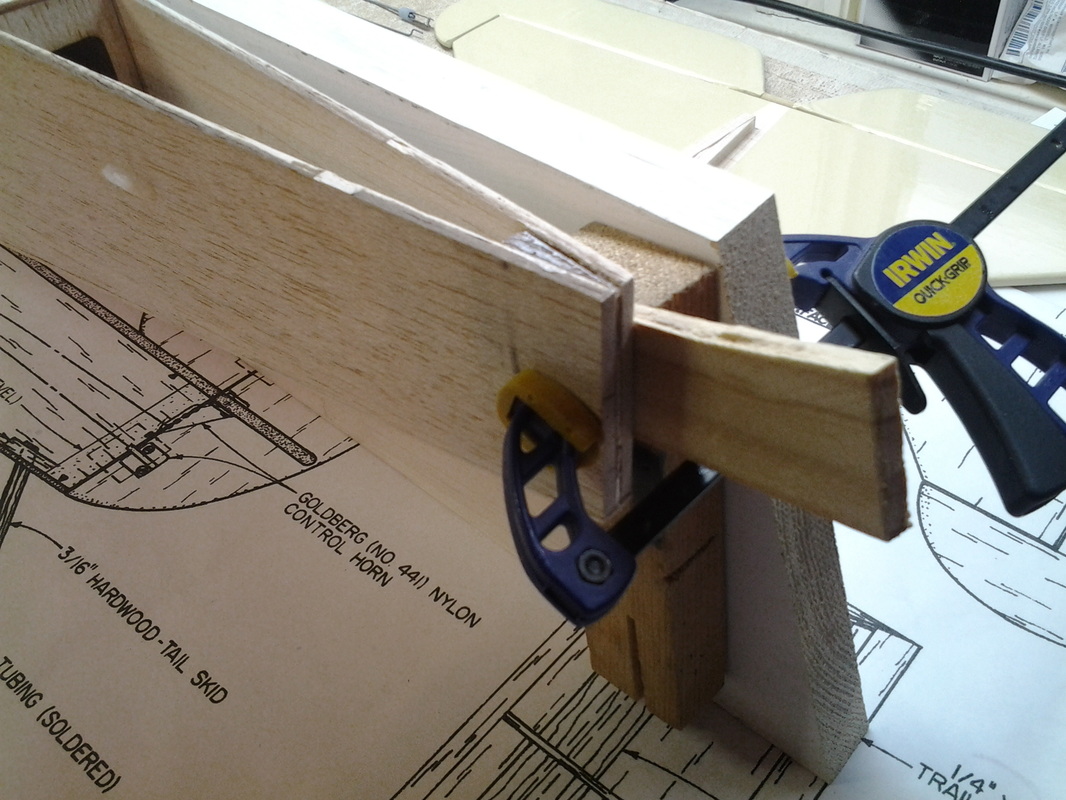
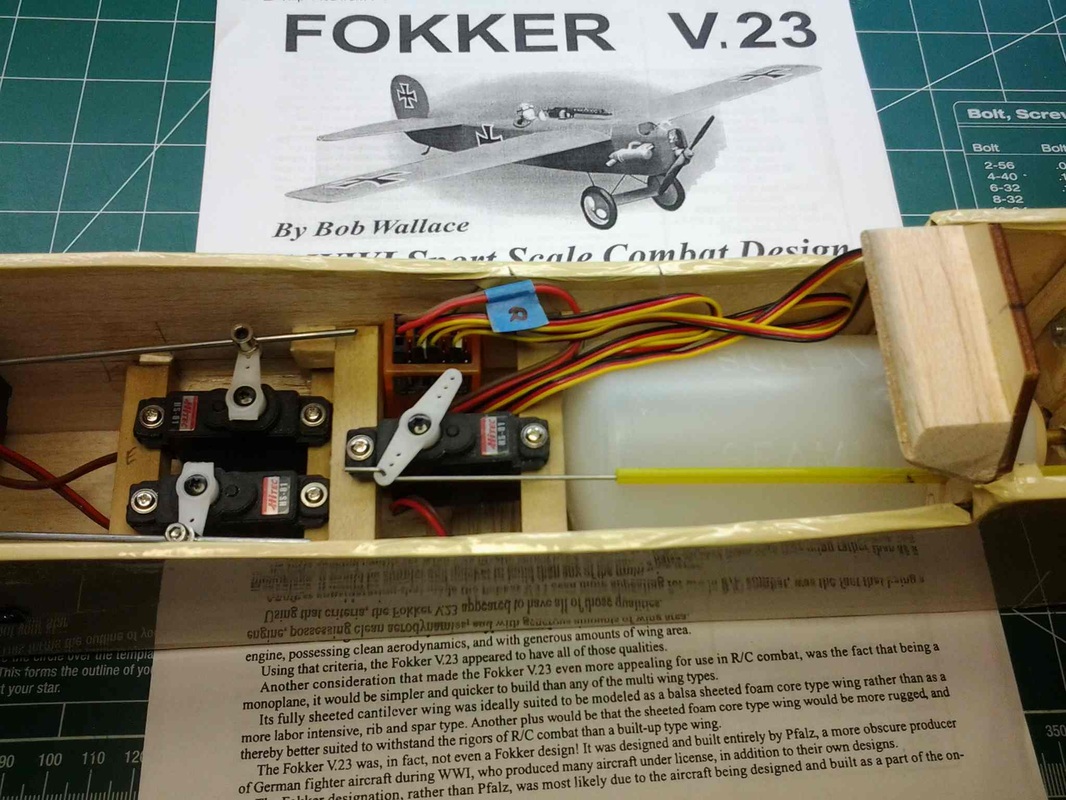
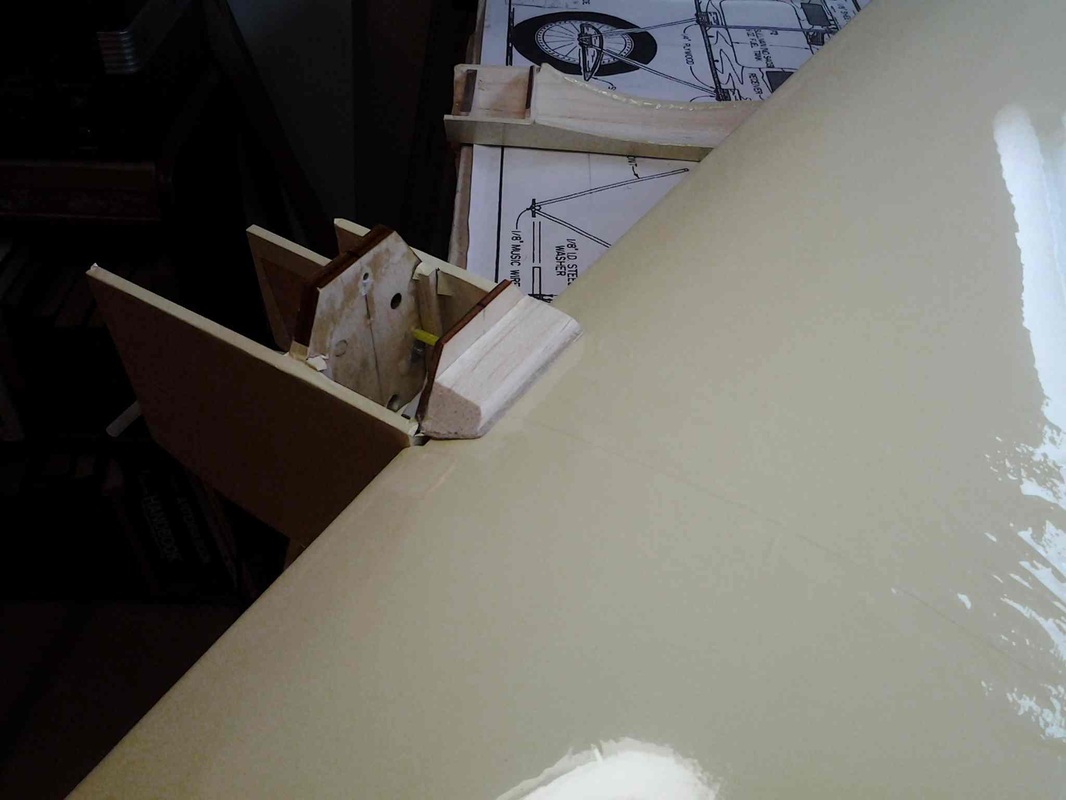
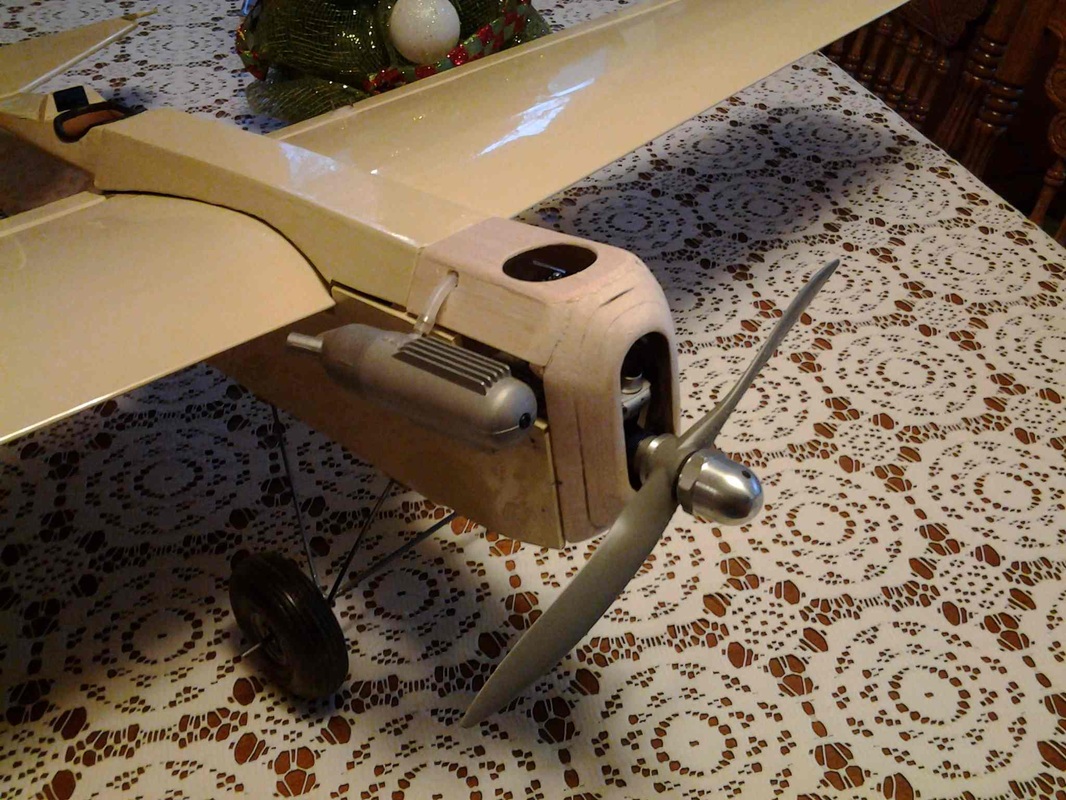
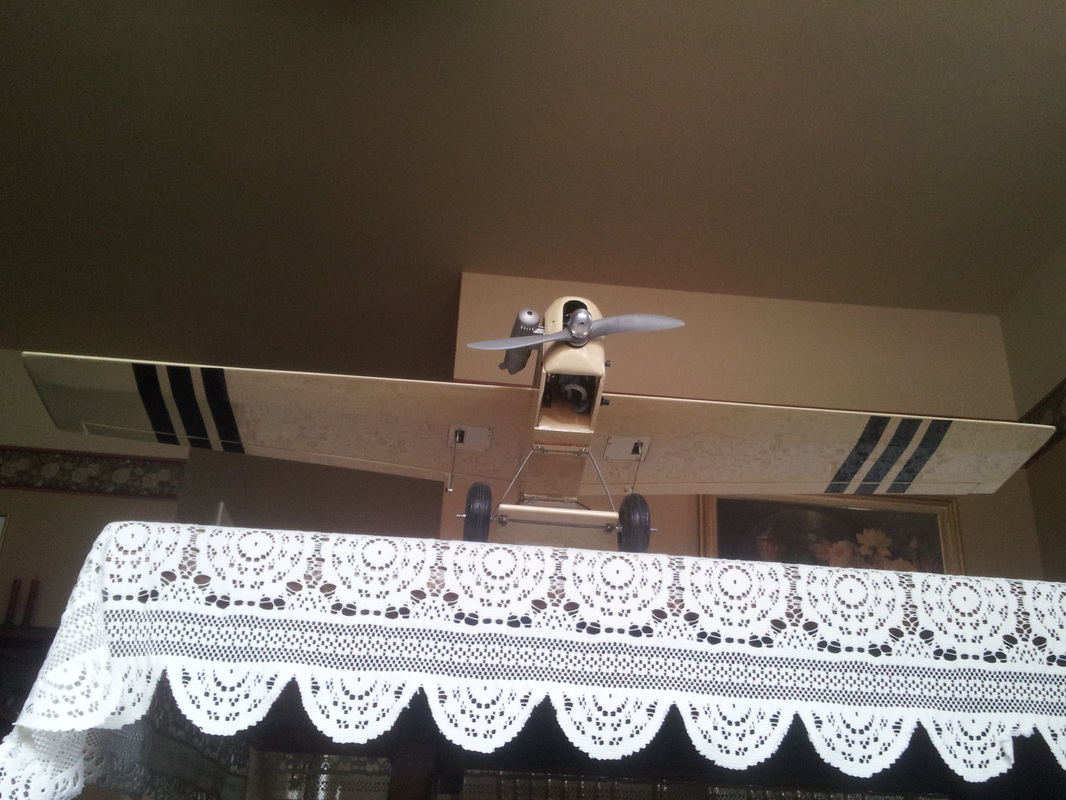
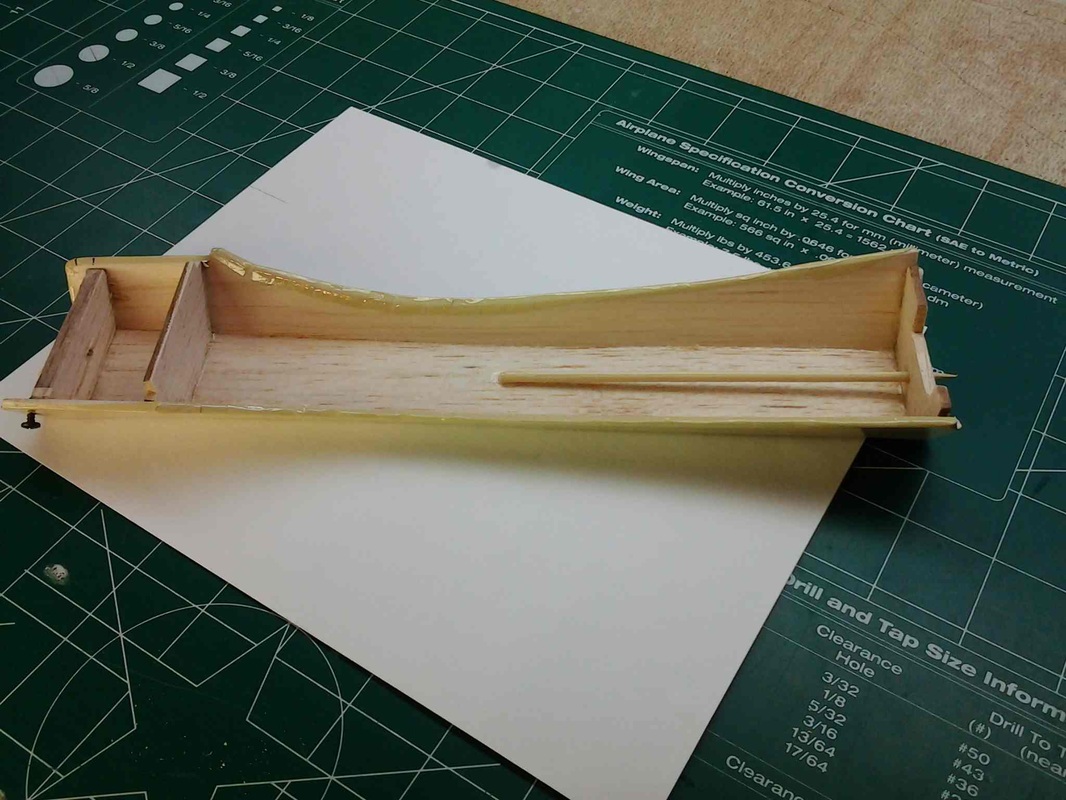
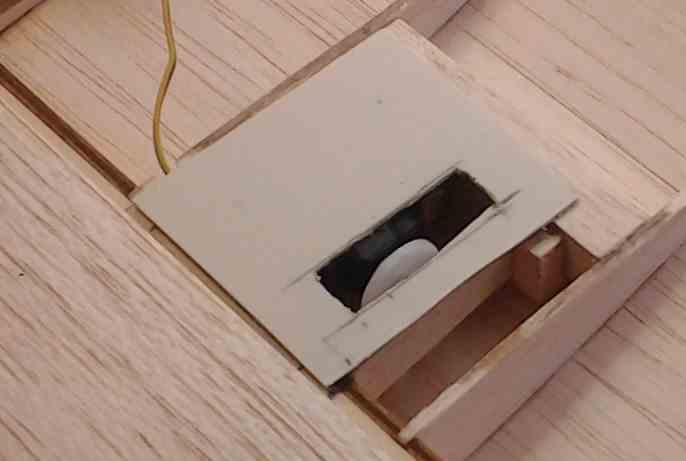
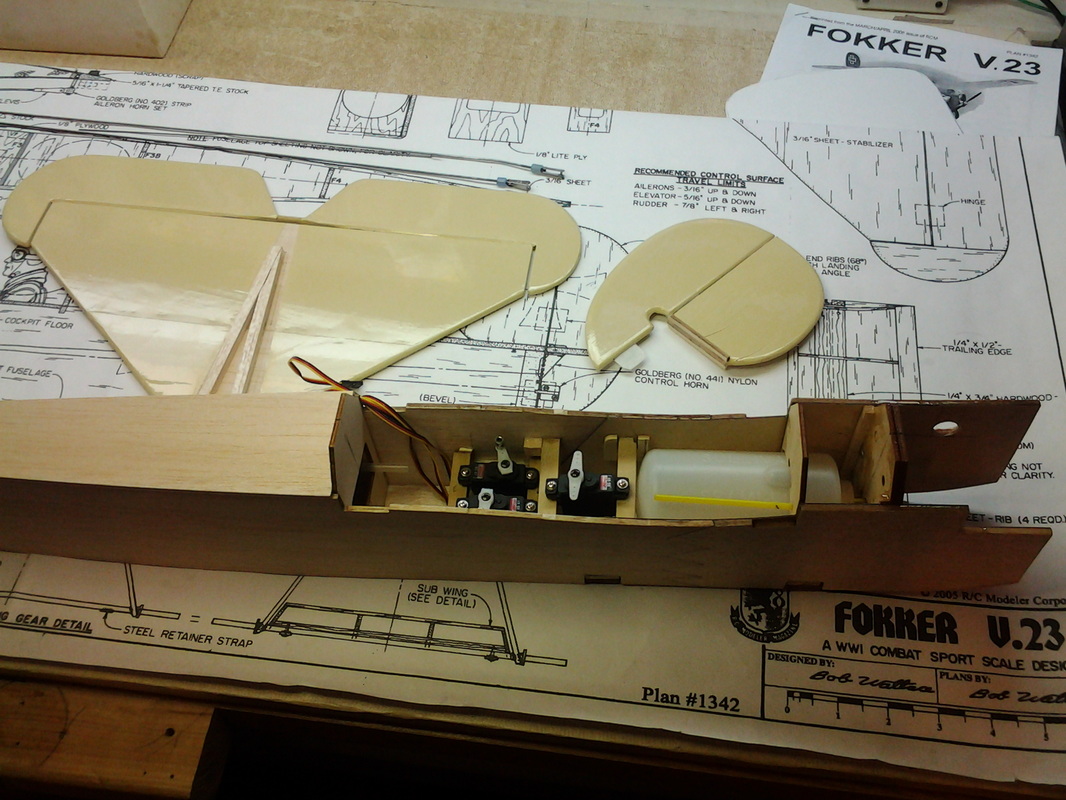
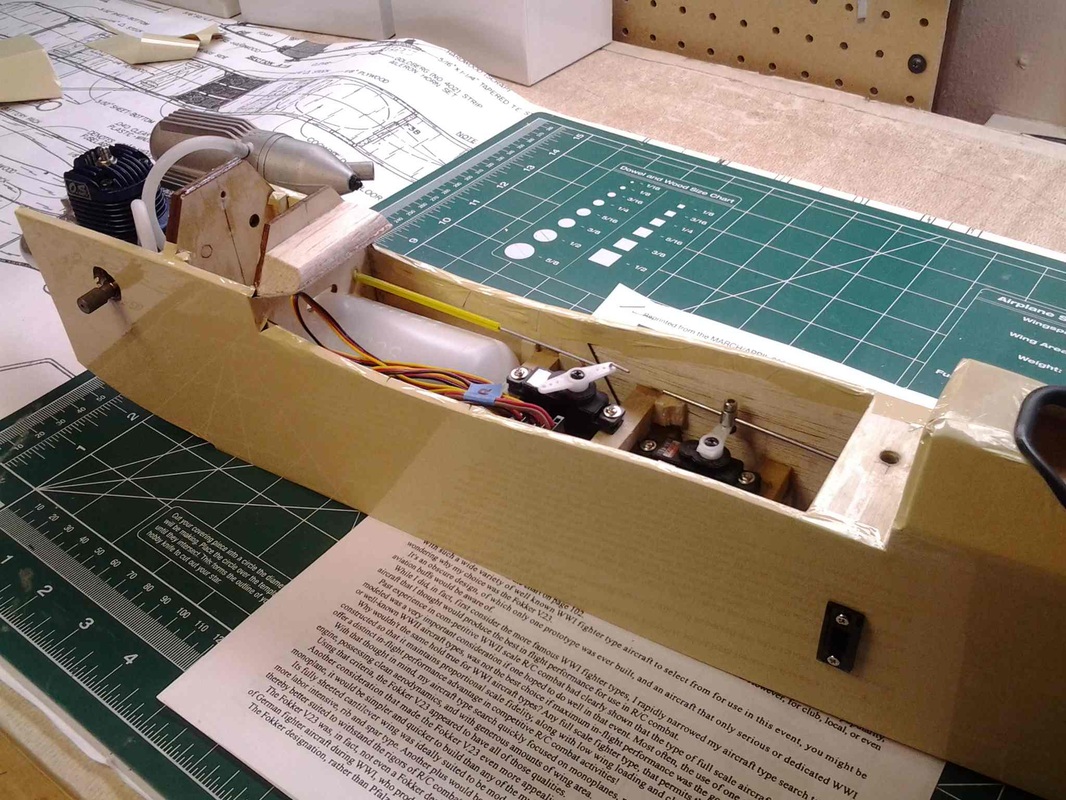
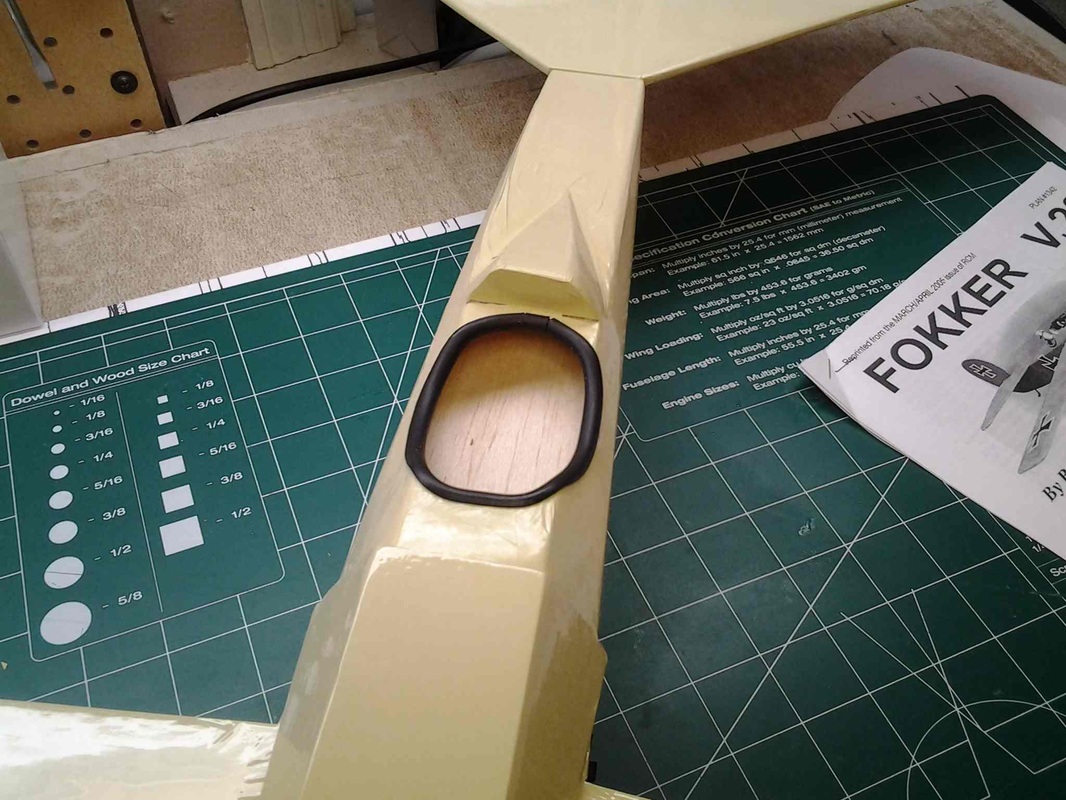
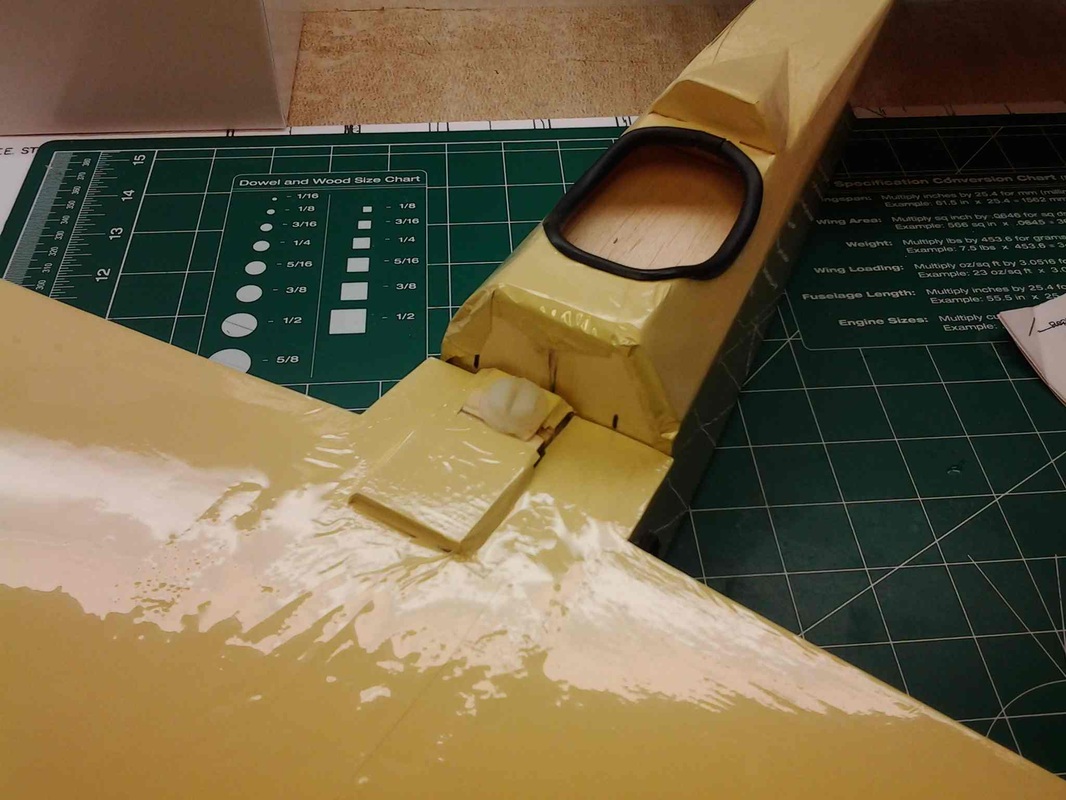
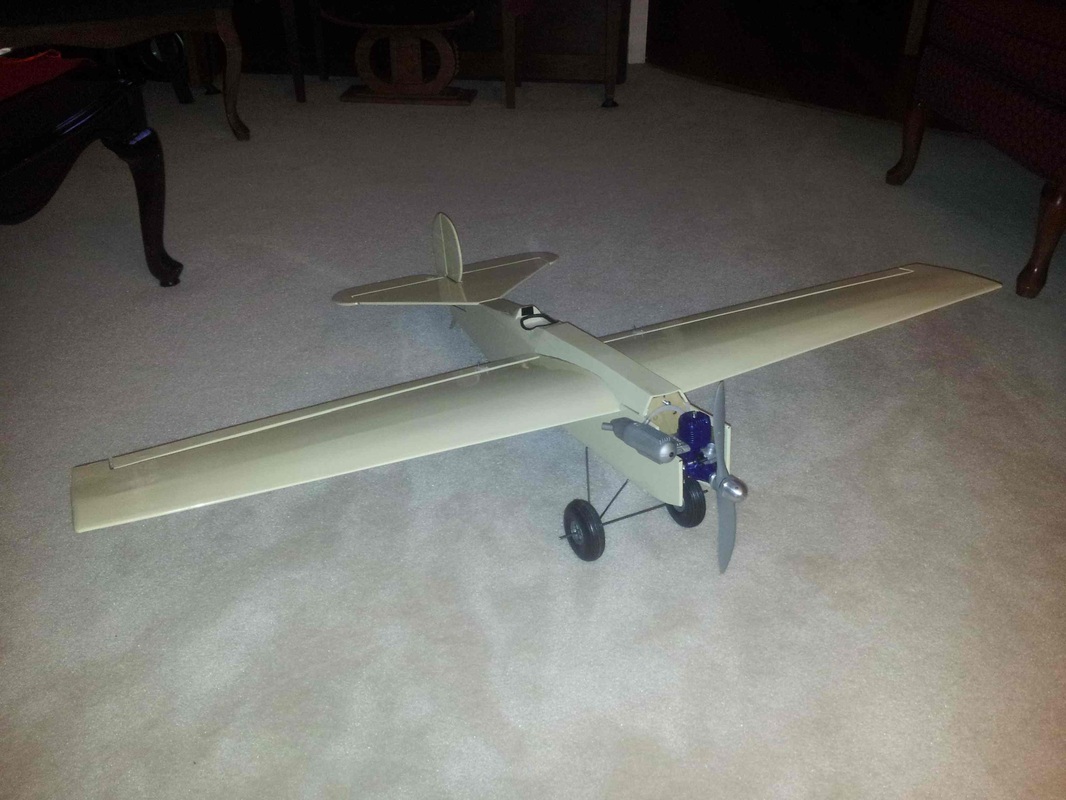
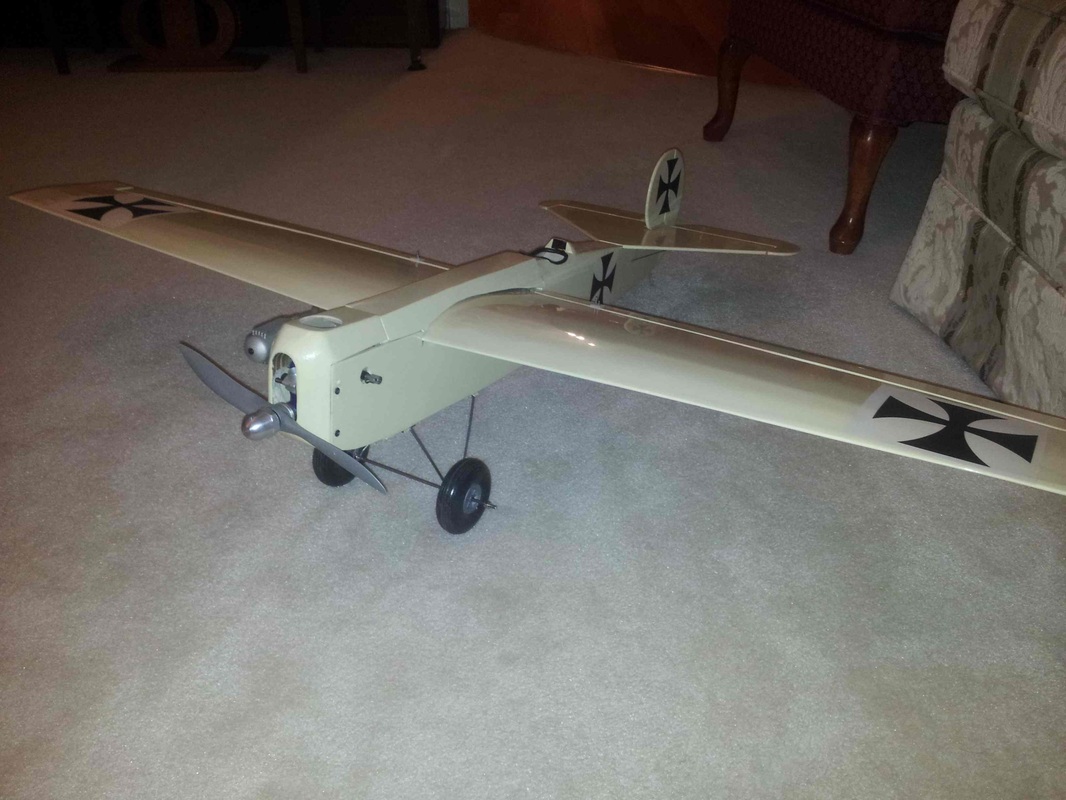
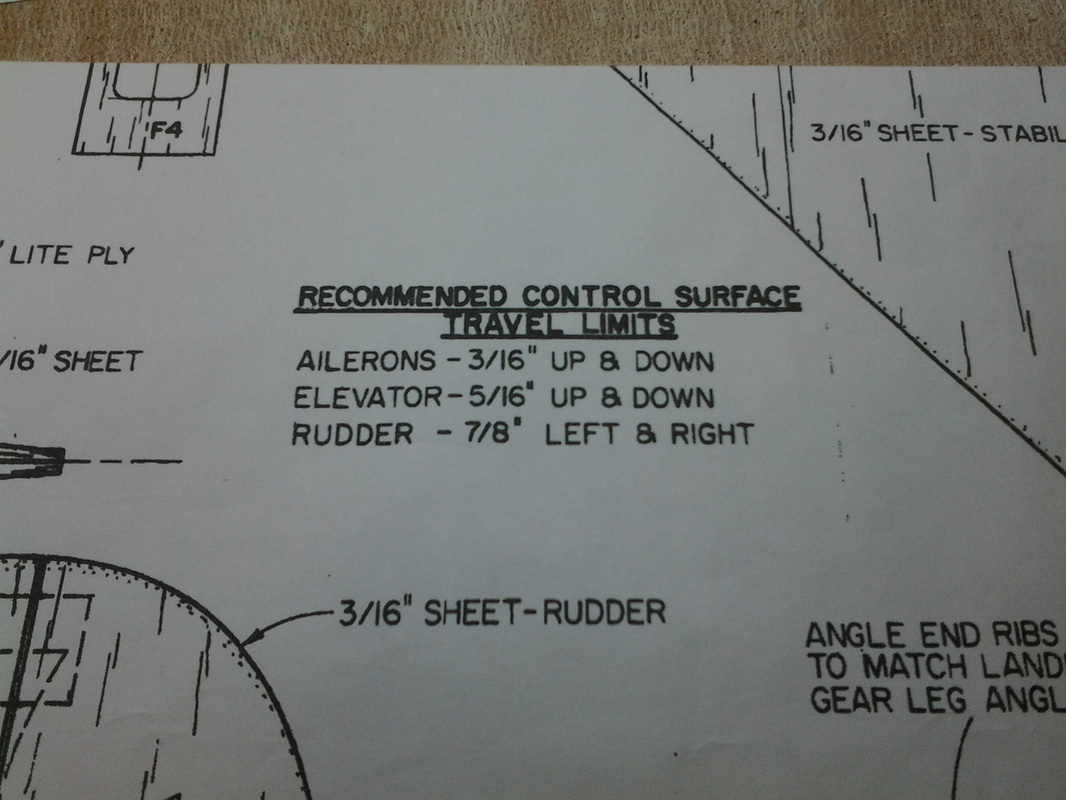
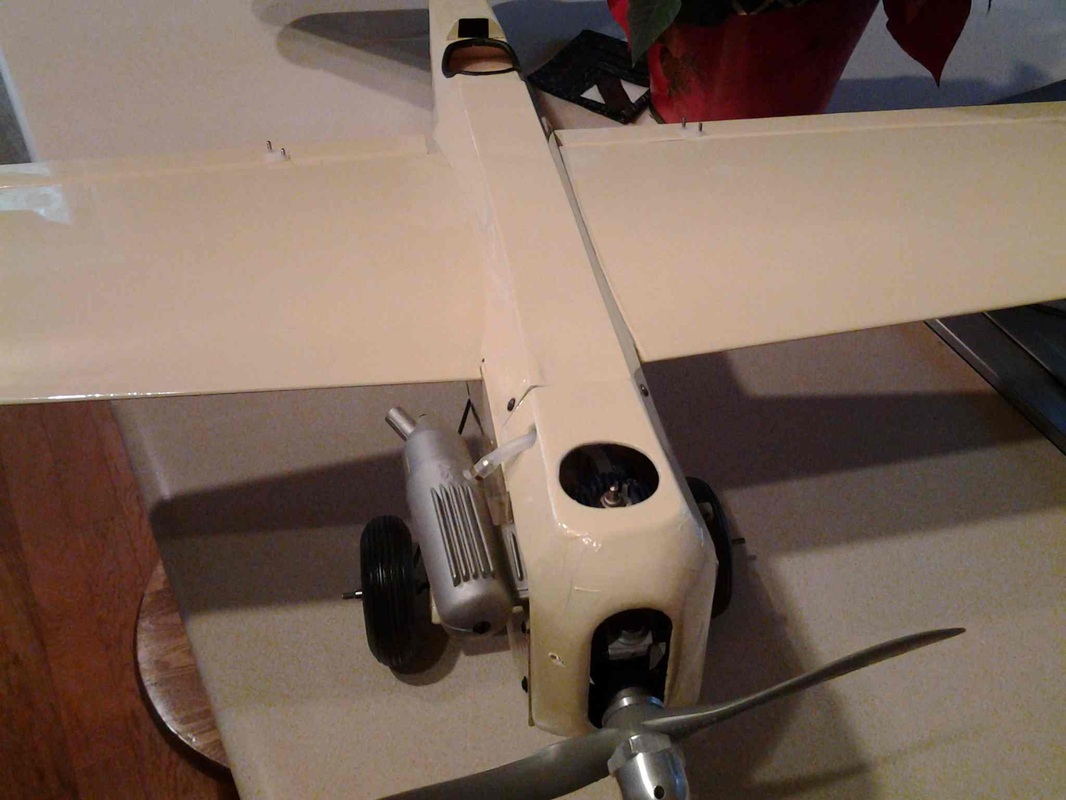
While thinking about that I took the first steps on building the fuselage. 11/26/14 got the fuselage pretty well framed. Also have the tail feathers roughed together. Learned something important for future builds. The elevator halves are supposed to be joined together with a 3/16 hardwood dowel. Well, I couldn't find one so decided to use a bamboo barbecue skewer, seemed pretty rigid. Bad choice. though it is fine in "stiffness", it is NOT fine in twisting strength. The two halves feel like they are joined with a rubber stick! Probably not good for a fast combat plane! I decided to "embed" the aileron servos in the wing. The photos show my approach. I cut the plastic mounting from a piece of vinyl siding material. 12/10/14 Making progress on the fuse and tail section. I was held up deciding on a color scheme as I needed to cover the tail feathers so I could install the hinges and determine the locations of the cranks for both the rudder and elevator. After looking at photos and talking it over with my son I decided to go with Monokote Cream material and color. I think it will look good. So tail feathers are covered, hinges installed, along with control rods and servos. All that allowed me to close in the rear part of the fuselage. One interesting issue there was that the fuselage was twisted a bit. I was also concerned about alignment, that the rudder was on the centerline and aligned down the centerline. So I rigged up a jig from a piece of 1x6 some wood scraps and clamps. Worked very well - I guess the maiden flight will prove that! I'm concerned about battery and receiver location. The fuselage is pretty cramped. Would like to put a 2000mAh battery in but it takes a lot of space and is heavy, making location even more critical. I may go with a 750mAh one that is much smaller and lighter. Sketched out the landing gear wire plan. It'll be pretty similar to the one on the plan but a little different to make it easier for me to make. 12/19/14 I'm nearing the end of construction on this plane. Everything but the ailerons are covered and functioning. I did decide to go with the 750mAh battery and installed it in the fuselage. Sure hope that was a good choice. It weighs in at 2.5 lbs. with engine, propeller, everything but the landing gear and ailerons. And the CG appears to be very close to where it should be as calculated using http://adamone.rchomepage.com/cg_calc.htm. That differs only slightly from where it is shown on the plan. I used I managed to find a space for the receiver, installed a switch and charge plug and tested everything but the ailerons out. All seems OK. The aileron delay is that I'm still puzzling over the best way to hinge them to the wing. They are 20 in. long, 1-1/4 in. wide and taper from 5/16th in. thick near the fuselage to about 1/8th thick at the tip. I don't know if I can slot the thin end successfully for CA hinges or not. I think that is what I'm going to do. I've contemplated using tape, like all of my foam planes do. All the discussions I've read on the various forums lead away from tape hinges on a fairly heavy and fast plane like this one. We'll see. Given the weather there is no hurry. It'll likely be several months before the weather allows enough warmth and light to safely test out a new plane. 12/21/14 I went ahead and installed the ailerons with CA hinges and then put on the control horns and connected everything up. All appears to work well. The Micro-Mark Mini Wire Bender came today (can't believe they deliver on Sunday!). It is very simple and straight forward. Took me about an hour to bend the .032 in. piano wire, cut the 1/8 in. piano wire axle and solder it all together. It turned out very well. That wire bender (#60346) is more than worth the about $20 it cost. You get a very smooth bend right where you want it and can keep everything straight. Next step will be to install it on the plane. Still waiting on the vintage wheels to come. Even my wife thinks the plane is "cute". But she did ask about a cowl. I had all but decided to forget that, but with her remarks, I guess I'll see what I can do! Also got some Avery 8665 Clear Label stock to see if I can make the emblems for it. So still a few things to do before it goes on the wall awaiting warmer weather in the Spring! 12/22/14 Fabricated a cowl for the plane today. The short kit comes with the nose pieces so I glued them together and shaped them. Then Figured out a way to attach it. It turned out very nice if I have to say so myself. The issue that I still haven't solved is how to put fuel into the plane! I was planning to just pull the line from the engine and inject the fuel. But with the cowl on you can't get to that line. And it is too late to add a third line to the tank as it is all enclosed and would be a major thing to remove it. So I'm thinking about that one. Also mounted the landing gear That too turned out well. Last thing I did today is print out the emblems for it on the clear label material. They look very nice. Not sure who they will handle glow fuel! New weight is 2.86 lbs. which is a half ounce under the weight of the author's plane in the article describing the plane originally. And the CG is still good. So one more day ends in a good mood! 12/23/14 Like a lot of projects there is always one more thing to do! Looking at the photos I realized I had forgotten to build the sub wing, the little wing mounted on the landing gear between the wheels! I also discovered that the landing gear was one inch too narrow! So today I corrected the narrow landing gear, built and installed the sub wing. I also installed a fueling valve between the tank and the engine. Now I think all I need are the wheels for which I am still waiting. The photos show the "finished" airplane with some old wheels I found in a box. I printed the emblems on the "clear" labels with my inkjet printer. Will be interesting to see how they hold up. 12/24/14 Christmas Eve. Amazing, tomorrow we celebrate the birth of Jesus Christ, Emmanuel, God with us, the Savior of all who will place their life/afterlife trust in Him. Like I said yesterday there is always one - or more - thing(s) to do on a plane project. I realized I had not allowed for adjusting the idle jet with the cowl in place. Simple fix but an important one. I also reworked the arrangement to keep the upper fuselage piece in place. My original plan didn't allow for a cowl or pilot's cabin, both of which blocked access to the two screws I had planned for. A simple barbecue skewer took care of the rear of the piece and two nice little black screws dealt with the front! "Finally", I put three 1 in. wide black stripes on the bottom of each wing so I can tell if it is upright or inverted when in flight! And I adjusted the travel and set 50% proportional for all the control services. Pictures show all of the above. |


|
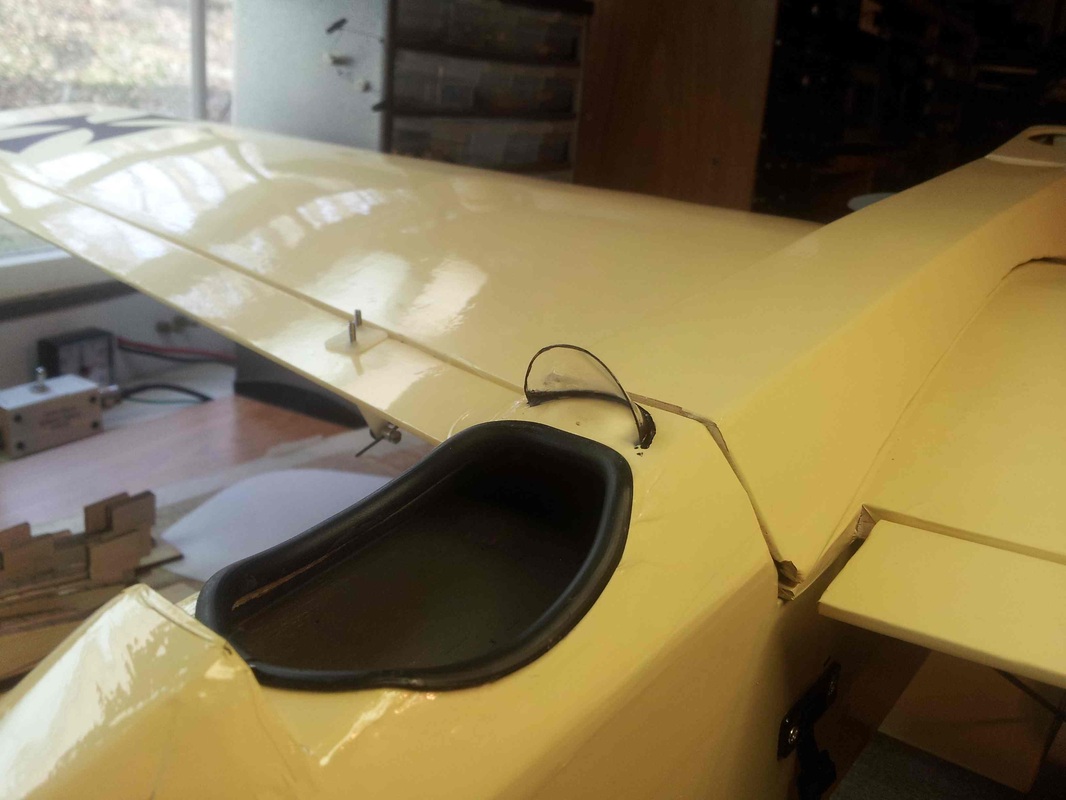
12/26/14 One More Thing... Never done? Discussing windshield ideas with my son last night after Christmas Dinner I said I couldn't find any cement that would effectively stick to the plastic I tried to use. He suggested carefully sanding the edge. Then the idea came up of cutting a slit at an angle in the cabin top with my #11 Xacto knife and carefully pushing the little piece of plastic into that slot, then cementing in place with thin CA. So I tried that this morning. It worked very nicely! Here are a couple photos showing the result. NOW I'm all done with construction...!
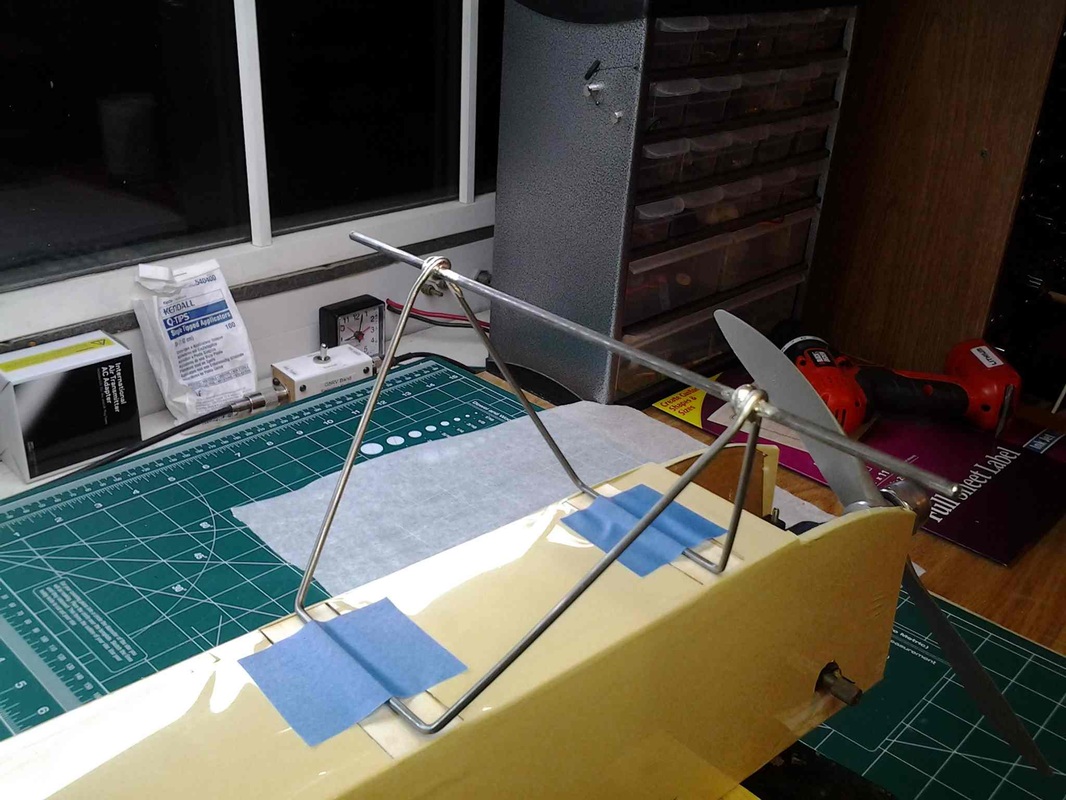
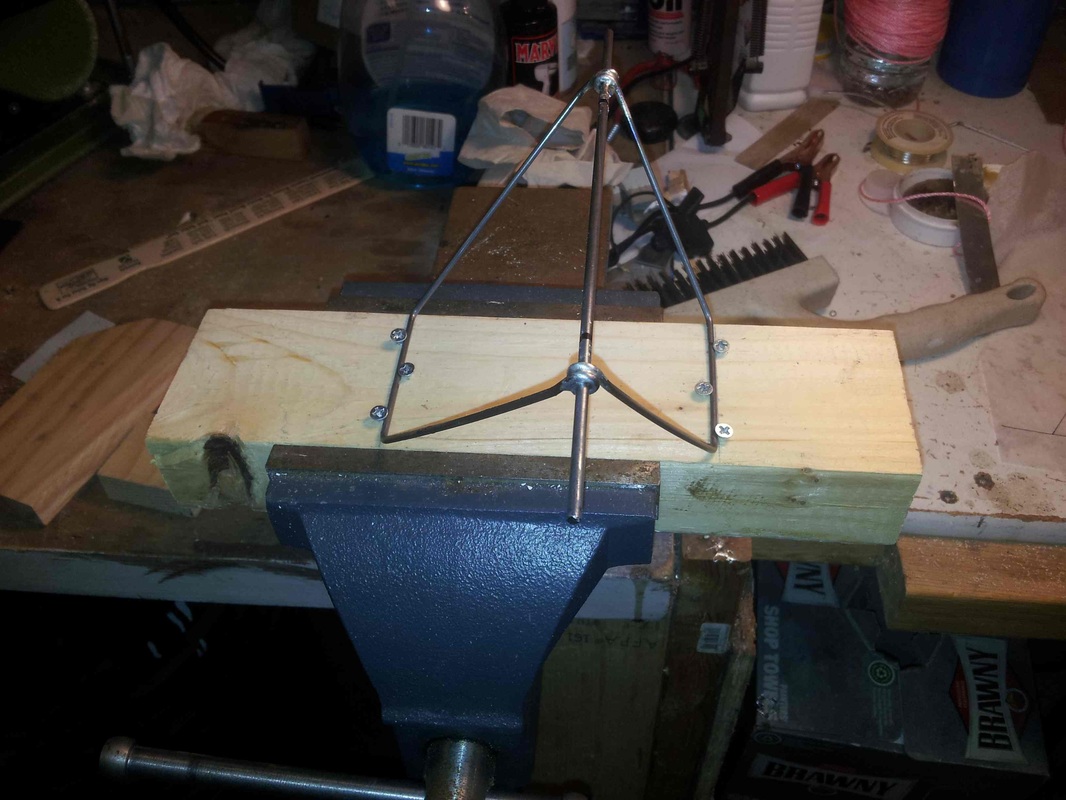
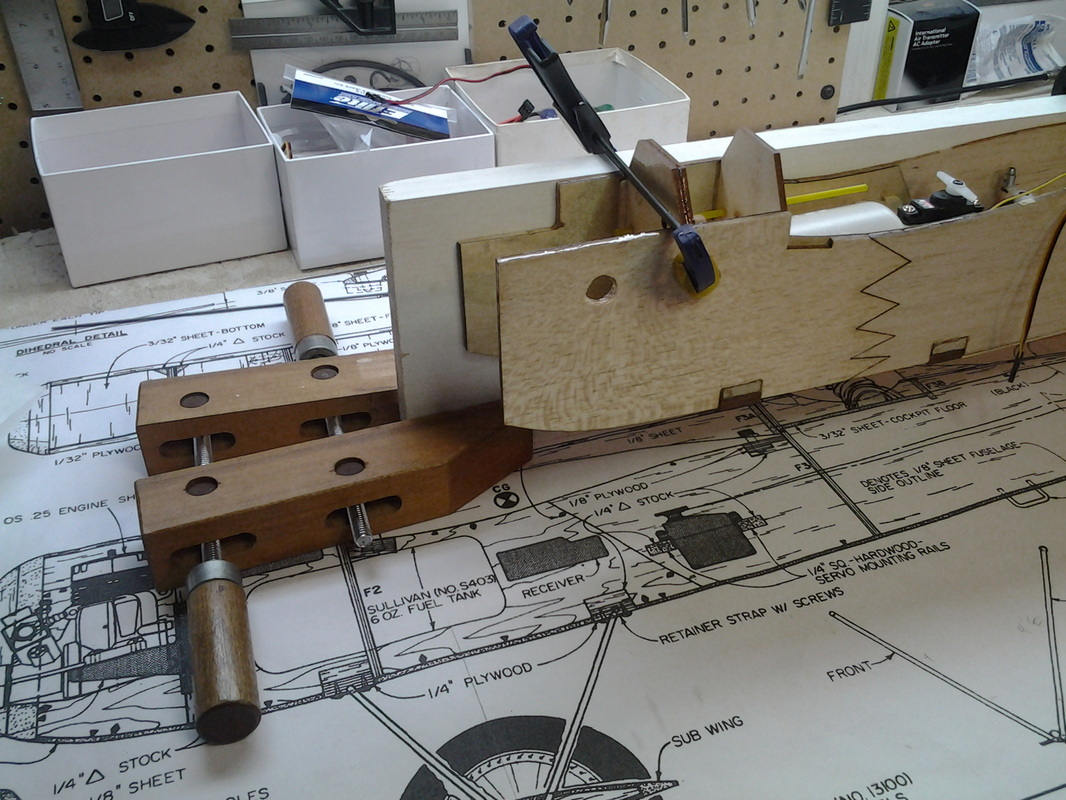
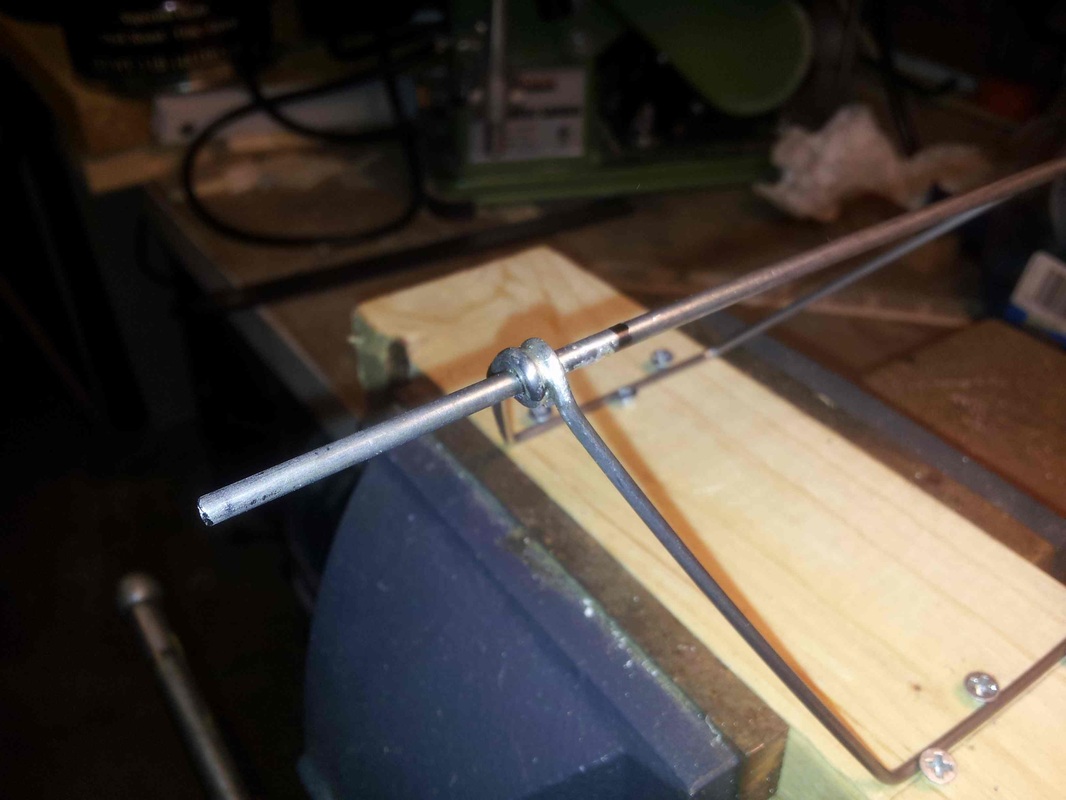
In concluding this build log I just wanted to post and comment on the jig approach I used to hold the landing gear wires in place while soldering them. It was quick and easy and fairly precise. Amazing what you can do with a few wood screws and a block of wood! I have also found that silver based plumbing solder and flux works well on Music Wire. I've used a propane torch in the past to heat the wires but this time I used a 75W soldering iron. I think I like the iron best as it allows more localized heating and avoids overheating.
This has been a really fun plane to build. I am increasingly liking building from short kits and/or just plans. It takes a lot more thought and problem solving which I enjoy. And the result is a unique plane, that reflects you, the builder, for good or ill! :-) I'm on the prowl for my next one....