Cessna 170
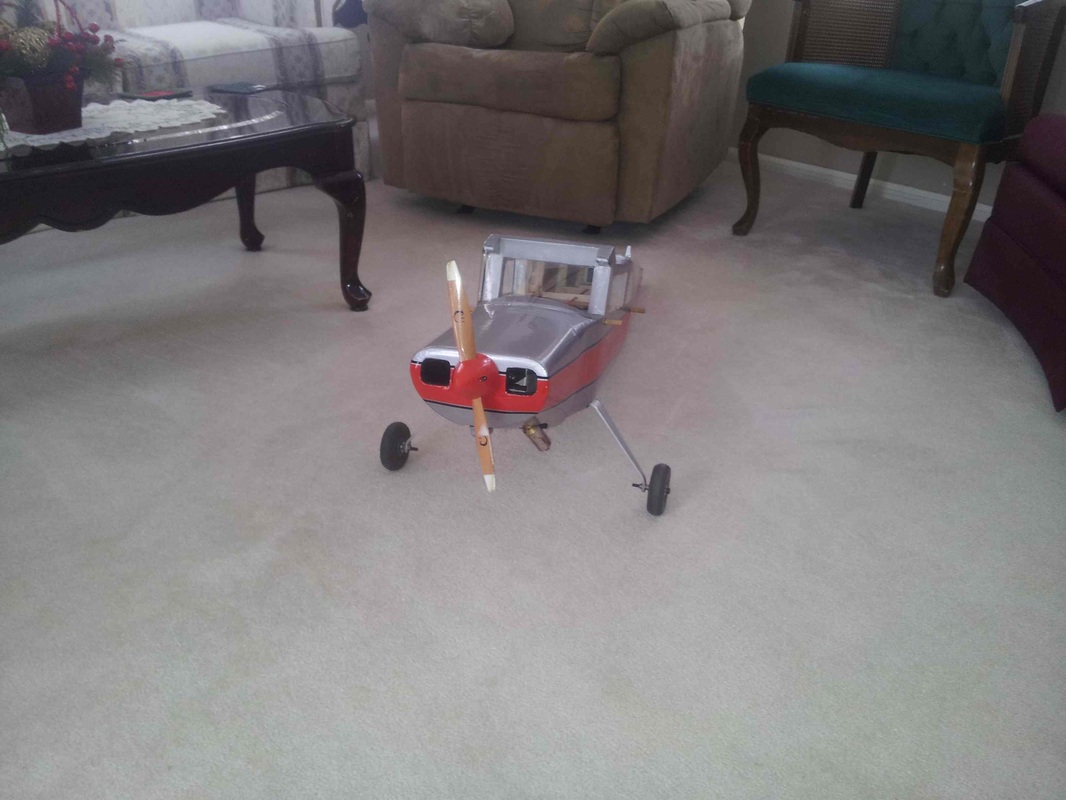
Ready to go!
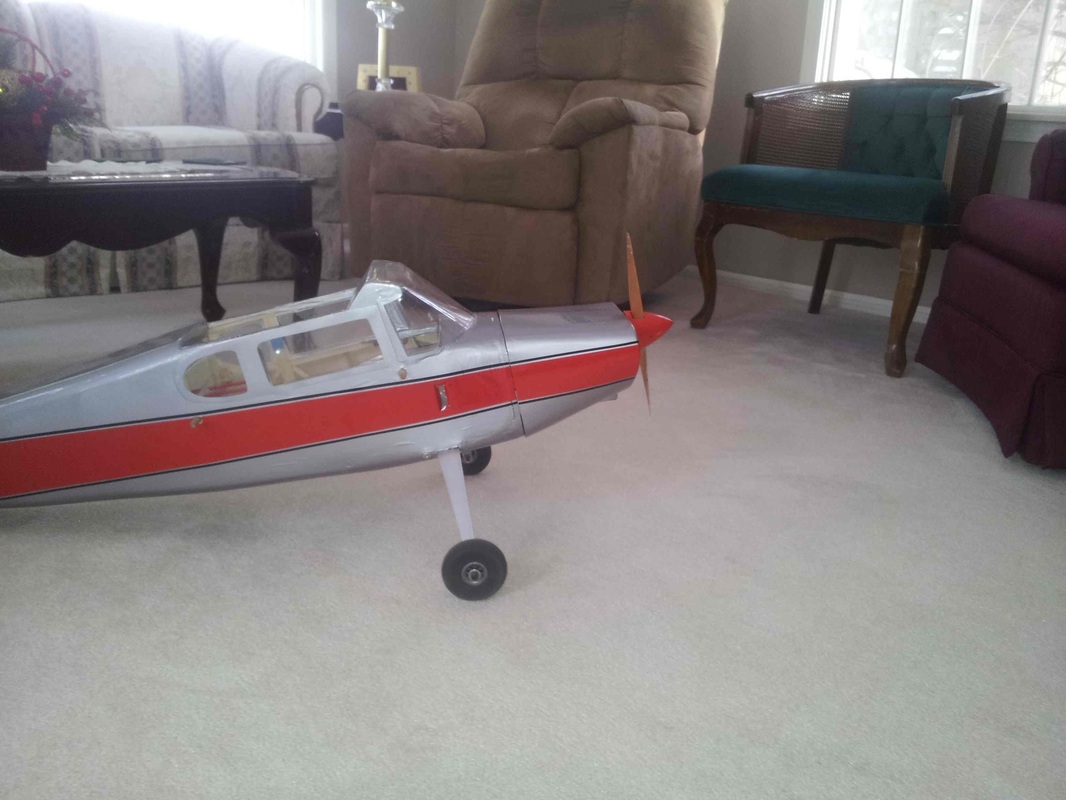
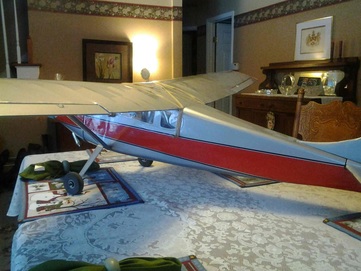
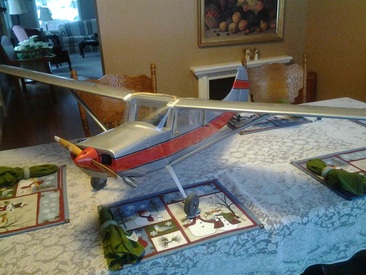
2016-05-09 A couple weeks ago I got the 170, along with all of my glow powered planes out and fired it up to make sure it was ready to go. The engine (a new old stock 4 stroke OS FS-48 Surpass engine) started easily and really didn't need much tweaking to run smoothly from idle to full power. That was encouraging. With the 2016 flying season now under way (I've had several dozen flights with several planes with no re-portable mishaps) I'm about ready to give the 170 a try again. After getting it repaired from the sheared wing back in 2014 I got a Spektrum receiver for the Apprentice with the SAFE technology for it. Then I got cold feet and decided to put the original Spektrum AR8000 receiver in.
But this morning I decided to go back to the SAFE one after I tested it to make sure all worked. Initially I was puzzled, as throttle seemed unpredictable. But looking carefully I realized that I had selected the trainer button on my Spektrum DX8 transmitter (the first version I believe) for throttle cut. It is necessary to push that button once to enable the throttle. (If the gear or some other toggle switch is used it is only necessary to have the toggle set run.) Without doing that throttle will be disable but works normally after that initial pushing it.
So, I think I'm ready to brave the cold, cruel and forgiving world with my baby and try again. If you see tears running down your screen you'll know I did not have a good day!
Flying the Cessna 170 - I wish!
11/12/15 The flying season is over and I never got the Cessna back to the field. Next year!
9/29/15 I put the Cessna 170 on my test stand yesterday and played with the engine tuning based on what I think I am learning about engines, particularly the air bleed carburetor. It idles smoothly and without bogging down at about 3500 RPM and has a smooth running top end of about 8200 RPM. That is with a 12x6 prop which is on the large side for the 4 stroke OS FS-48 Surpass engine. Now if I can crank up enough courage to fly it....
9-26-15 I've been mulling over my inverted engine problems with the Cessna while flying other planes. I think my problem is that I have the idle too rich. I've discovered that is my problem on most of my engines. Happened again today on my Escapade with the ASP FS-52 engine I originally had in the Cessna. I thought all was well but as I was carrying it out to the field, idling, it began to sputter a bit and then quit. I went back to the starting table and sure enough it was idling rich. The test I used is to pinch the fuel line at the carburetor. If it stops immediately it is too lean. If it speeds up for several seconds before it dies it is too rich. I think it should surge for about a second or two then die when it is just right. That point also seems to get the smoothest transition to full power. One of the guys at the field told me that trip several weeks ago when I was helping my son tune up his ASP FS-52 engine. I'm going to get the Cessna off the rack this week and play with it. I think it should and can work and that plane needs to be flown!
6/30/15 I'm about to think this plane is not supposed to fly! I've had it out to the field twice this season. The first time one of our lawn mowers was leaking fuel and I spent most of the flying time messing with that. The second time I got it fueled up, run up and ready for a test flight. But it died during taxi and for the life of me I couldn't get it started again. I think I have about had it with trying to run a 4-stroke engine inverted. I know they should and do work but my engines that never cause any problem right side up just won't seem to keep running inverted. So I'm mulling over trying to deal with that somehow. Maybe horizontal? I hate to mount it upright as the cylinder will have to protrude through the top of the cowl which just seems unsightly on this plane. We'll see.
Cessna 170 Short Kit Build
|
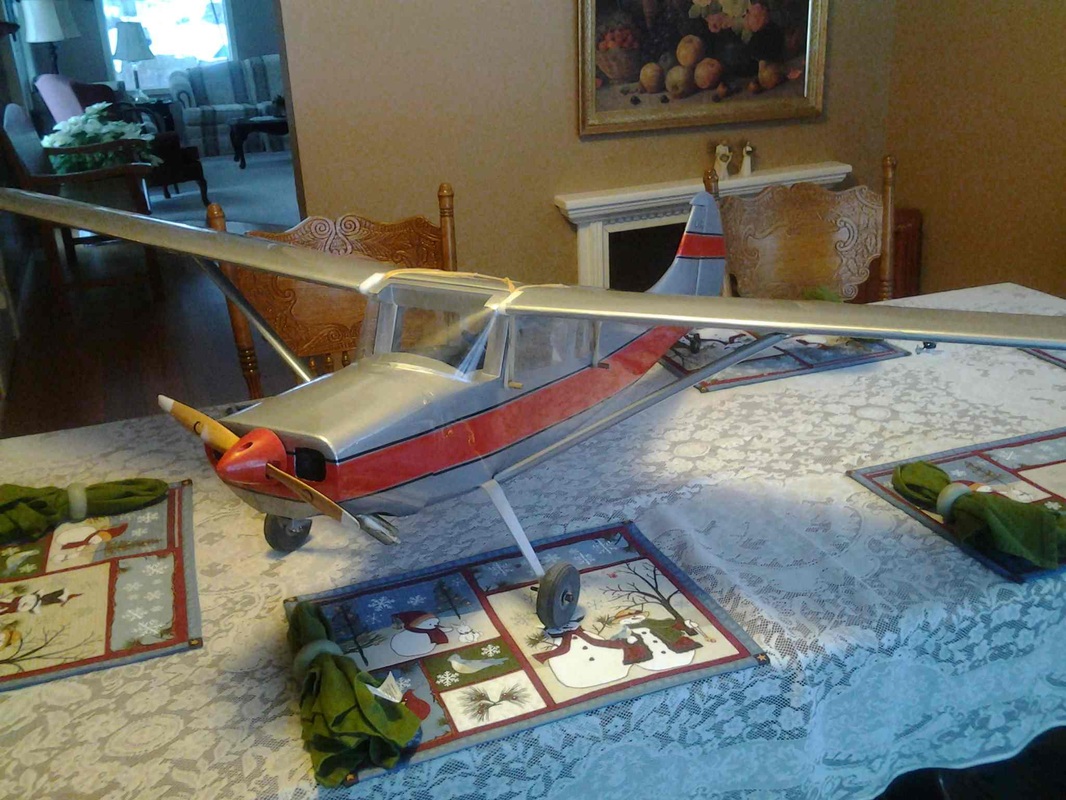
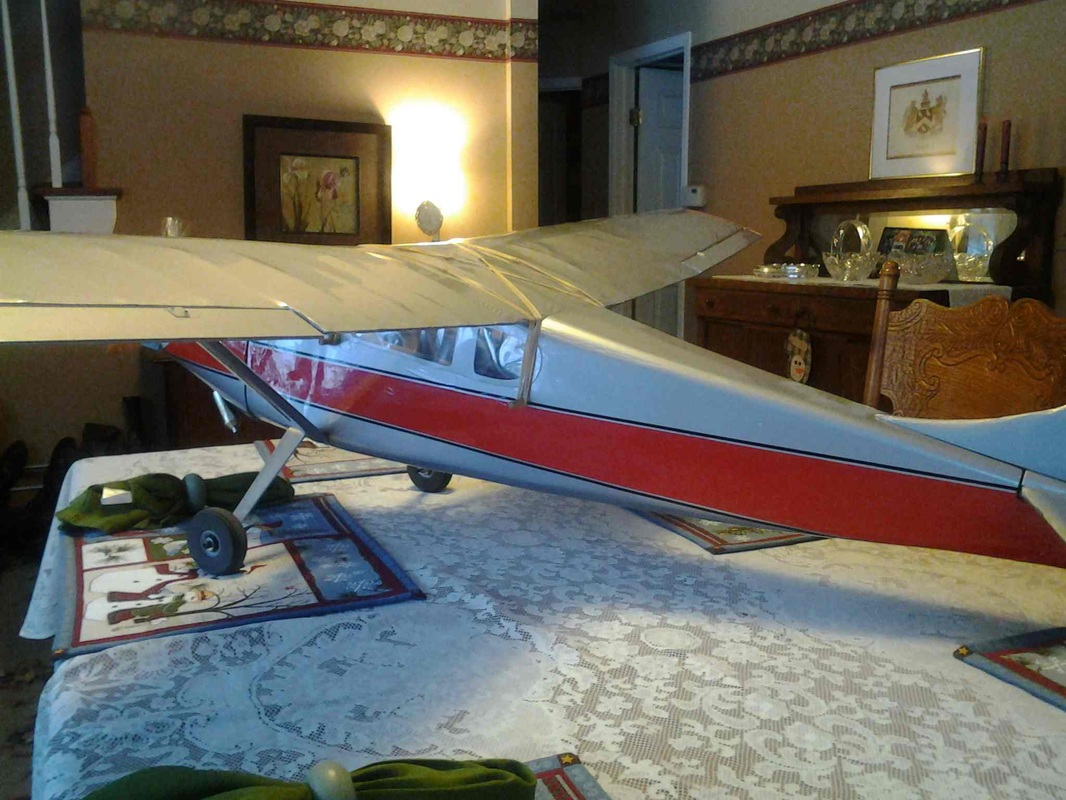
After building and successfully flying a couple kits I wanted to try my hand at building from plans as opposed to a kit. The result is the 72" Cessna 170 based on a Berkeley design and drawings by SIG dated 1954 shown here. Building was completed over a four month period this past winter using the Short Kit from laser-design-services.com.
|
This was my first Plans/Short kit build and it was a lot of fun. The plans are very good but it still requires a lot of thinking things through which for me was the fun part. I completed and maidened the first build in April 2014. On the third flight the left wing sheered off resulting in a rather dramatic crash. After hiding the sad pieces away for a long time, in January 2015 I decided to try to rebuild it. That is now essentially complete. Just waiting on good weather to see if the rebuild was successful. The following is the story of both the build and rebuild. The rcGroups build log has more details about the original build.
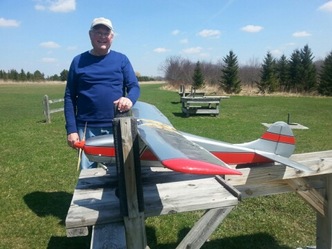 Before the first flight
Friday, April 18 was the day of the maiden flight of my Cessna 170. I and my son who was my spotter were both too nervous to take any flight photos but here I am just before the flight. The plane lifted off easily powered by its ASP FS52AR 4 stroke glow engine and only required minimal trim adjustments. The only "glitch" was as I was setting up for a landing the, engine quit! But the planes gliding characteristics are admirable and I was able to complete a 270 degree turn and bring it in nearly perfectly. It was one of my best landings ever with any plane. Still not sure why the engine gave out but will check it out thoroughly before the next flight.
Saturday, May 17 I decided to give it another try. After tuning the engine it seemed to run fine both at idle and full throttle.
On first takeoff a gust of wind caught it before and took it into the bushes. No damage.
Fired it up again and had another go. Lifted off fairly well (a bit erratic due to the pilot!). Was getting the feel for it after several minutes when the engine quit again! This time it was quite a ways off and pretty high so I headed back to the field, made a 270 degree turn and lined up. Conditions were gusty and it came in well and slow but at the last second dropped fairly hard from a couple feet. Crunched a landing gear mount! I knew when I built it that the landing gear was a weak point. Everything else is undamaged. It'll be a fairly involved repair but it will fly again.
The engine stopping is driving me crazy. This was again around half throttle. Reading up on 4 stroke engine and ASP ones in particular I'm wondering if I need to adjust the valves. Some suggest that if they are too tight then when the engine gets hot the valves may not close completely making it run erratic or die. Clearly this is with the engine hot, after about five minutes or so in the air. I've never checked the valves in this engine so will do that.
In the meantime.... back to the construction/maintenance shop!
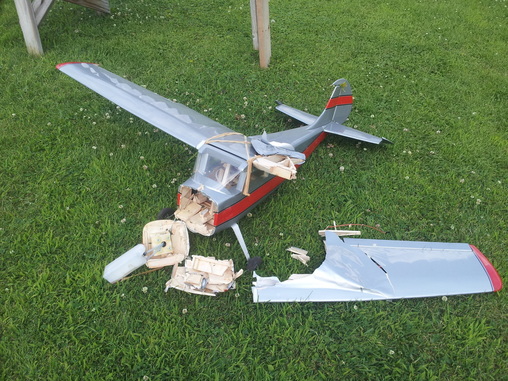 After the 4th Flight!
Today, Friday, June 13, 2014 I decided to replace the ASP FS52AR 4 stroke engine with an OS FS-48 Surpass 4 stroke engine that I got off eBay a week ago. I've been flying one of those in my Great Planes PT-40 for a year with absolutely no trouble with it at all. The mounting holes, hoses, throttle linkage, everything fit perfectly. I just finished running it for probably the equivalent of a tank. It started immediately. After tweaking the high and low speed needle valves it just runs very smoothly, transitions well from idle.... I never was happy with the way the ASP ran. It always sounded tentative instead of completely smooth no matter what I did. If the wind cooperates I plan to fly it tomorrow. I hope it will perform exactly as my other FS-48. That one was used, with a stuck valve when I got it but the valve came free very easily and it has never caused a bit of trouble. The one I installed today was clean and obviously run very little if any. If this solves my problem I may quite buying "less expensive" engines. I suspecting that the carburation on the OS engine is better than on the ASP, but that is just a guess and probably not fair to ASP. I plan to communicate with them about it if they will communicate.
Returned from the flying field a while ago (6/14/14). Engine performed well. But upon my takeoff attempt the left wheel seized up and bent the left axle! I had used 8-32 machine screws for the axle. Bad idea. Couldn't field repair so pumped the fuel out and set it aside. I went to the hardware store and got two hardened M5 bolts with a long shoulder to act as a smooth axle. Had to do a bit of drilling but they are now installed and look good. I think they'll do better because they are stronger and have a smooth shoulder for the wheel. Next week....
7/18/14 Well, today wasn't the best day for me or the Cessna. The OS FS48 Surpass engine performed perfectly. But I had a lot of trouble stabilizing the plane in the air. Takeoff was beautiful. But it was all out of whack trim wise. After a short flight I managed to get it back on the ground safely, not pretty but safe. We looked it over, adjusted the trim to compensate for what I was experiencing and then after a pause I took it up again. Once again the takeoff was smooth and it the adjustments definitely made a difference. In retrospect I am sure I had way too much travel on all the control surfaces as it would dive this way and that with just a little input. After about four or five minutes I took it across the airstrip, began the left turn to do the 270 degree turn and line up with the runway. I turned too steeply and it went into a dive. I righted it and pulled up and thought all was going to be OK when the left wing sheared off! We stomped around in the weeds and found both the wing and fuselage. From the front of the fuselage cabin to the tail and the right wing all is well. But since it nosed into the ground the engine came through the firewall and the cabin front wall so everything ahead of the windshield is destroyed. And of course the wing is not in good shape. All the electronics tore loose also. I cleaned up the mess, took all the servos and receiver and battery out and put it on the shelf to think about for a while. I'll probably repair it but it will be a while! Just to be sure I hadn't totally lost all skill I went out and flew my Great Planes PT-40 today. It and I came home intact with one of the best takeoff and landing pairs I've ever done! :-)
|
November 13, 2014: Well, after several months and with winter coming early (the next week or so will be below freezing) I decided to get the pieces of the Cessna 170 down from the rack and do a serious assessment of the damage. The good news is that in fact it is "relatively" minor. The fuse is intact from the cabin front to the rear. The relatively soft, weak balsa that holds the firewall probably saved a lot of damage as it completely collapsed, taking most of the force of the nose-in crash. The wing is of course broken just to the left of the fuse and where the plywood spar converts to all balsa. The right wing is essentially untouched and the left wing beyond the break point is also nearly intact.
After looking it over I think I will build a whole new wing and this time may use basswood for the main spar and perhaps extend the plywood. I think that will be less work than trying to rejoin the wings and strengthen the spar. The balsa spar may actually have been OK had I flown with the wing struts installed but I'll feel better with a better main spar. Rather than cut out the ribs by hand I decided to reorder the short kit which should make it a bit easier. So here goes. I've cleaned up the bits and pieces, made up a plan in my head and ordered the short kit. Can't wait for next Spring. And if eflite begins selling their SAFE technology receiver again, I think I'll install one in this place to protect my investment from myself next time! 1/2/15 With the wing nearly completed, have been thinking about fabricating an aluminum bracket to mount the engine mount to the front cabin wall instead of the rather involved balsa and plywood one in the original. One issue will be weight so need to do some checking prior to proceeding.
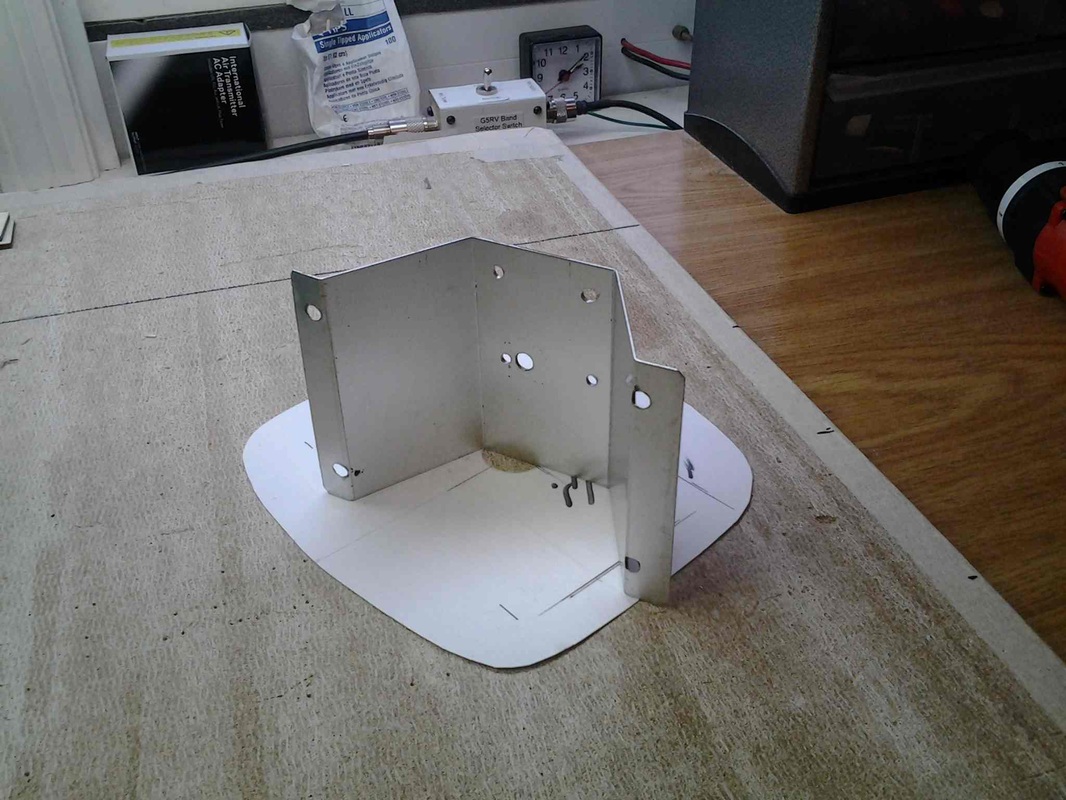
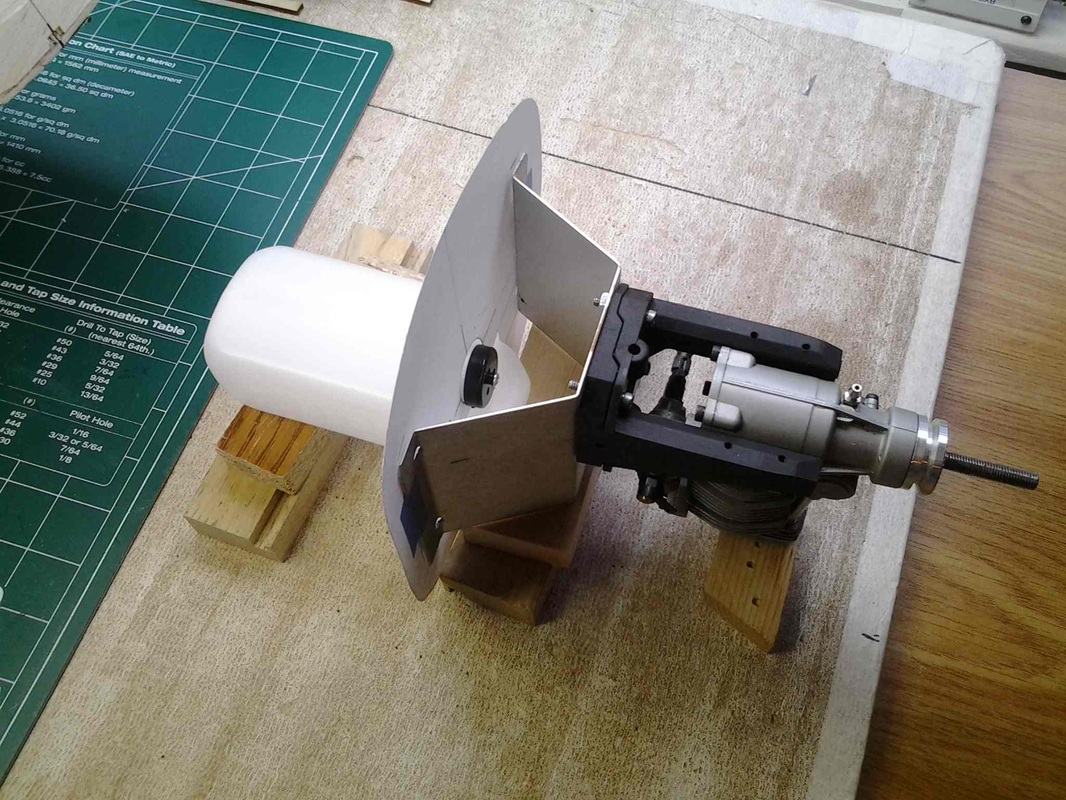
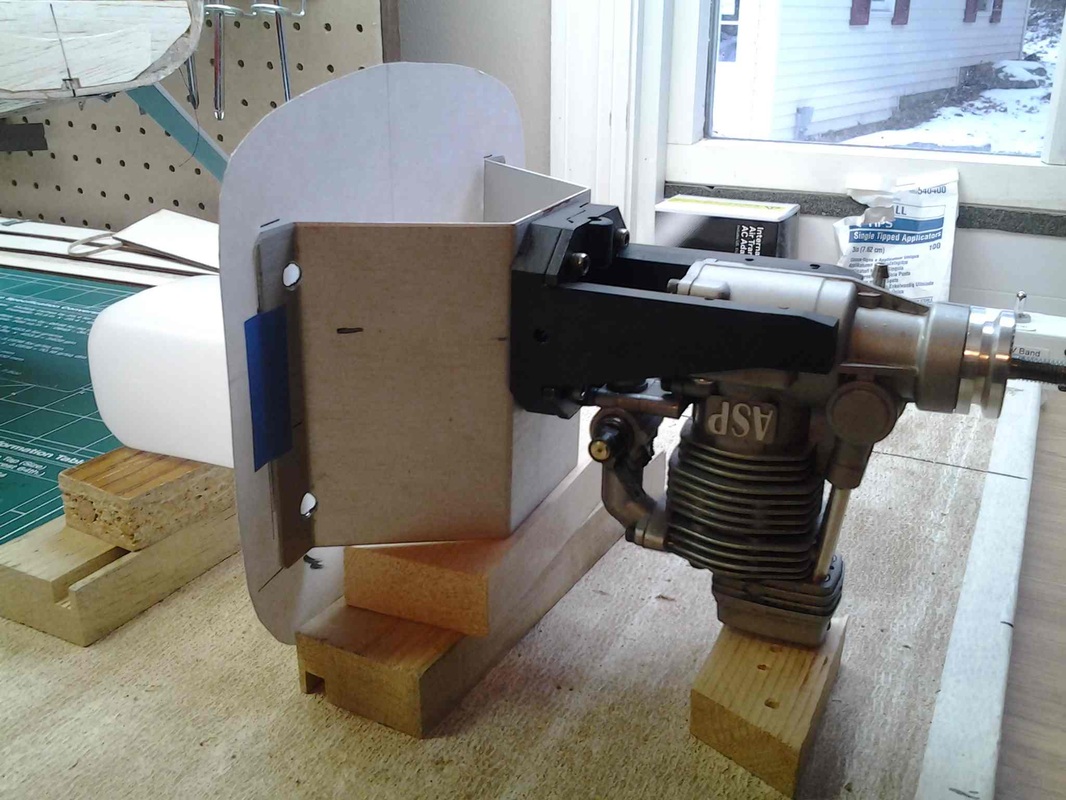
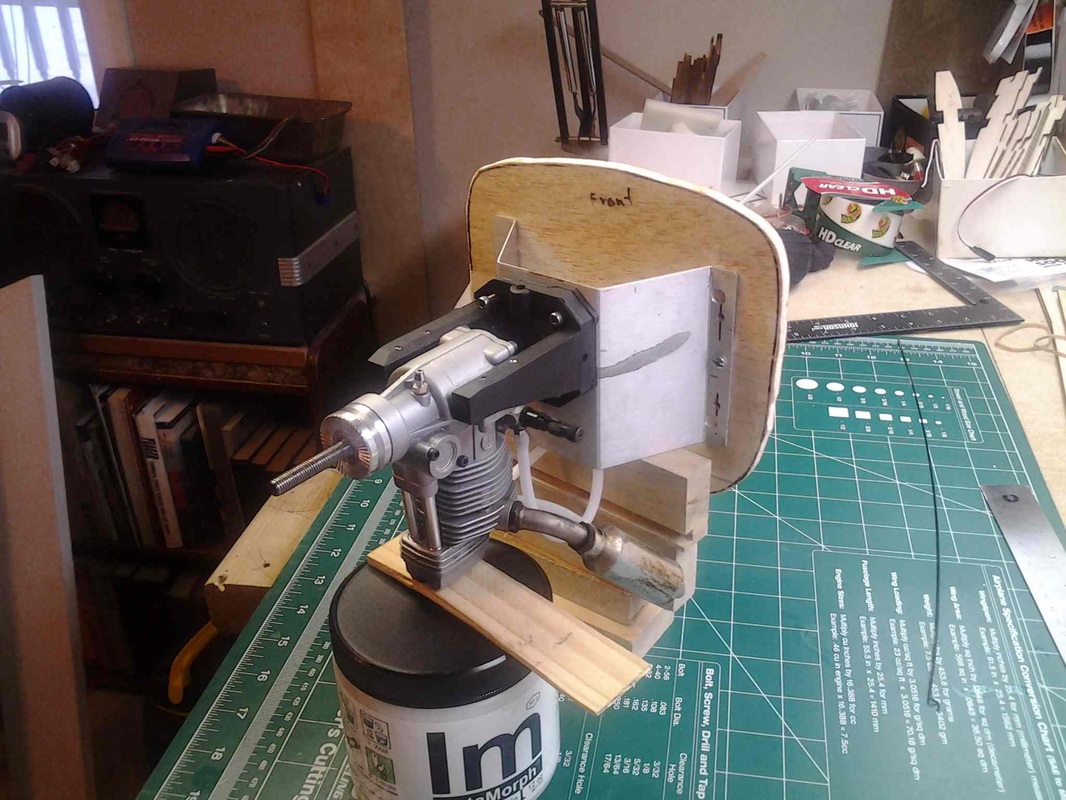
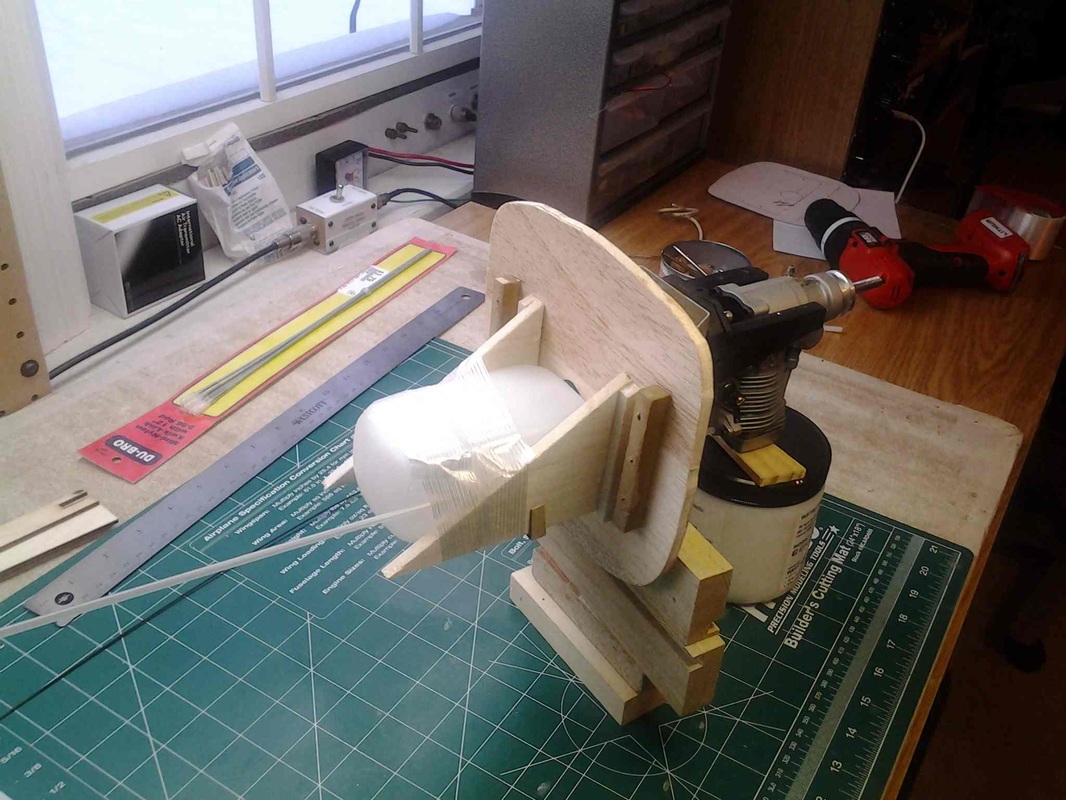
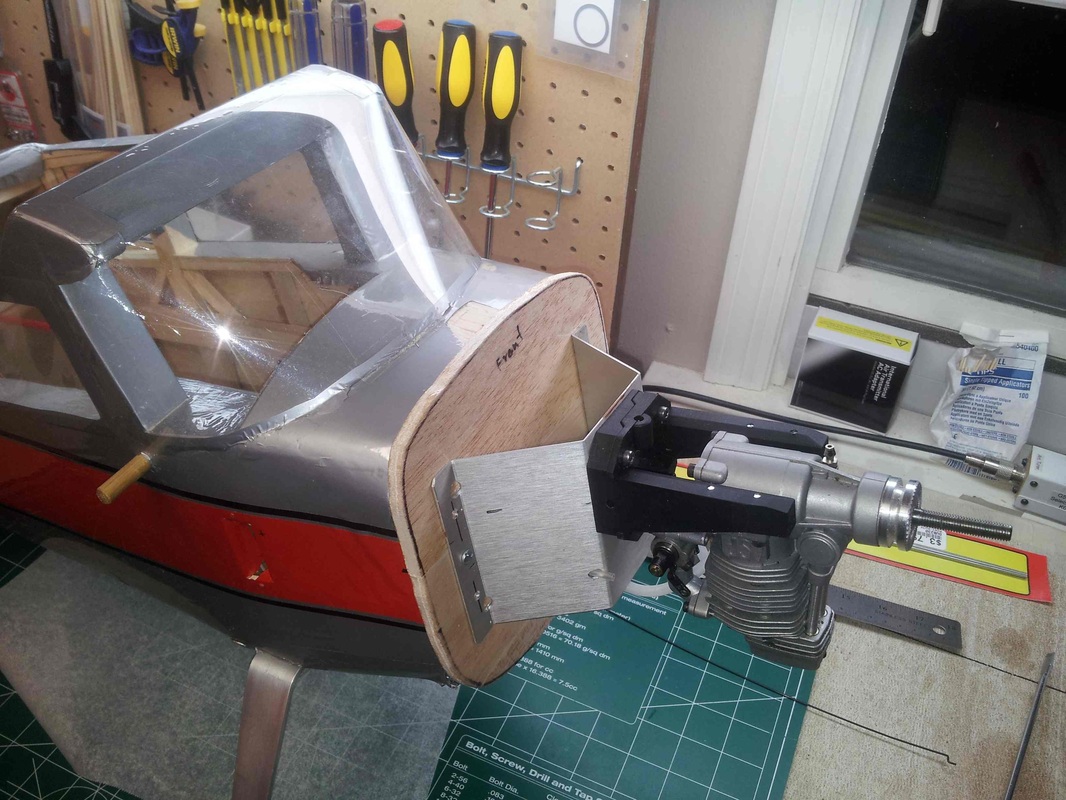
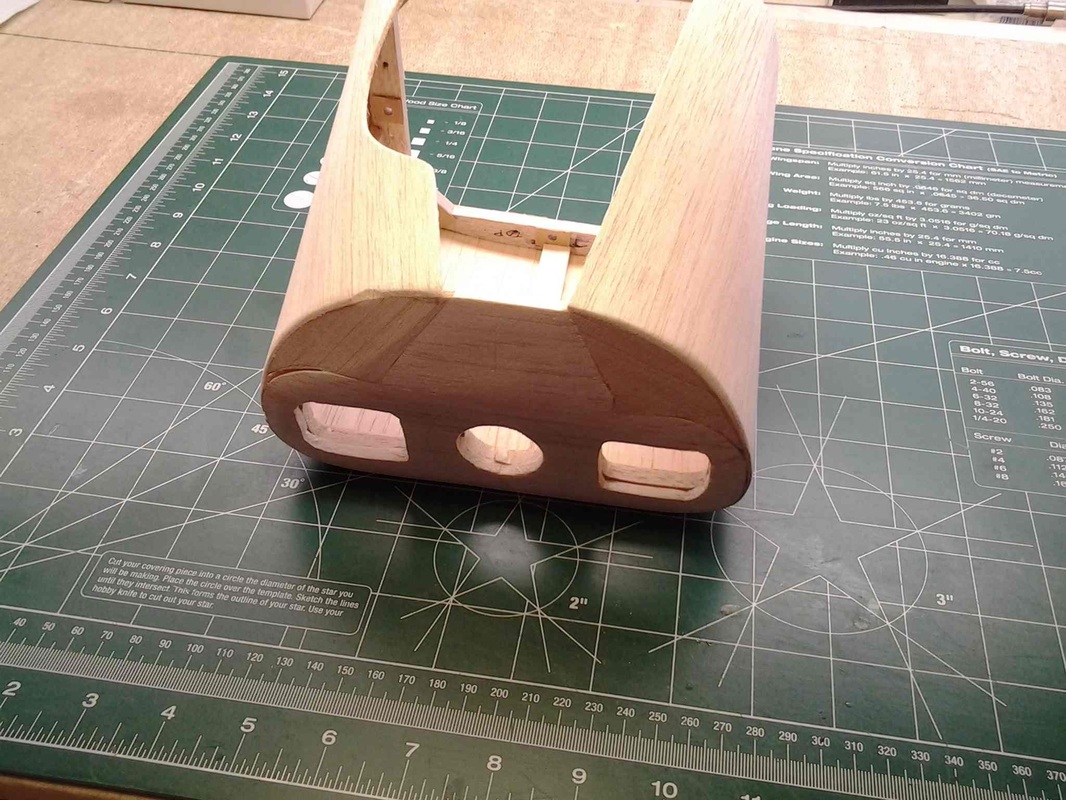
Another issue is locating the fuselage/propeller shaft centerline. That was a challenge on the original as the plan really doesn't identify it in relation to any of the surfaces that I could see anyway. I had carefully marked the center of the prop shaft location on the front cabin wall early in the original construction. With the cabin wall destroyed I am without any simple reference points. An interesting situation. 1/3/15 Decided to design and build the aluminum engine mount. On the original plan there is a 1/4 inch sheet balsa front to the cabin. Then extenders made of 1/4 balsa sheet on edge that form the four sides of a box with the cabin front on one end and the 1/8 plywood firewall on the other end. The ending mount is attached to the firewall. In the crash the engine smashed through the firewall and extenders pushed through the cabin front. In fact all that collapsing may have saved a lot of fuselage damage so that is the up side. The down side is that building that box is tricky. Since everything is cemented in place everything has to be "perfect" as later adjustments are difficult. Further more you have this rather large box space between the cabin front and firewall to traverse with throttle linkage and fuel lines with virtually no access to the inside of the box. Enter the aluminum bracket, which takes the place of both the balsa extender box and plywood firewall. As I mentioned earlier I was concerned about weight. Turns out that it is slightly lighter than the wood structures it replaces! And it gives me good access to fuel lines, etc. The photos show a mockup of the cabin front plate, fuel tank, bracket and engine using a cardstock template for the cabin front. 1/5/15 Finished assembling the cabin front wall, engine bracket, engine mount and fuel tank and epoxied it all to the plane. I puzzled a long time over whether to do a plywood cabin front but decided to use balsa. I had some hard 1/4 in. balsa that I glued into a slab and then marked and cut out the shape and cut out tank openings. I also strengthened it where the aluminum bracket mounts with 3 in. x 1/2 in. square stick so the engine force is spread across much of the cabin wall. Also decided to epoxy that front wall to the fuselage. I contemplated figuring out a method that could be easily removed but just got too complicated. The photos show how it all went together.
|
December 10, 2014: I now have the parts and materials to tackle the wing, thanks to good help from Bob at Laser Design Services. Am anxious to get started. I also purchased the E-flite Apprentice S (SAFE RX) receiver to use in it. If it performs even half as well as it does in the Apprentice, I'll be very happy.
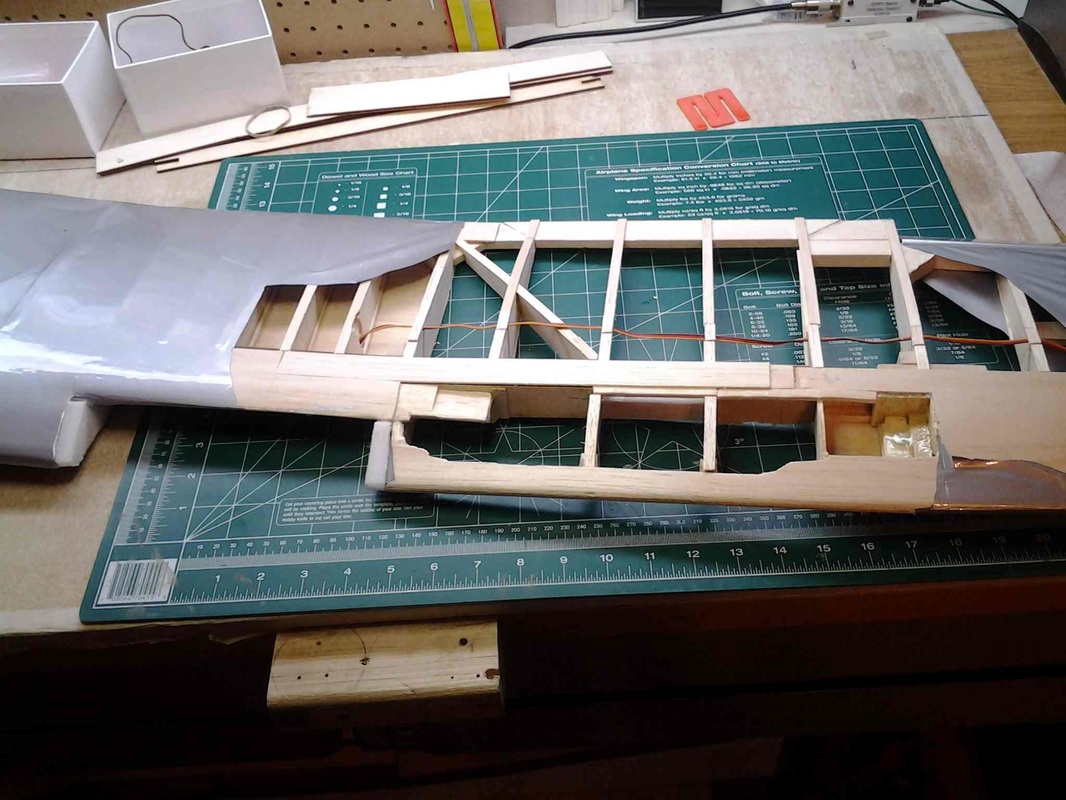
December 31, 2014: With work on the Fokker V.23 finished I have turned my attention back to the Cessna 170 wing. Spent quite a while the other day looking carefully at the damage and decided to try to repair it rather than start from scratch. The right wing is completely undamaged and other than the break at the end of the ply wood spar reinforcement the left wing is also in good shape. It will take a little creativity to repair the spar but I think it is doable. That won't result in a stronger main spar but if I AWAYS use the struts I'm thinking it will be fine. 1/2/15 Did some work on the Cessna 170 wing over New Years and pretty much completed rebuilding the framework. A bit of sanding and other minor things before covering. Once that is completed will resume work on the fuselage. I used the little 18 inch sheet metal brake I got a few years ago at Harbor Freight to bend the aluminum. The aluminum is a somewhat hardened grade about 1/16th inch thick, seems pretty strong. Still thinking about the best way to mount the cabin front plate. the original was simply cemented to the front of the fuselage shell with medium CA.
On a side note, reading up on proper mounting of an inverted 4 stroke, many writers emphasize the importance of the centerline of the tank being in level with the engine needle valve to avoid overloading the engine, which would be noticed especially at lower RPMs. I realized that in my original install I had the tank considerably higher than that. It was also located at least six inches behind the engine. Perhaps that explains why it would run "perfectly" on the ground at nearly any RPM and for an extended time while in the air it would stop - at lower RPMs. On the ground the tank was down and the engine up since it is a tail dragger. But when in level flight the tank would be above the needle valve. Interesting theory at least! |
|
1/6/15 The Cowl. That is my puzzle now. I made the one destroyed in the crash out of Balsa. On the one hand I sort of liked it but on the other hand It didn't look just right.
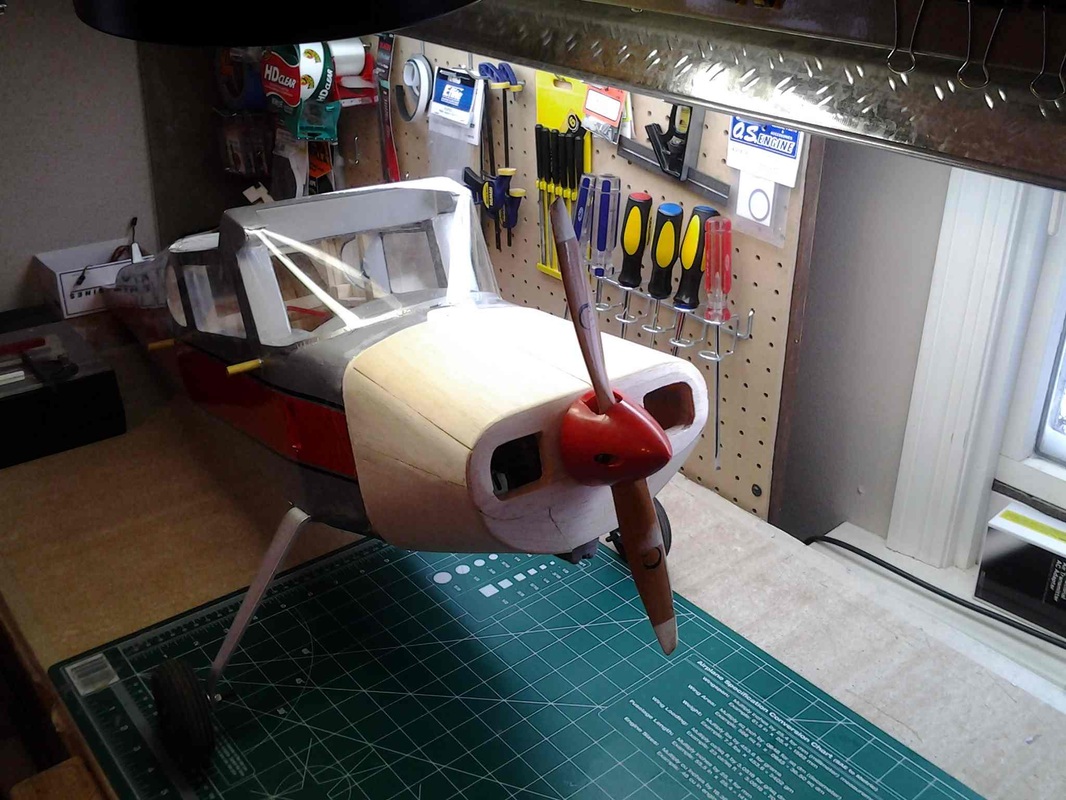
I decided to go online and study various approaches to cowl making. The two most novel ideas both required making a plug of the cowl. A common thing is to then lay it up with fiberglass and resin. But one guy used panty hose material instead of fiberglass. Another used paper Mache! I had thought of the paper Mache idea but don't think I would have come up with the pantyhose, though they make a lot of sense to me. As he pointed out it is easy to get a good smooth fit! Making the plug is the bigger challenge to me. I also spent some time looking at photos of real Cessna 170s and finally found a good nearly straight on side view and made a copy of that. I then adjusted the size on my computer to fit my fuselage and checked clearances. To my surprise it would work. But I still have to work out how I want to fabricate one. Something to sleep on! 1/11/15 OK, the cowl is "done." I put that in quotes because I have learned one is NEVER done with these things! But I think it is ready to fly. Now to install the servos, battery, receiver, power switch, etc.
|
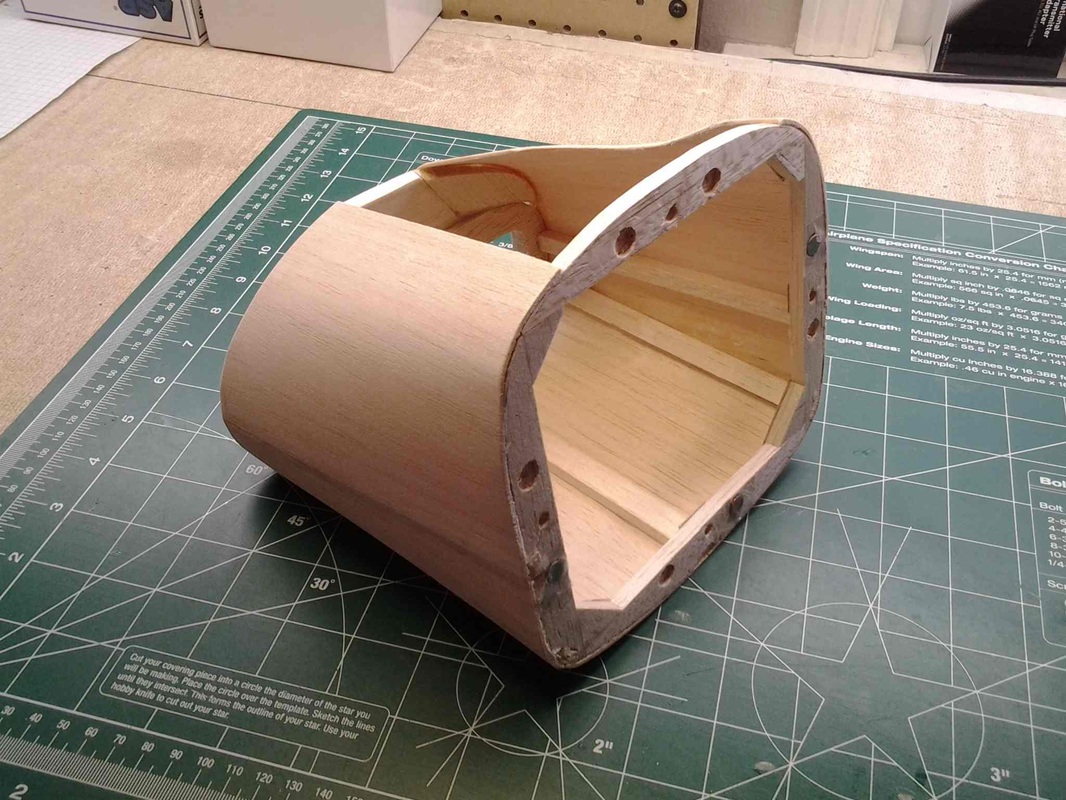
1/10/15 After considering a number of approaches, decided to build a new cowl from balsa but taking a different approach from last time. Spent quite a bit of time on the Internet looking at photos of Cessna 170s until I found three good ones, straight on from the front, straight on from the side and pretty much from the top. Using the computer I adjusted the sizes to fit my plane and printed them out. That gave me an accurate profile to work from.
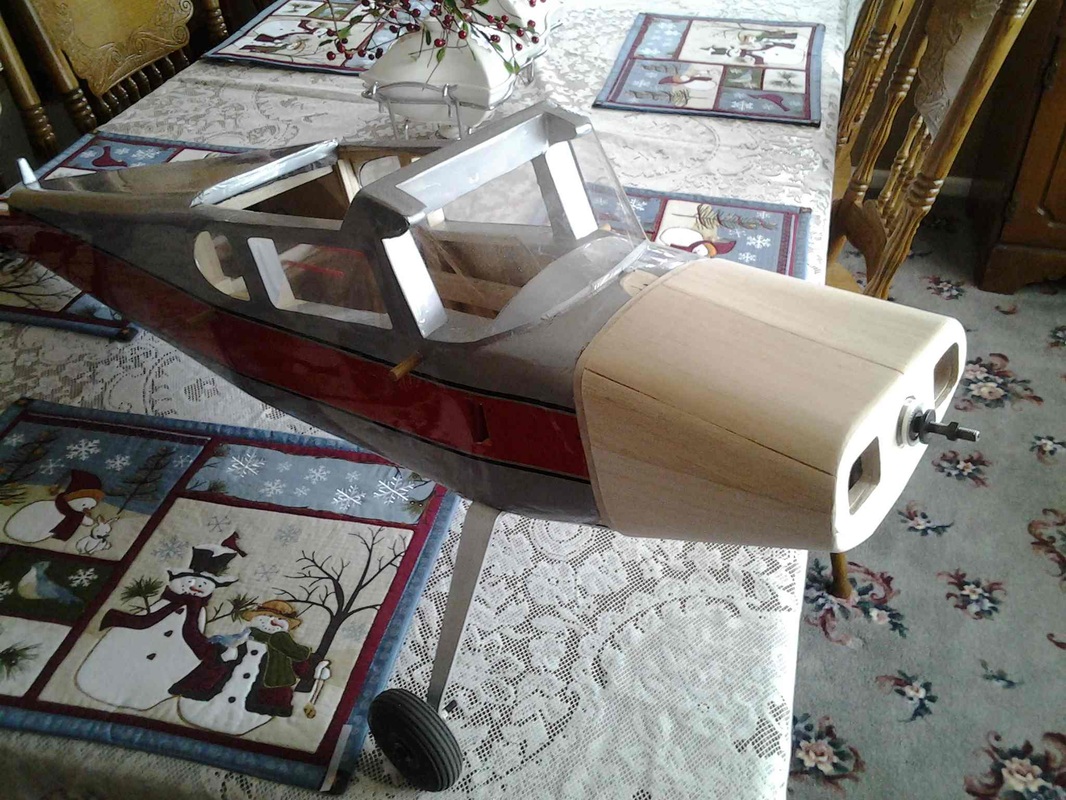
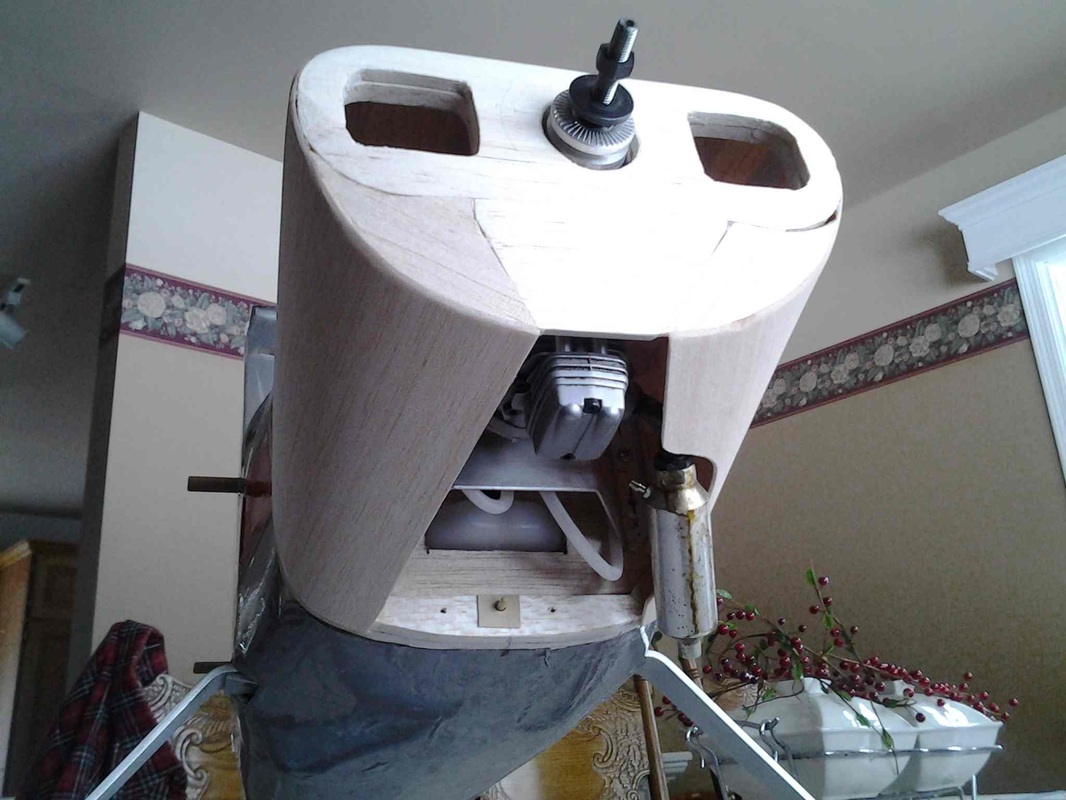
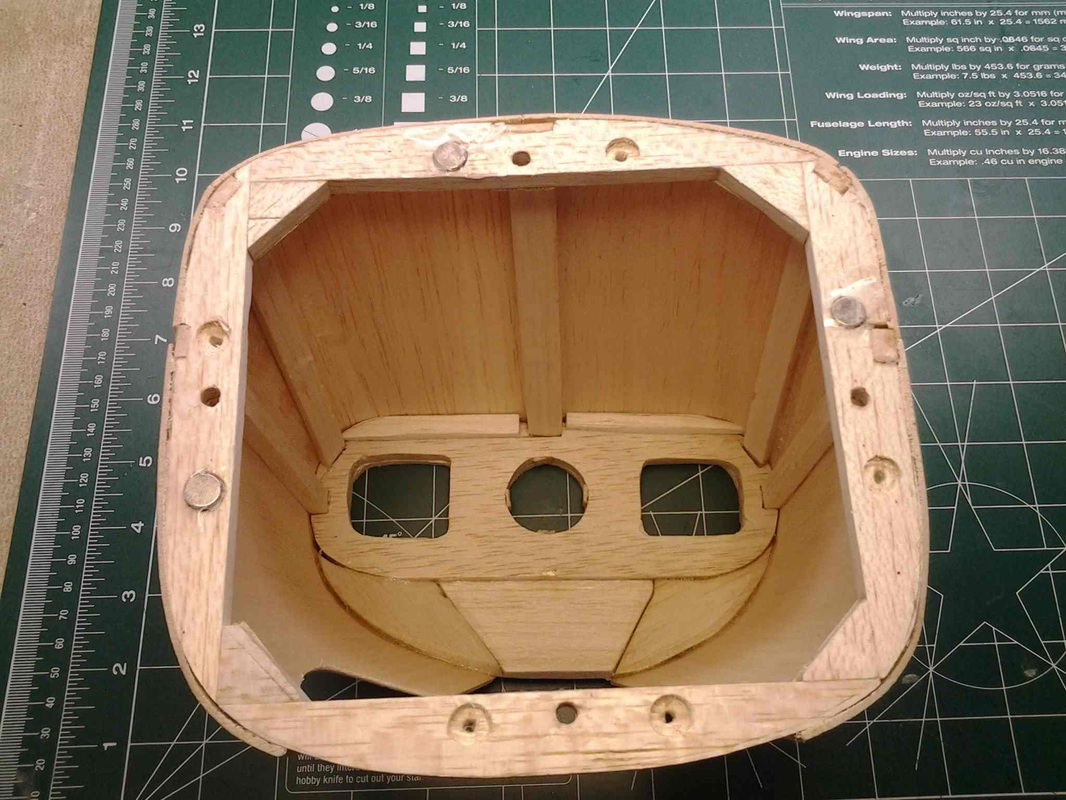
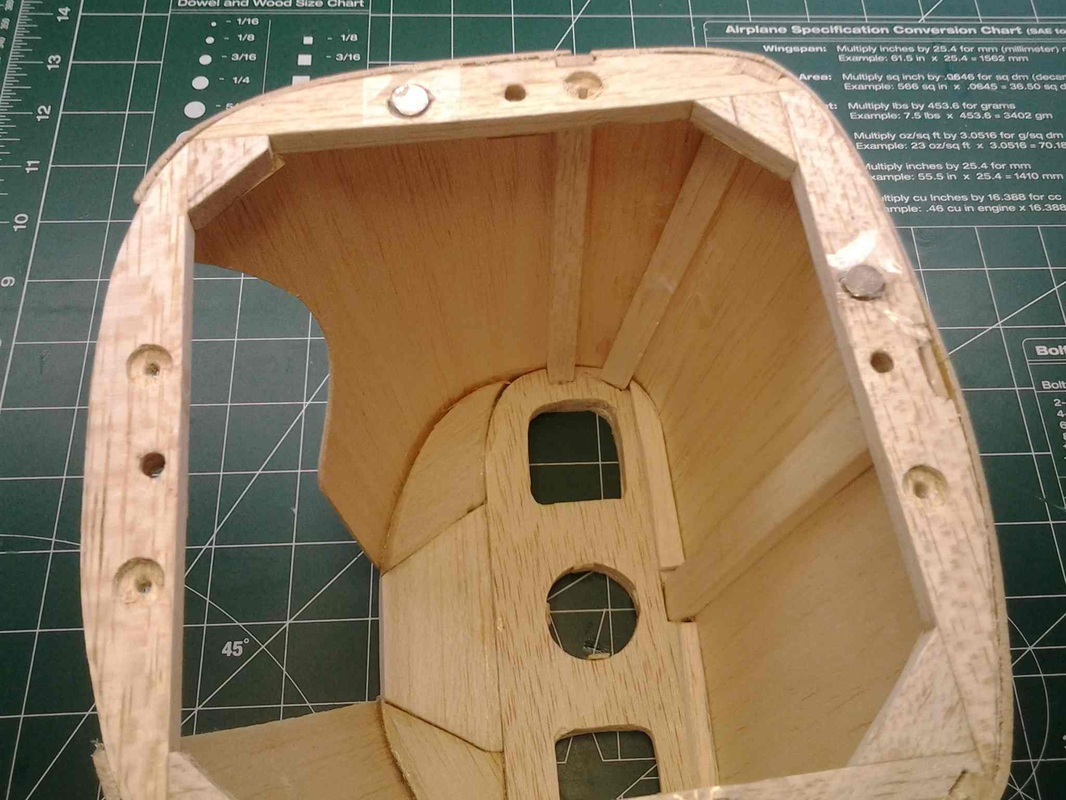
I carefully measured the engine to see what issues I would face. Then I "simply" built the cowl around the engine! Decided to use magnets to hold it on the plane so I built a frame the size of the cabin front, sanded it to match "exactly". I then installed four small dowels (barbecue skewers) top, bottom and each side so the new frame would slide into place precisely. I then cut out and built the cowl nose piece from two pieces of 1/4 in. sheeting. Then I drilled out the cowl nose piece the exact size of the engine front (behind the prop back plate) and pressed it onto the engine. After carefully aligning it with a level (after leveling the plane) and making sure the prop hub clearance was adequate, I measured from the cabin front plate to the cowl nose at the top center and on each side, cut some 1/4 by 1/2 sticks accordingly and cemented those in place. prior to cementing I cut notches at the three locations in the rear layer of the cowl nose piece and the frame on the cabin front. Then I cut and cemented two other sticks at the fuse corners an cowl nose corners. That gave me a very solid framework to build on. I covered the resulting framework with 1/16 by 4 soft balsa sheet and trimmed and sanded. That sounds easier than it was but it was not all that difficult. I'm pleased with the result. It very much has the look of the real plane though the photos don't show that very well. |
|
1/14/15 Reinstalled the aileron servos in the wing this morning. Had to replace the one in the left wing as the crash stripped it out internally. Fortunately had one on hand. Plugged in the Y-adaptor, connected it to the receiver and bingo, everything works.
I mentioned earlier that I was installing the Horizon Hobby receiver they sell for their new Apprentice S 15e which incorporates stability for things like wind and turbulence AND three "SAFE" flight modes, beginner, intermediate and expert along with a panic button.
I purchased an Apprentice this past summer and was very impressed. Depending on the mode chosen it limits how steep turns and climbs/dives can be and incorporates a panic button which will "right" the plane no matter what position it may be in when you hit the button. On my Apprentice I normally fly in the intermediate mode which allows most normal flight attitudes but maintains some safety margin. I'll feel safer flying this Cessna with that receiver. Tested everything out this morning on the dining room table and both stabilization and attitude control seem to work just fine. I use a Spektrum DX8 transmitter and was able to simply copy the Apprentice configuration for the 170 with no changes.
Other than a few minor things (including making sure the struts fit!) I think this plane is ready for a test flight if/when the weather ever warms up!
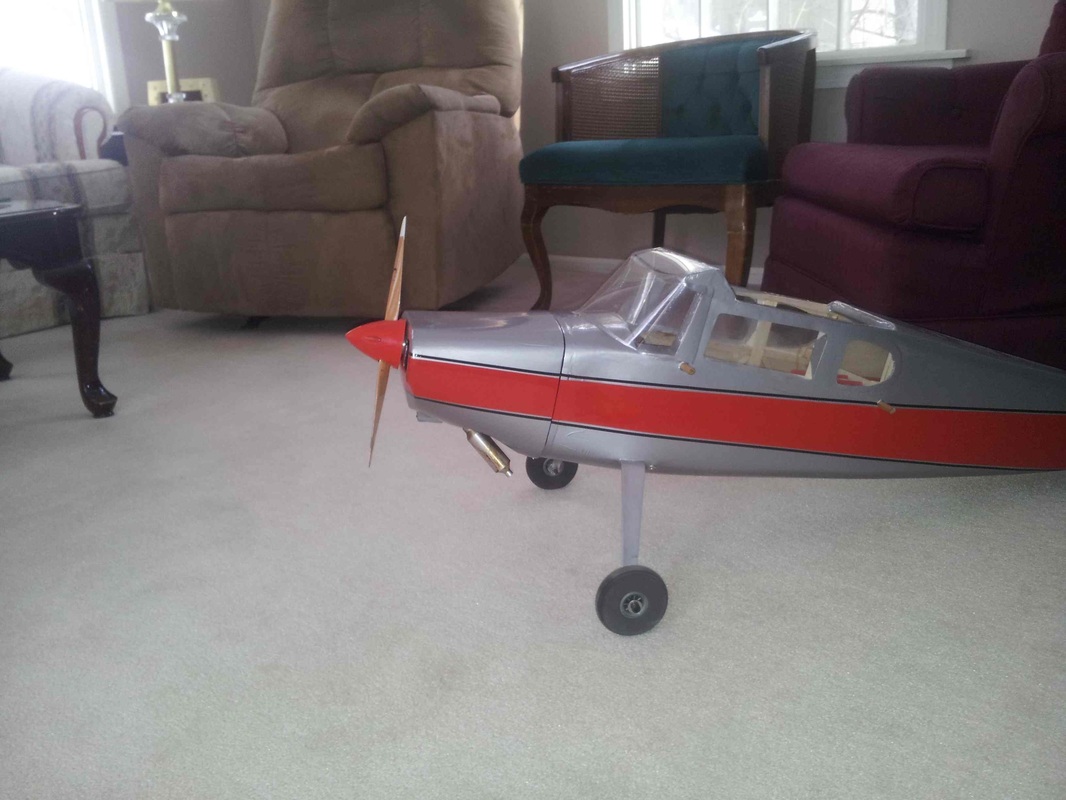
Update: Added the struts to the plane. The good news is that they still fit after rebuilding the wing. There is no bad news at this point! Also went to the Aircraft Center of Gravity web site and entered the data to check the CG. Comes out very close to the plan and reality is also very close to the calculation. Weight is 6.26 lbs. Interesting that the calculator thinks its stall speed is just over 22 mph. I don't normally think in terms of mph for the planes so I don't know if that is "normal" or unusual. Changed out the photos to reflect the addition of the struts.
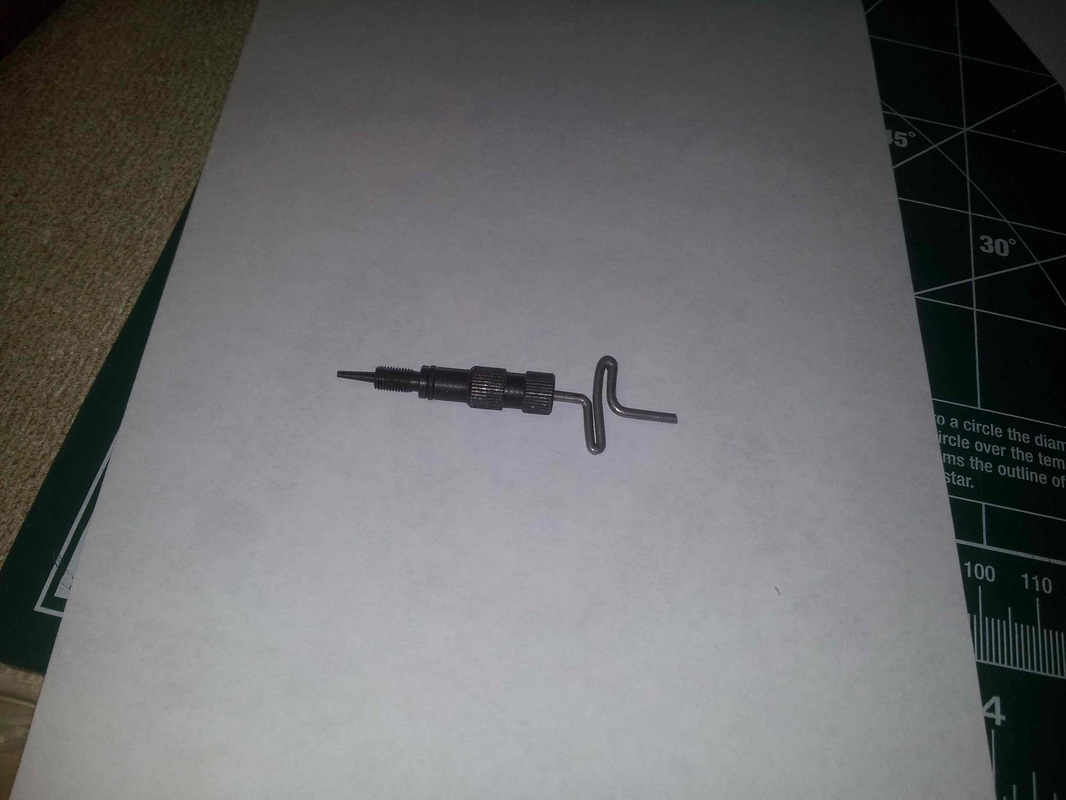
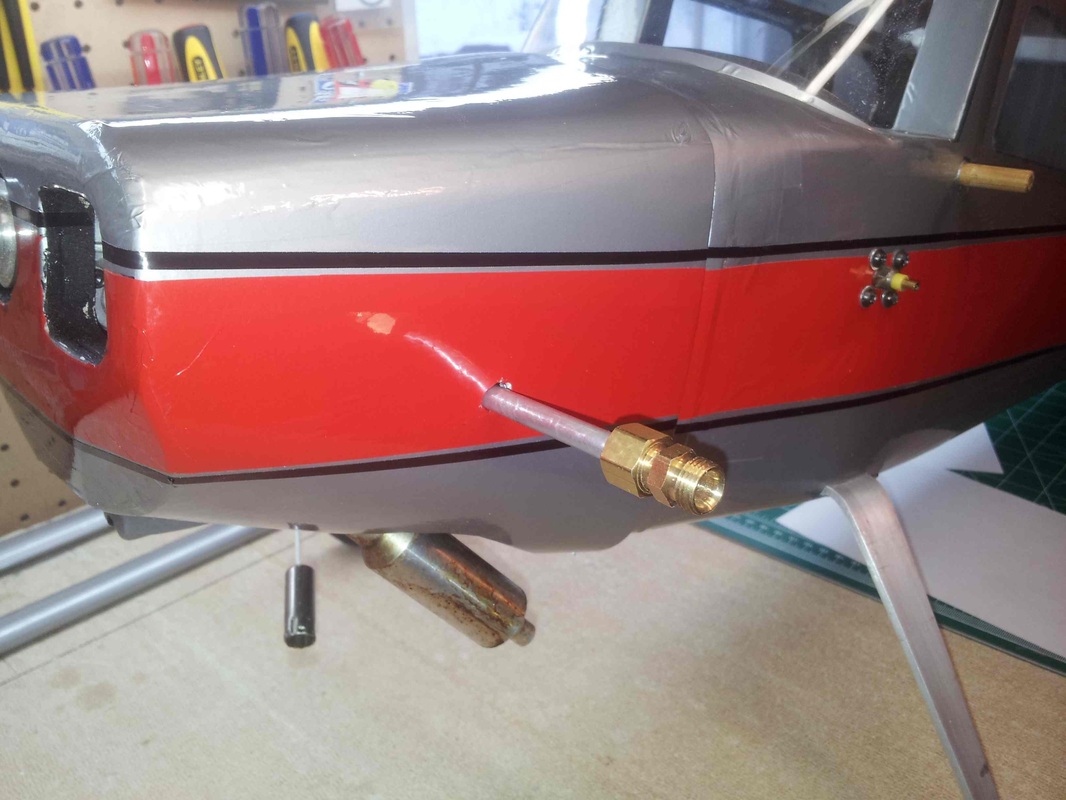
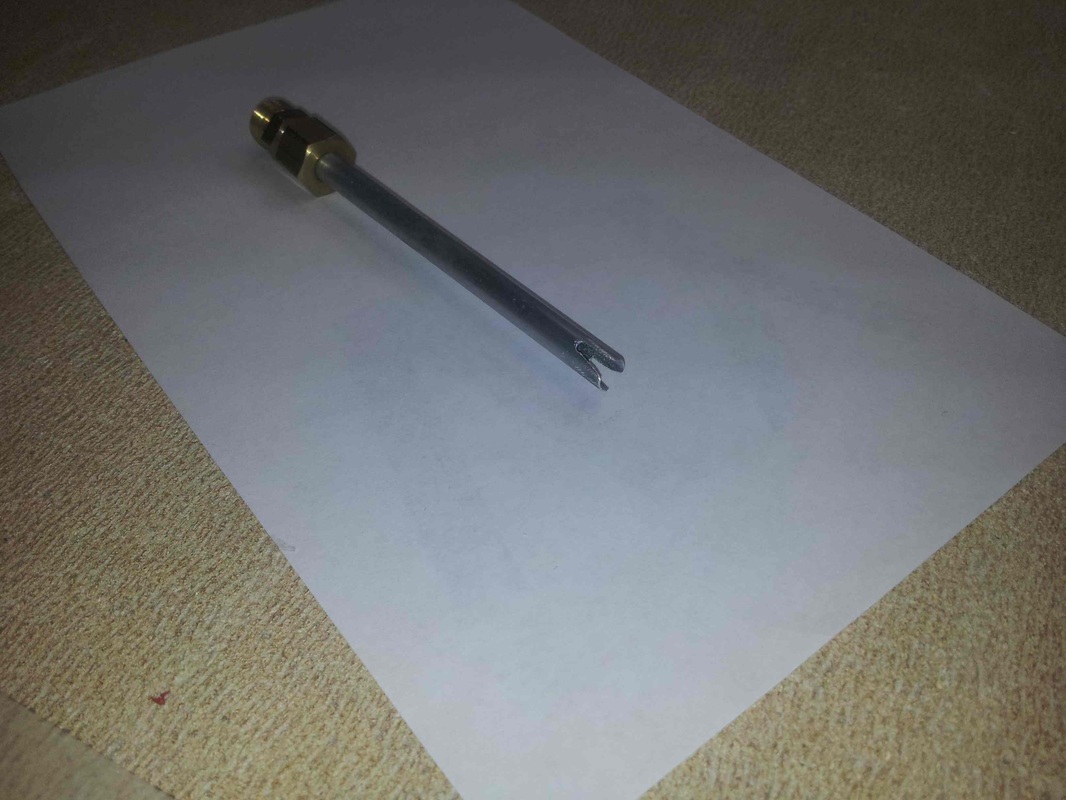
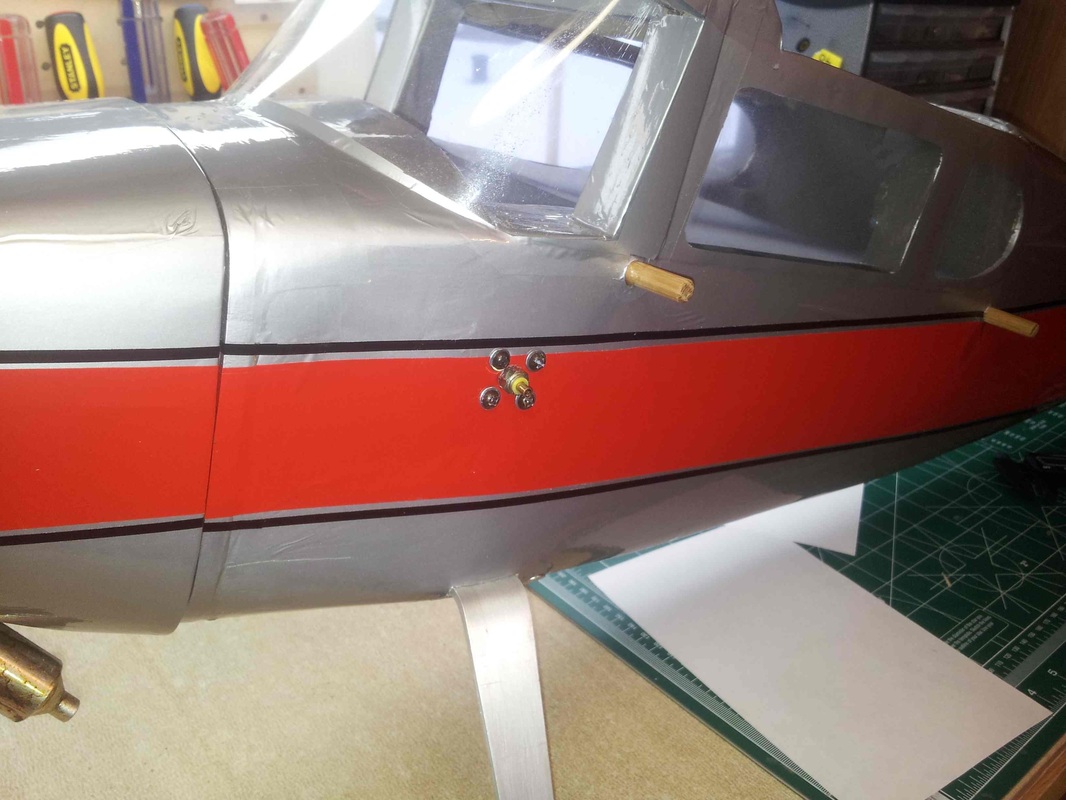
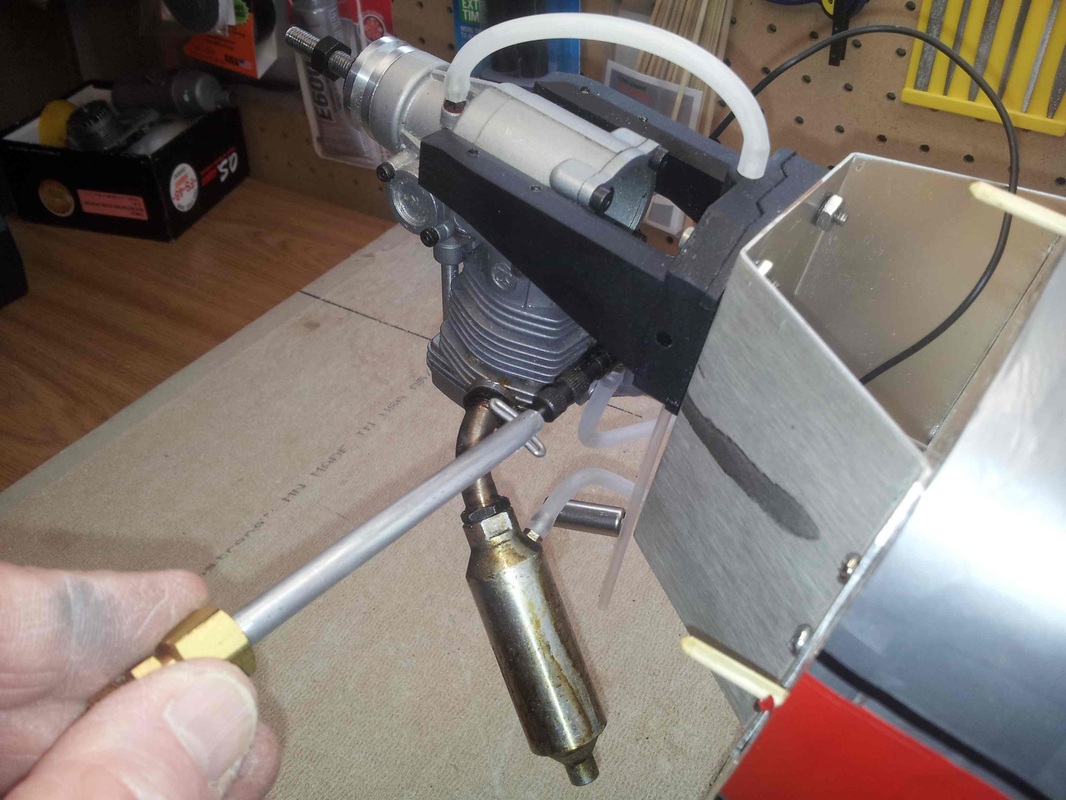
1/16/15 Never done. I think I've said that before. I've been mulling over how to make it possible to adjust both the idle and full throttle mixture controls with the cowl on while at the same time not making it difficult to remove the cowl. On my first build I just let the needle valve extension protrude through the cowl which worked fine until I needed to remove the cowl. Then I had to pear into the darkness of the cowl while trying to stick a tiny hex wrench into the little screw (which by the way was always NOT facing me. That required turning the needle valve and totally messing up any settings. Just a mess! :-) As the photos show I think I have the solution. For the idle, I just bored a hole in the side of the cowl to stick a small screw driver into and hopefully find the slot to put it in. But for the needle valve I made a little wire gadget and a special wrench. I can insert the wrench through a hole in the cowl over the wire gadget and adjust away! Time will tell whether these approaches really work. Also mounted the glow extension on the side of the fuselage instead of the cowl so it doesn't interfere with cowl removal either.
|
|
|
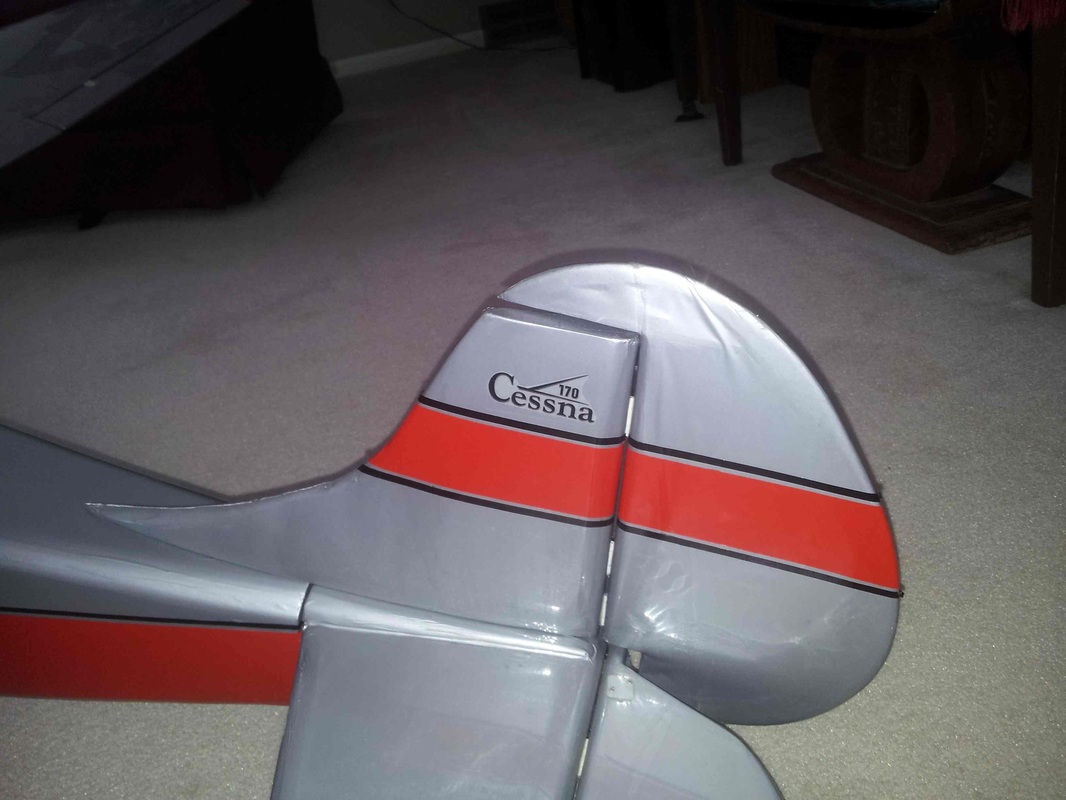
Finally (for now) I found a great photo of the Cessna 170 emblem which I downloaded, size adjusted and mounted on the rudder. Looks real sharp. I'm now messing around with a way to put a false bottom in the fuselage just below the windows so all the servos and wiring are hidden. If I can find some 1/12th scale figures for the pilot, and three passengers I may add them too. Perhaps I should just hang this plane up for a display!
1/19/15 I, as well as others have been concerned about whether the Horizon Hobby Apprentice S 15e receiver would OK in a glow or gas powered plane give the vibration caused by an engine vs. an electric motor. I searched the various forums and was unable to find any definitive information regarding that or anyone who has actually tried it in a glow/gas powered plane. However this morning I did find someone who is flying it in a glow powered plane with no problems. His recommendation was to wrap it in foam. Time will tell!
1/20/15 Today I borrowed a Robart Model Incidence Meter from my son and checked the wings and stabilizer on the Cessna 170. To my joy and surprise the two wings are "exactly" aligned with one another and the stabilizer is aligned with the wings. I also compared mid wing (at the fuselage end of the aileron where I check alignment) with the wing tip and found the wingtip aimed downward 1.0 degree on both wings. I think that is about right, at least better than being aimed up! So the wings are not only in alignment but the washout that the plan calls for is in fact there!
Also remounted the receiver in foam, and just for something to do painted the inside of the cowl with finishing epoxy. This thing wants to fly!
3/13/15 With the daytime temperatures in the mid to upper 50's, the snow rapidly disappearing and the sun shining brightly nearly every day now for about a week flying season is nearing! That made me think about this Cessna, sitting on the table in my garage. Mulling things over in my mind I suddenly wondered if the platform I had mounted the Horizonhobby SAFE receiver on was actually lined up with the straight and level line of flight for the plane. So yesterday I put it on my workbench and did some checking with a level. I propped the fuselage so that the wings were level and then checked the receiver. Good thing I did! It was way off level the plane likely would want to climb steeply trying to level the receiver. Glad I thought of that. I think it is now level with the wings. Still nervous about the first flight...!
3/31/15 A couple days ago I remounted the receiver. I've not been happy with how I did it previously. It is important that the receiver be level in level flight. It also needs to stay put! After considering a number of possibilities I decided to use Duck Tape brand double sided foam tape to fix a small piece of 1/4 in. foam to the pad I fabricated several days ago for it. Then I used another piece of the foam tape to fix the receiver to the foam. Both pieces of tape seem very secure and the receiver can move slightly but seems well attached. So I think engine vibration should not be an issue.
6/3/15 The 170 is ready for a test flight. I found an old stock new carburetor for the OS FS-48 Surpass 4 stroke engine that was in it when it crashed. The needle valve was bent in the crash. I couldn't find a new needle valve anywhere but was happy to find the carburetor. It seems to run very smoothly.
I also decided to remove the Apprentice receiver I was planning to use as several times while finalizing all the details of tuning the engine, setting control surface travels it would lose its binding. That makes me very insecure! So I reinstalled the Spektrum receiver that was in it before the crash. I've been flying my Great Planes PT-40 quite a bit and feel pretty comfortable with a standard receiver. All seems to work well now too. I did set three control throws; from very limited to fairly aggressive and set up proportional amounts accordingly so that even on the highest setting it should be fairly gentle. And gentle is what this plane is supposed to be, not acrobatic! Perhaps, weather permitting, this afternoon I can have the first test flight flight.
I also decided to remove the Apprentice receiver I was planning to use as several times while finalizing all the details of tuning the engine, setting control surface travels it would lose its binding. That makes me very insecure! So I reinstalled the Spektrum receiver that was in it before the crash. I've been flying my Great Planes PT-40 quite a bit and feel pretty comfortable with a standard receiver. All seems to work well now too. I did set three control throws; from very limited to fairly aggressive and set up proportional amounts accordingly so that even on the highest setting it should be fairly gentle. And gentle is what this plane is supposed to be, not acrobatic! Perhaps, weather permitting, this afternoon I can have the first test flight flight.
